Real-time Blocklist (RBL) Check
Real-time Blocklist monitor checks and confirms if your hostname or IP addresses are blocklisted against popular DNS-based blocklists in real-time. It allows you to instill confidence in your customers that they can contact you safely, through email, your website, and social media.
Licensing
- You can add unlimited hostnames or IP addresses for Real-time blocklist check.
- Basic monitor licenses are consumed in increments of 10 (monitoring a single hostname/IP address or monitoring 10 hostnames/IP addresses will both consume one basic monitor license).
Adding Real-time Blocklist Monitor
- Log in to Site24x7.
- Click Admin > Inventory > Monitors > Add Monitor.
- Select Real-time Blocklist monitor to add a new monitor.
- Specify the following details to add the Real-time Blocklist monitor:
- Display name: Provide a name to your monitor.
- Resolve Hostname during every poll: You can choose to resolve the hostname into its corresponding IP address and monitor both, hostname and IP address on every poll. Alternatively, if you set the toggle to 'No'the hostname is resolved once only and the IP addresses will be cached.
- Hostname and IP addresses: Specify the hostname or the list of IP addresses to perform blocklist check. You can add multiple hostnames or IP addresses for monitoring.

- Monitor Groups: You can associate your monitor with multiple monitor groups by selecting the relevant monitor groups from the drop down list. This allows in logical grouping of your monitors.
To learn how to create a monitor group for your monitors, refer Monitor Groups.
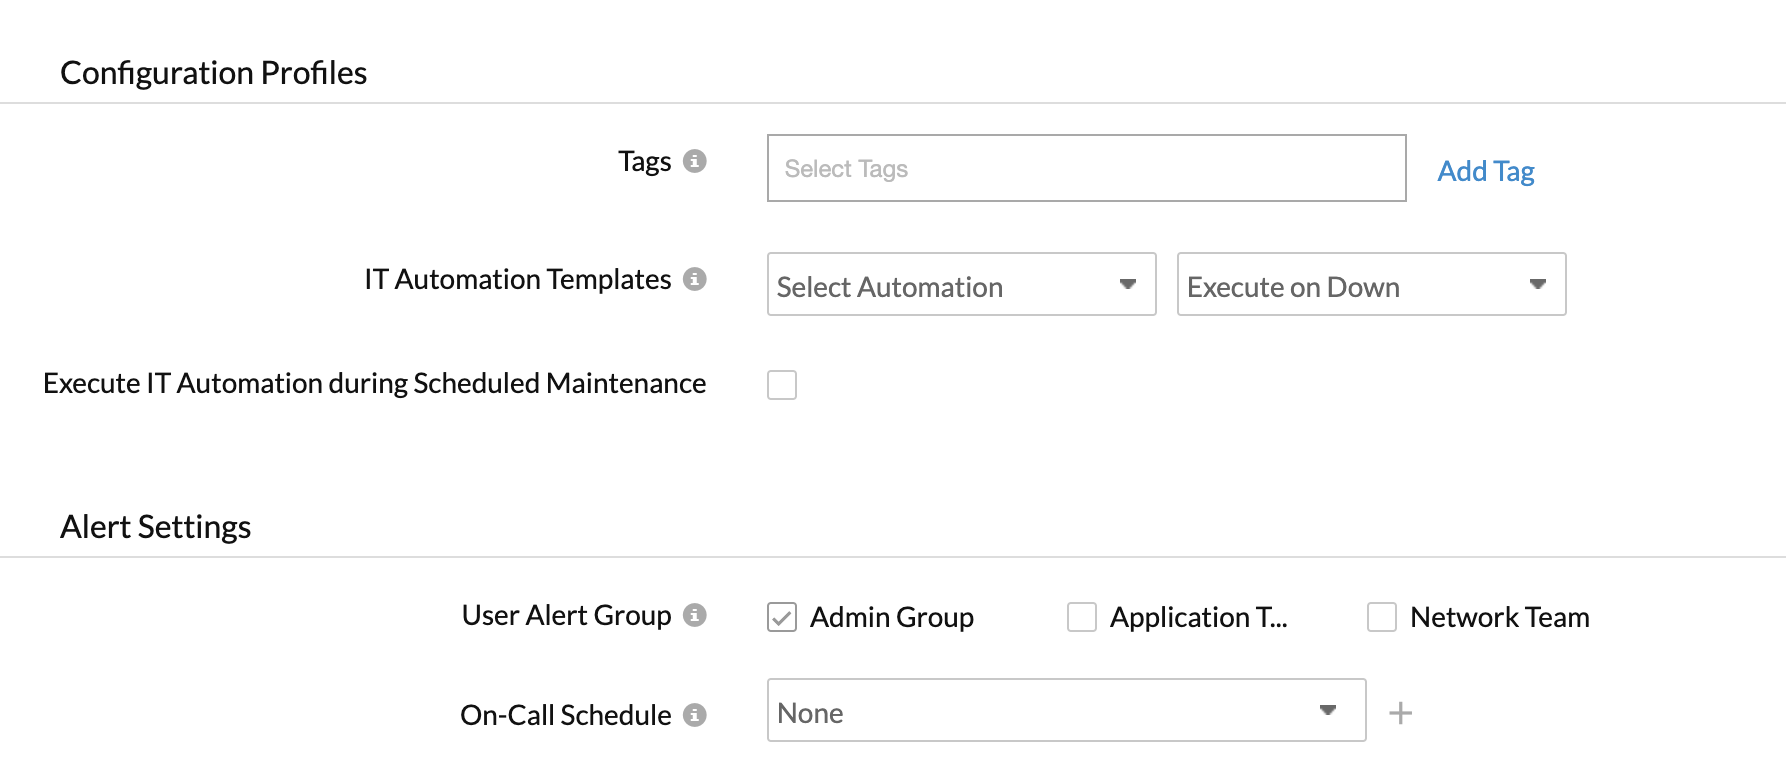
Configuration Profiles
- Tags: Associate your monitor with predefined Tag(s) to help organize and manage your monitors creatively. Learn how to add Tags.
- IT Automation: Select an automation to be executed when the website is down/trouble/up/any status change/any attribute change. The defined action gets executed when there is a state change and selected user groups are alerted.
To automate corrective actions on failure, refer IT Automation.

Alert Settings
- User Alert Group: Select the user group that need to be alerted during a outage.To add multiple users in a group, see User Alert Group.
- On-Call Schedule: On-Call Schedule option helps you to ensure that the notifications are sent to assignees in specific shift hours helping them to quickly respond to alerts or incidents. Choose an On-Call of your preference from the drop-down.
You can receive alerts if the monitors are associated to user groups irrespective of the On-Call shift you've configured.
Third Party Integration
Services: Associate your monitor with a pre-configured third-party service. It lets you push your monitor alerts to selected services, and facilitate improved incident management.
If you haven't setup any integrations yet, navigate across to ”Admin > Third Party Integration” to create one. Tell me more.
Click Save to configure the monitor.
Interpreting Blocklist Check Results
Summary
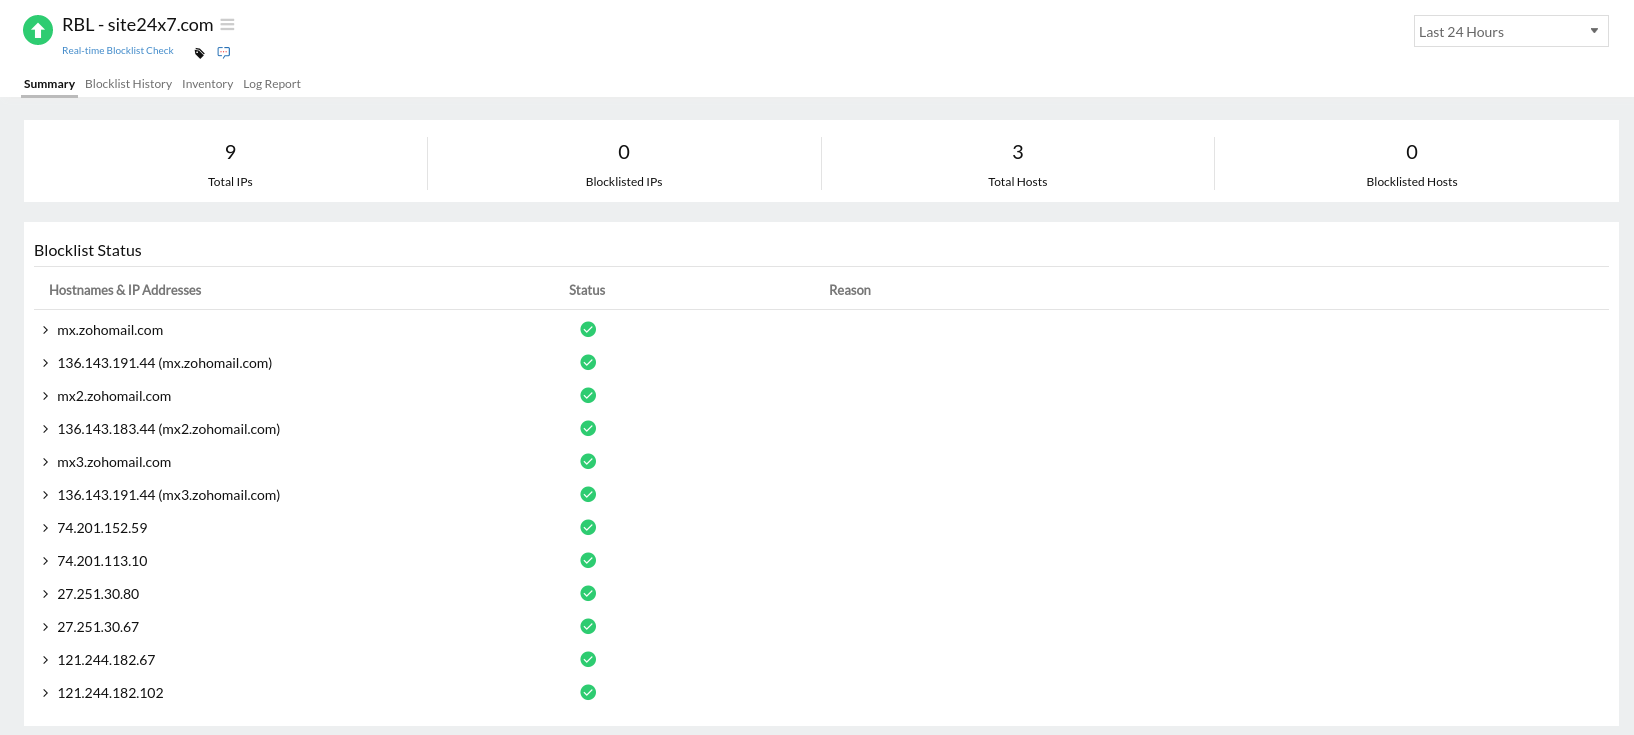
You can find the status of all the monitored IP addresses or hostnames in this tab. Click on each of the IP addresses/hostnames to see the blocklist status against all the popular blocklists checked. Any outage is marked separately along with a time stamp under Down/Trouble History.

Blocklist History
Every outage recorded due to a blocklist will be listed under blocklist history. You can view this for a custom time period. Also, to remove known outages, you can mark them as maintenance by accessing the hamburger icon at the right and choosing the option 'Mark as maintenance'.
The blocklists we check
- BACKSCATTERER
- BLOCKLIST.DE
- InvaluementSIP
- InvaluementSIP/24
- InvaluementURI
- Passive Spam Block List
- SORBS HTTP
- SORBS SOCKS
- SORBS MISC
- SORBS SMTP
- SORBS WEB
- SORBS ZOMBIE
- SORBS VIRUS
- SURBL
- UCEPROTECT Level 1
- UCEPROTECT Level 2
- UCEPROTECT Level 3
- Lashback Unsubscribe Blacklist (UBL)
- Nordspam BL
