Adding a Log Profile
A Log Profile enables you to associate the log types to a particular set of servers. Once a Log Profile is created, corresponding logs will automatically be pushed to your account. Enable AppLogs to start managing your logs by creating a Log Profile and associating a Log Type to it.
Steps to add a log profile
Log in to Site24x7, go to Admin > AppLogs > Log Profile > Add Log Profile, and follow the steps below:
- Profile Name: Enter a name for your Log Profile.
- Choose the Log Type: Choose the Log Type you would like to associate with this profile. The Log Types that are supported by default will be displayed. You can also add a Custom Log Type by clicking on+.
- Log Source: Choose where your logs are located. You can choose from the following available sources:
- Local file
- Remote file
- Windows event logs
- Amazon Lambda
- Azure functions
- Log collectors Logstash, Fluentd
NoteYou can also collect logs from Network devices.
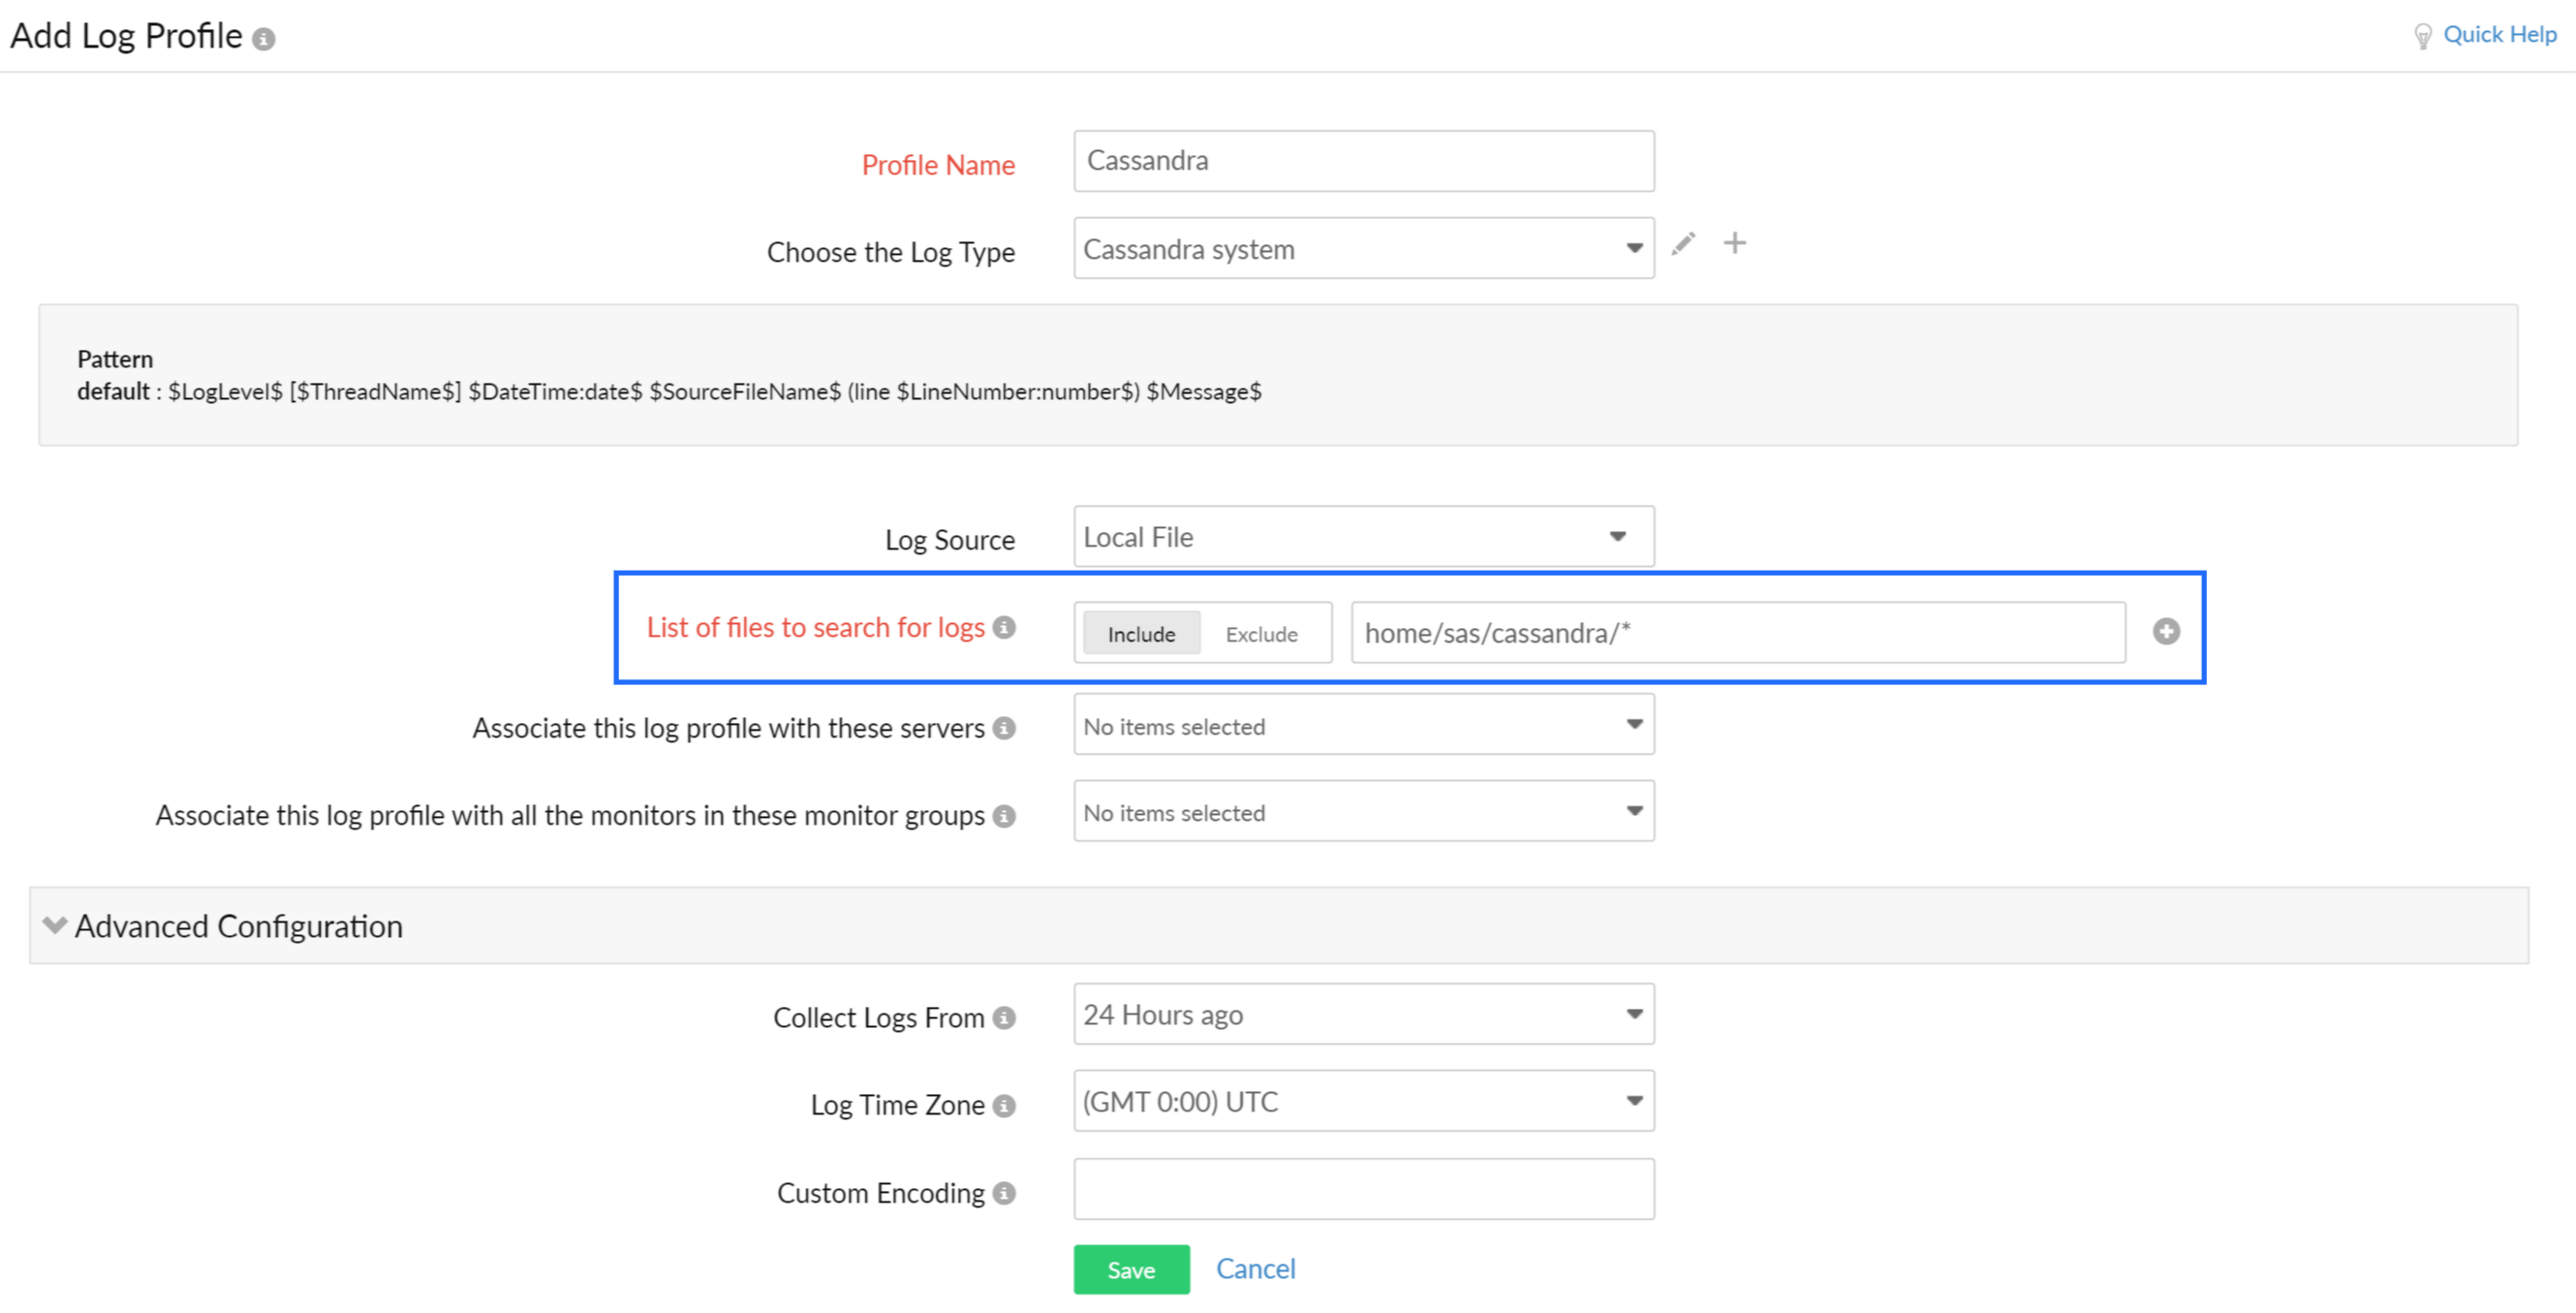
- List of Files to Search for Logs: You can now include or exclude file path to search for logs, click on the "+" icon to add additional file path.
- To include all files in a particular folder for logs upload
- To include all files and folders, in a folder for logs Upload
- To exclude certain files
To include all files in a particular folder for logs upload:
To include all files under a particular folder, mention the folder name suffixed with / followed by * in the “List of files” section and click the Include option. For example,This would include all the files under the folder “cassandra”. This option will only take into account files and will exclude the sub-folders.home/sas/cassandra/*

To include all files and folder, in a folder for logs upload:
To include all files and Folders under a particular folder, mention the folder name suffixed with “/“ followed by “**” in the “List of files” section. For example:home/sas/cassandra/**
This would include all the files and subfolders within the folder “cassandra". This option will include all the subfolders and files within the mentioned file path.To exclude certain files:
Exclude any particular file by clicking the “+” button and adding a specific file path to be eliminated and selecting the Exclude option. Follow the above-mentioned format for including a file path - Associate this log profile with these servers: Select a server to associate with this profile. This associates the Log Type under a profile with a particular server.
- Associate this log profile with all the monitors in these monitor groups: Choose a monitor group to associate with. This associates the Log Type under a profile with a particular monitor group.
Advanced configurations
Advanced Configuration are optional settings. You can either configure them or leave them to the default settings.
- Collect Logs From: The time from which log collection should start. The agent uses the file's last modified time to determine which files to collect. By default, we collect logs from files modified within the last 24 hours in the configured profile path. To collect older logs, you can choose options like 24 Hours Ago, 2 Days Ago, 3 Days Ago, or 7 Days Ago when setting up the log profile.
For example, to collect logs from the past three days, choose the 3 Days Ago option from the drop-down menu. This will allow you to collect logs starting from 3 days prior in the log file located in the configured log path. - Log Time Zone: If the time zone is not present in the log line, choose the appropriate time zone for your logs. If not, we will automatically fetch the time zone from the machine on which the Site24x7 server monitoring agent is installed.
- Custom Encoding: If the encoding of your file differs from UTF-8, enter your type of encoding (e.g., SHIFT-JIS, GBK) here.
- Click Save. To begin your log search, go to navigation menu and click AppLogs. You can use our powerful query language to extract valuable insights from logs.
