Authenticate and Monitor Azure Resources using Custom Apps
Site24x7 can discover and monitor Azure resources by creating a custom application in the Microsoft Azure portal. After creating the custom application, enable Site24x7 to discover and monitor resources by assigning the necessary permissions to the application.
Setting up a Microsoft Entra ID custom application involves two major parts:
- Part 1: Creating a Microsoft Entra ID application and generating the client secret
- Part 2: Providing the necessary permissions to the custom app
Part 1: Creating a Microsoft Entra ID Application
- Log in to the Microsoft Azure portal and navigate to the Microsoft Entra ID section.

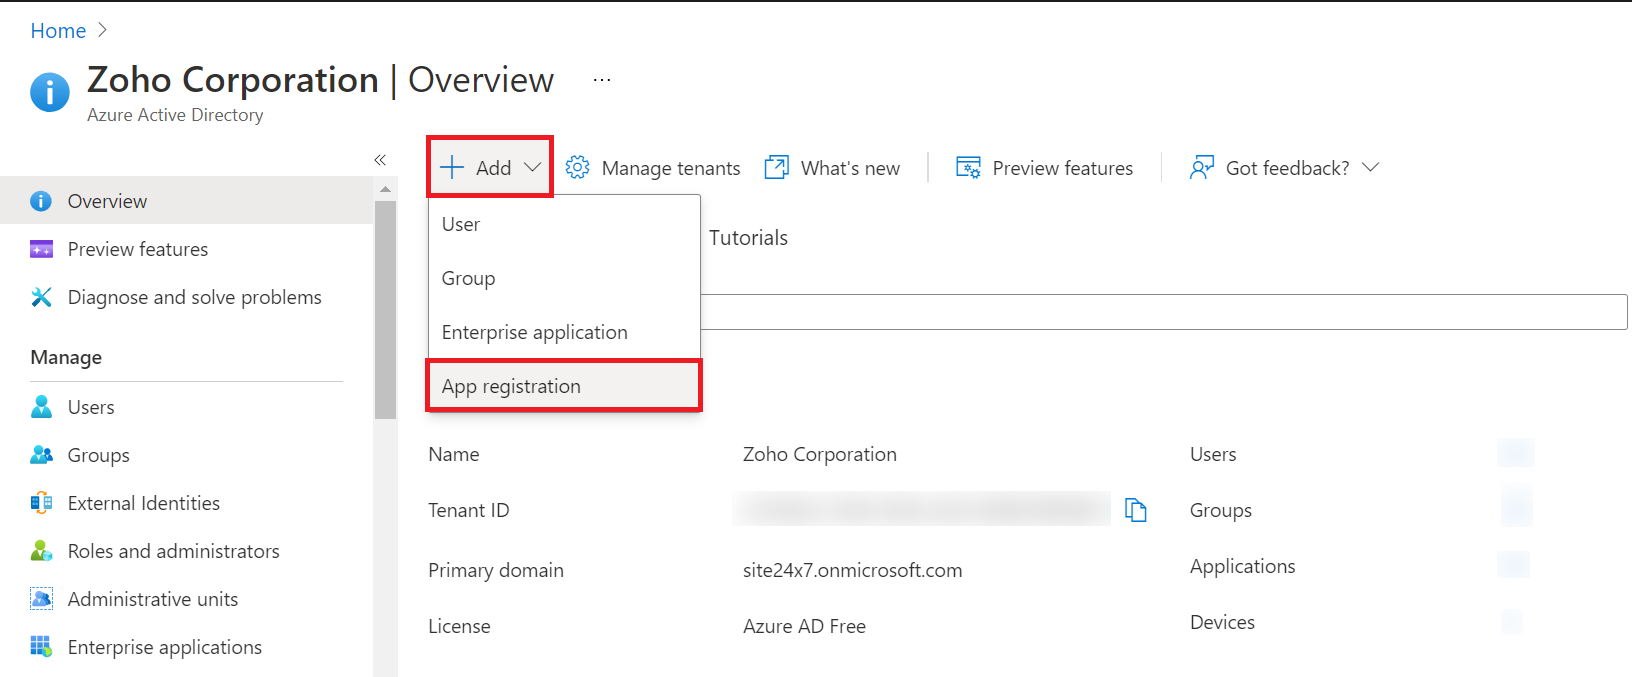
- Click on + Add > App Registration.
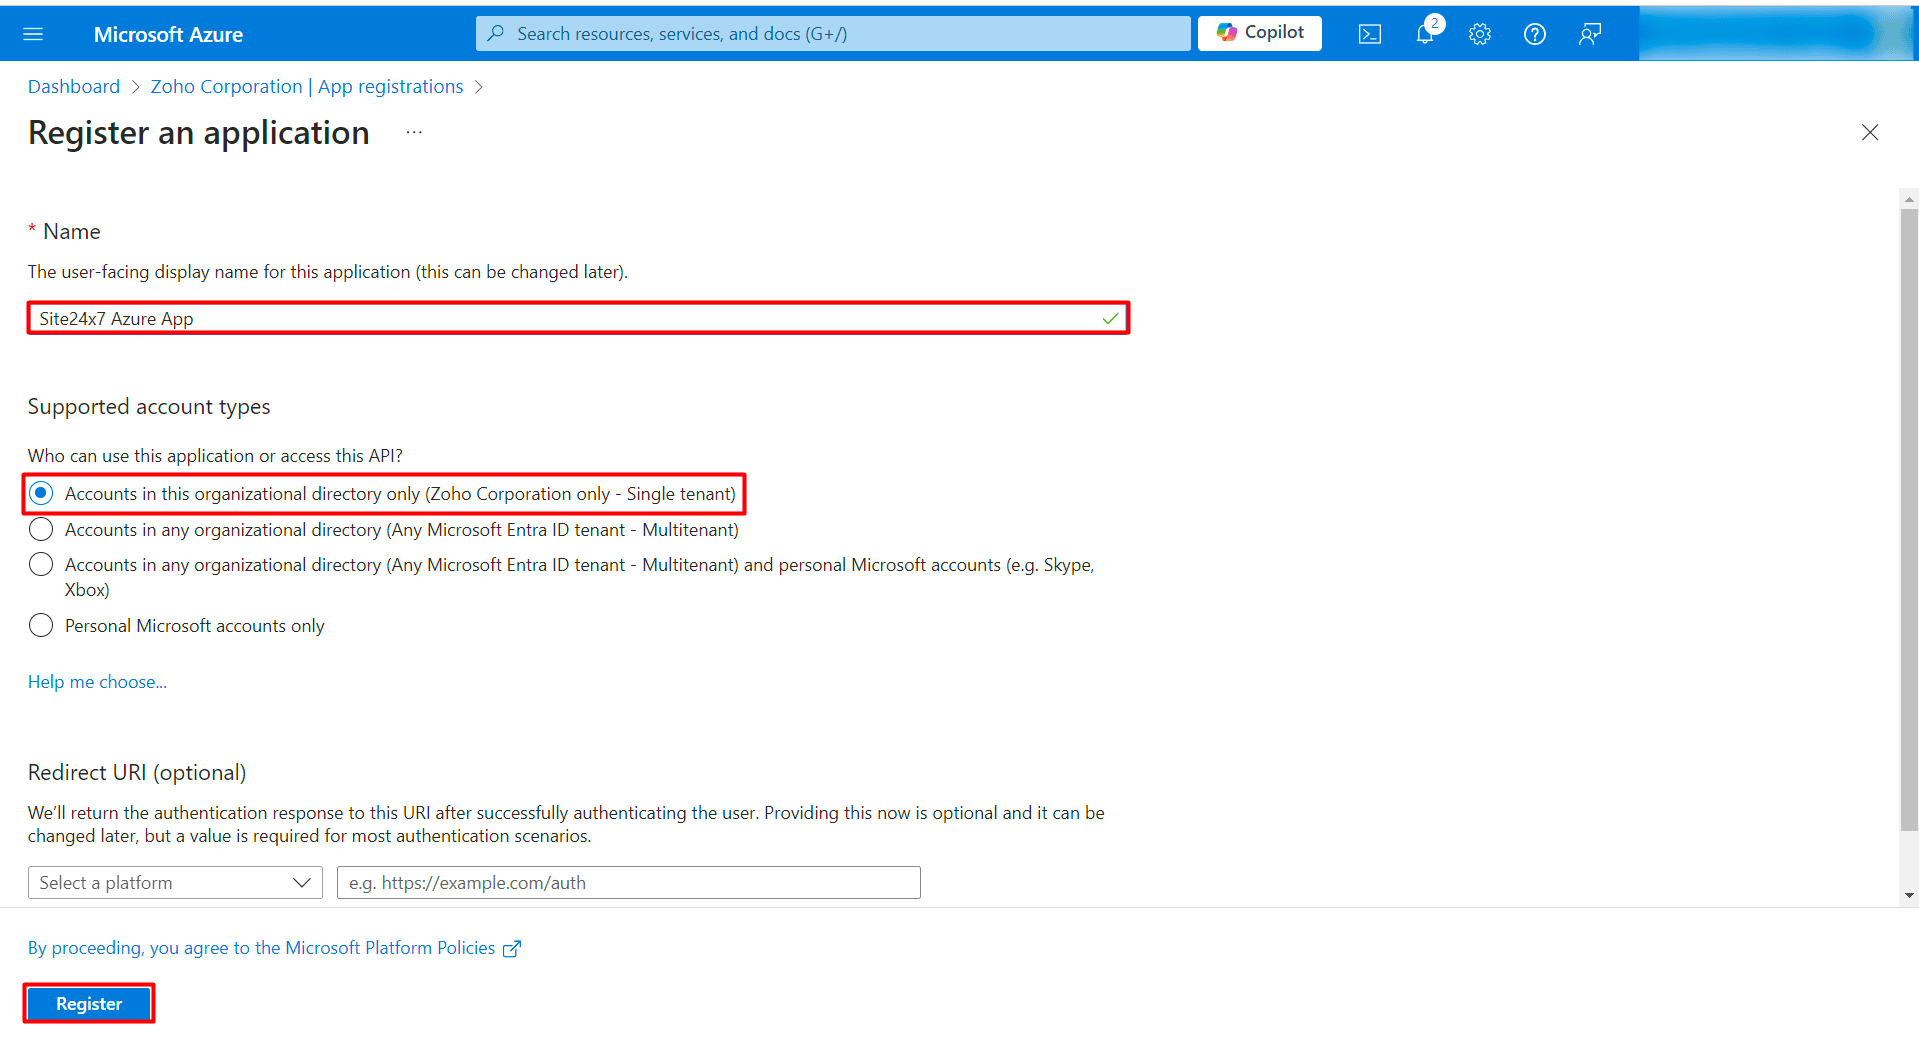
- In the Register an application page, provide the Name of the application, select the Supported account types.
- Name: Provide a unique name for identification purposes. Example: Site24x7 Azure App.
- Supported account types: Select Accounts in any organizational directory i.e., any of the below mentioned three options:
- Accounts in this organizational directory only (Zoho Corporation only - Single tenant)
- Accounts in any organizational directory (Any Azure directory - Multitenant)
- Account in any organizational directory (Any Azure AD - Multitenant) and personal Microsoft accounts (e.g. Skype, Xbox)
- Click Register.
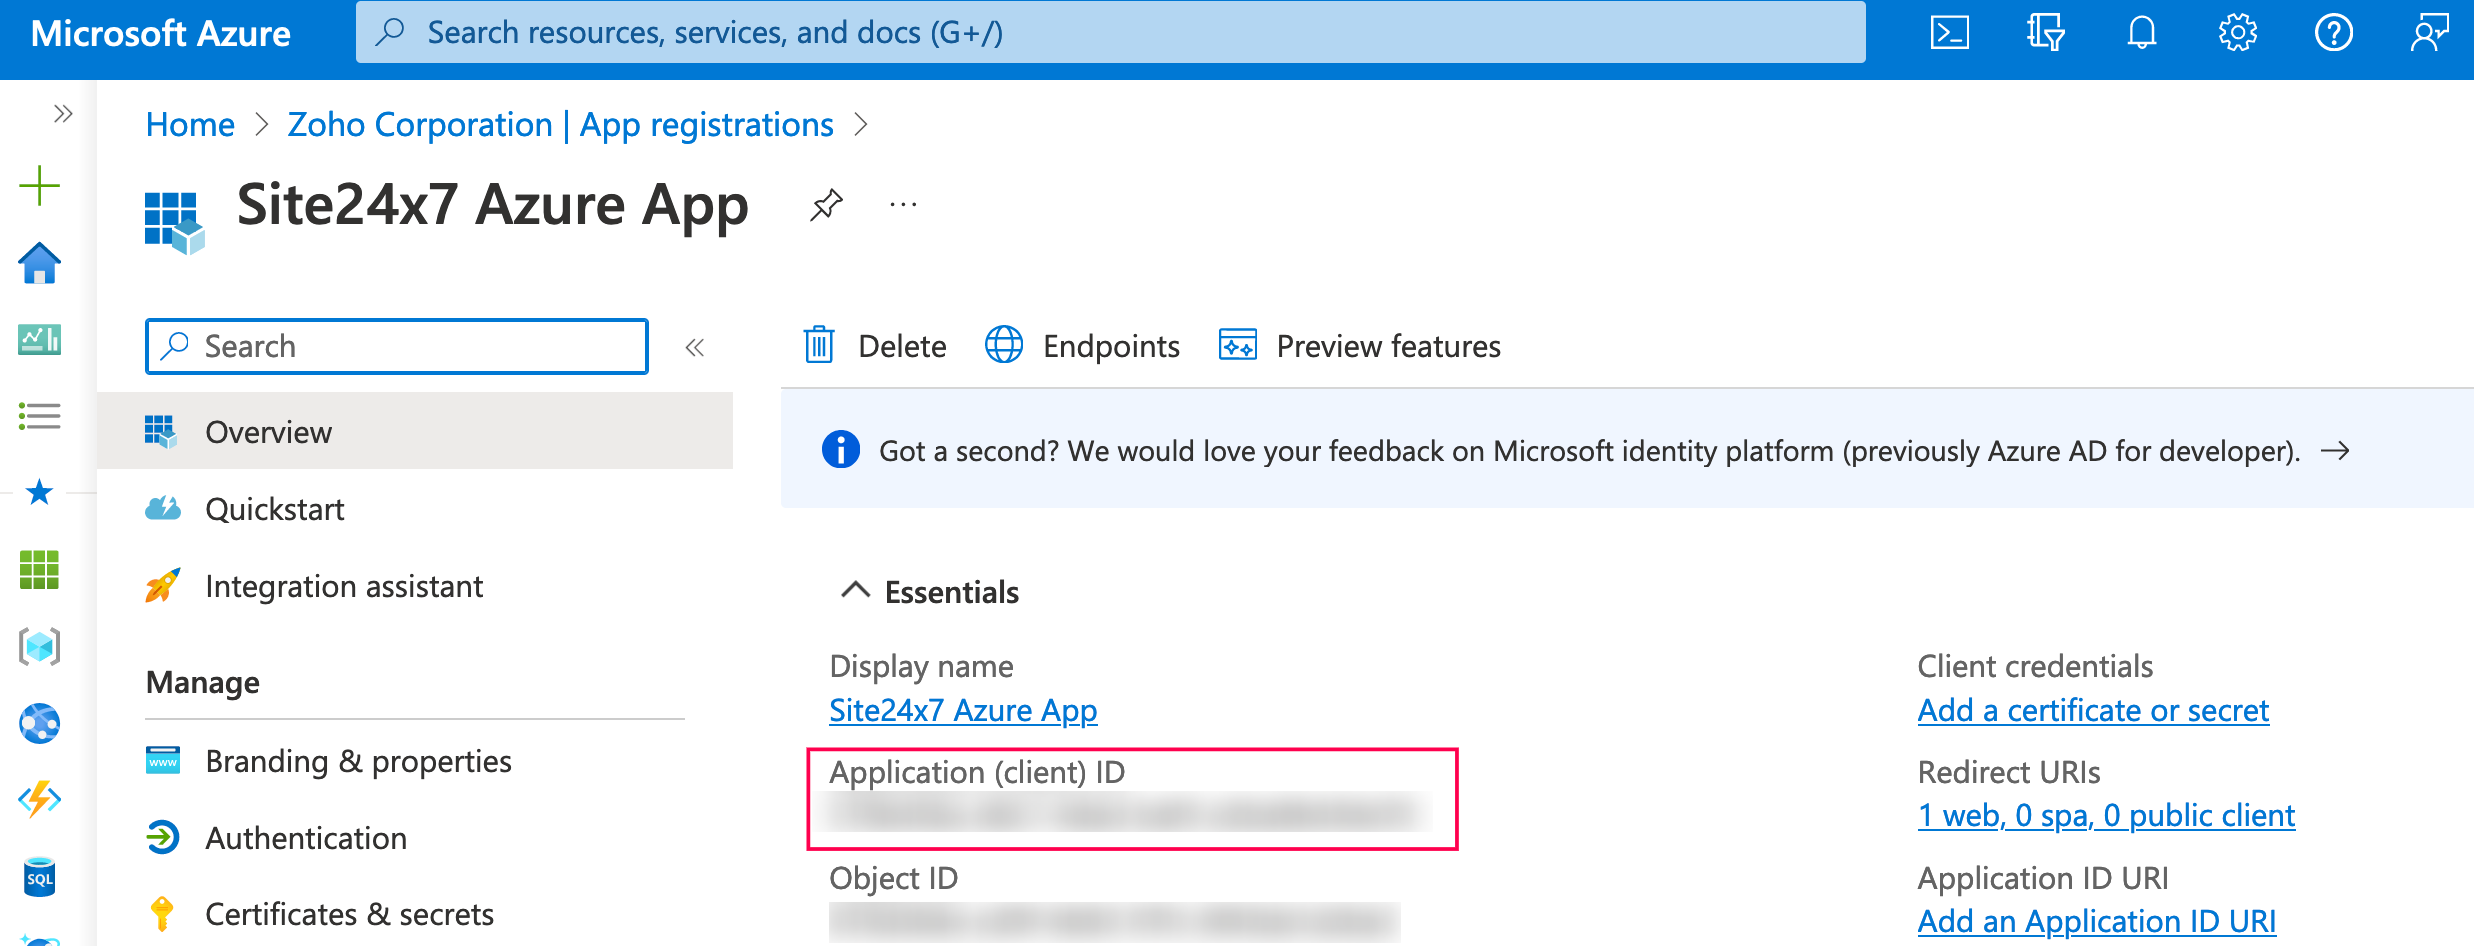
- Once the application is registered in the Azure portal, you will be taken to a new page with information about the application. Copy the Directory (tenant) ID and Application (client) ID and save them for later use.
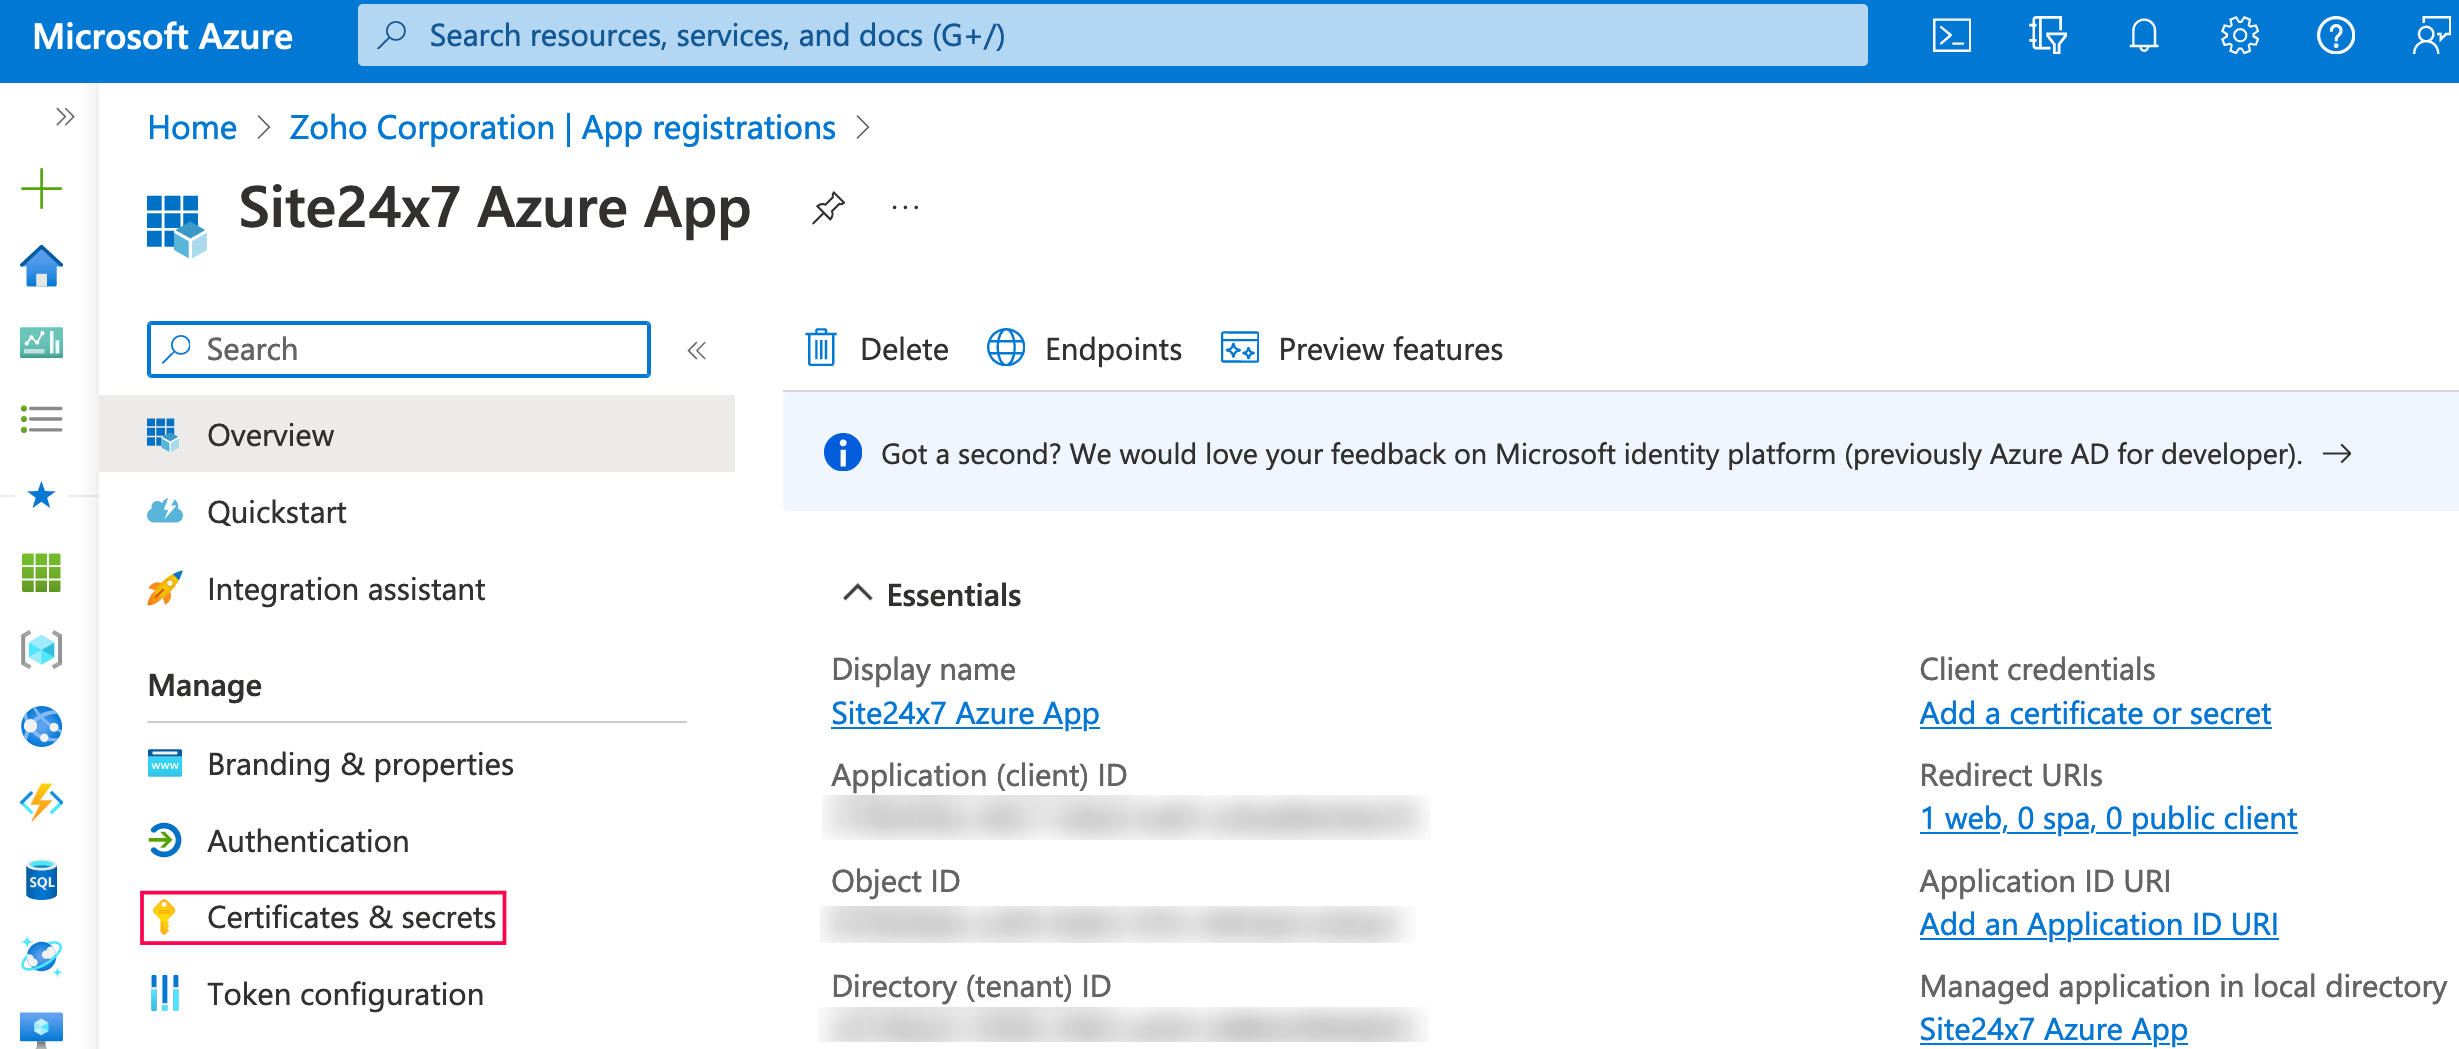
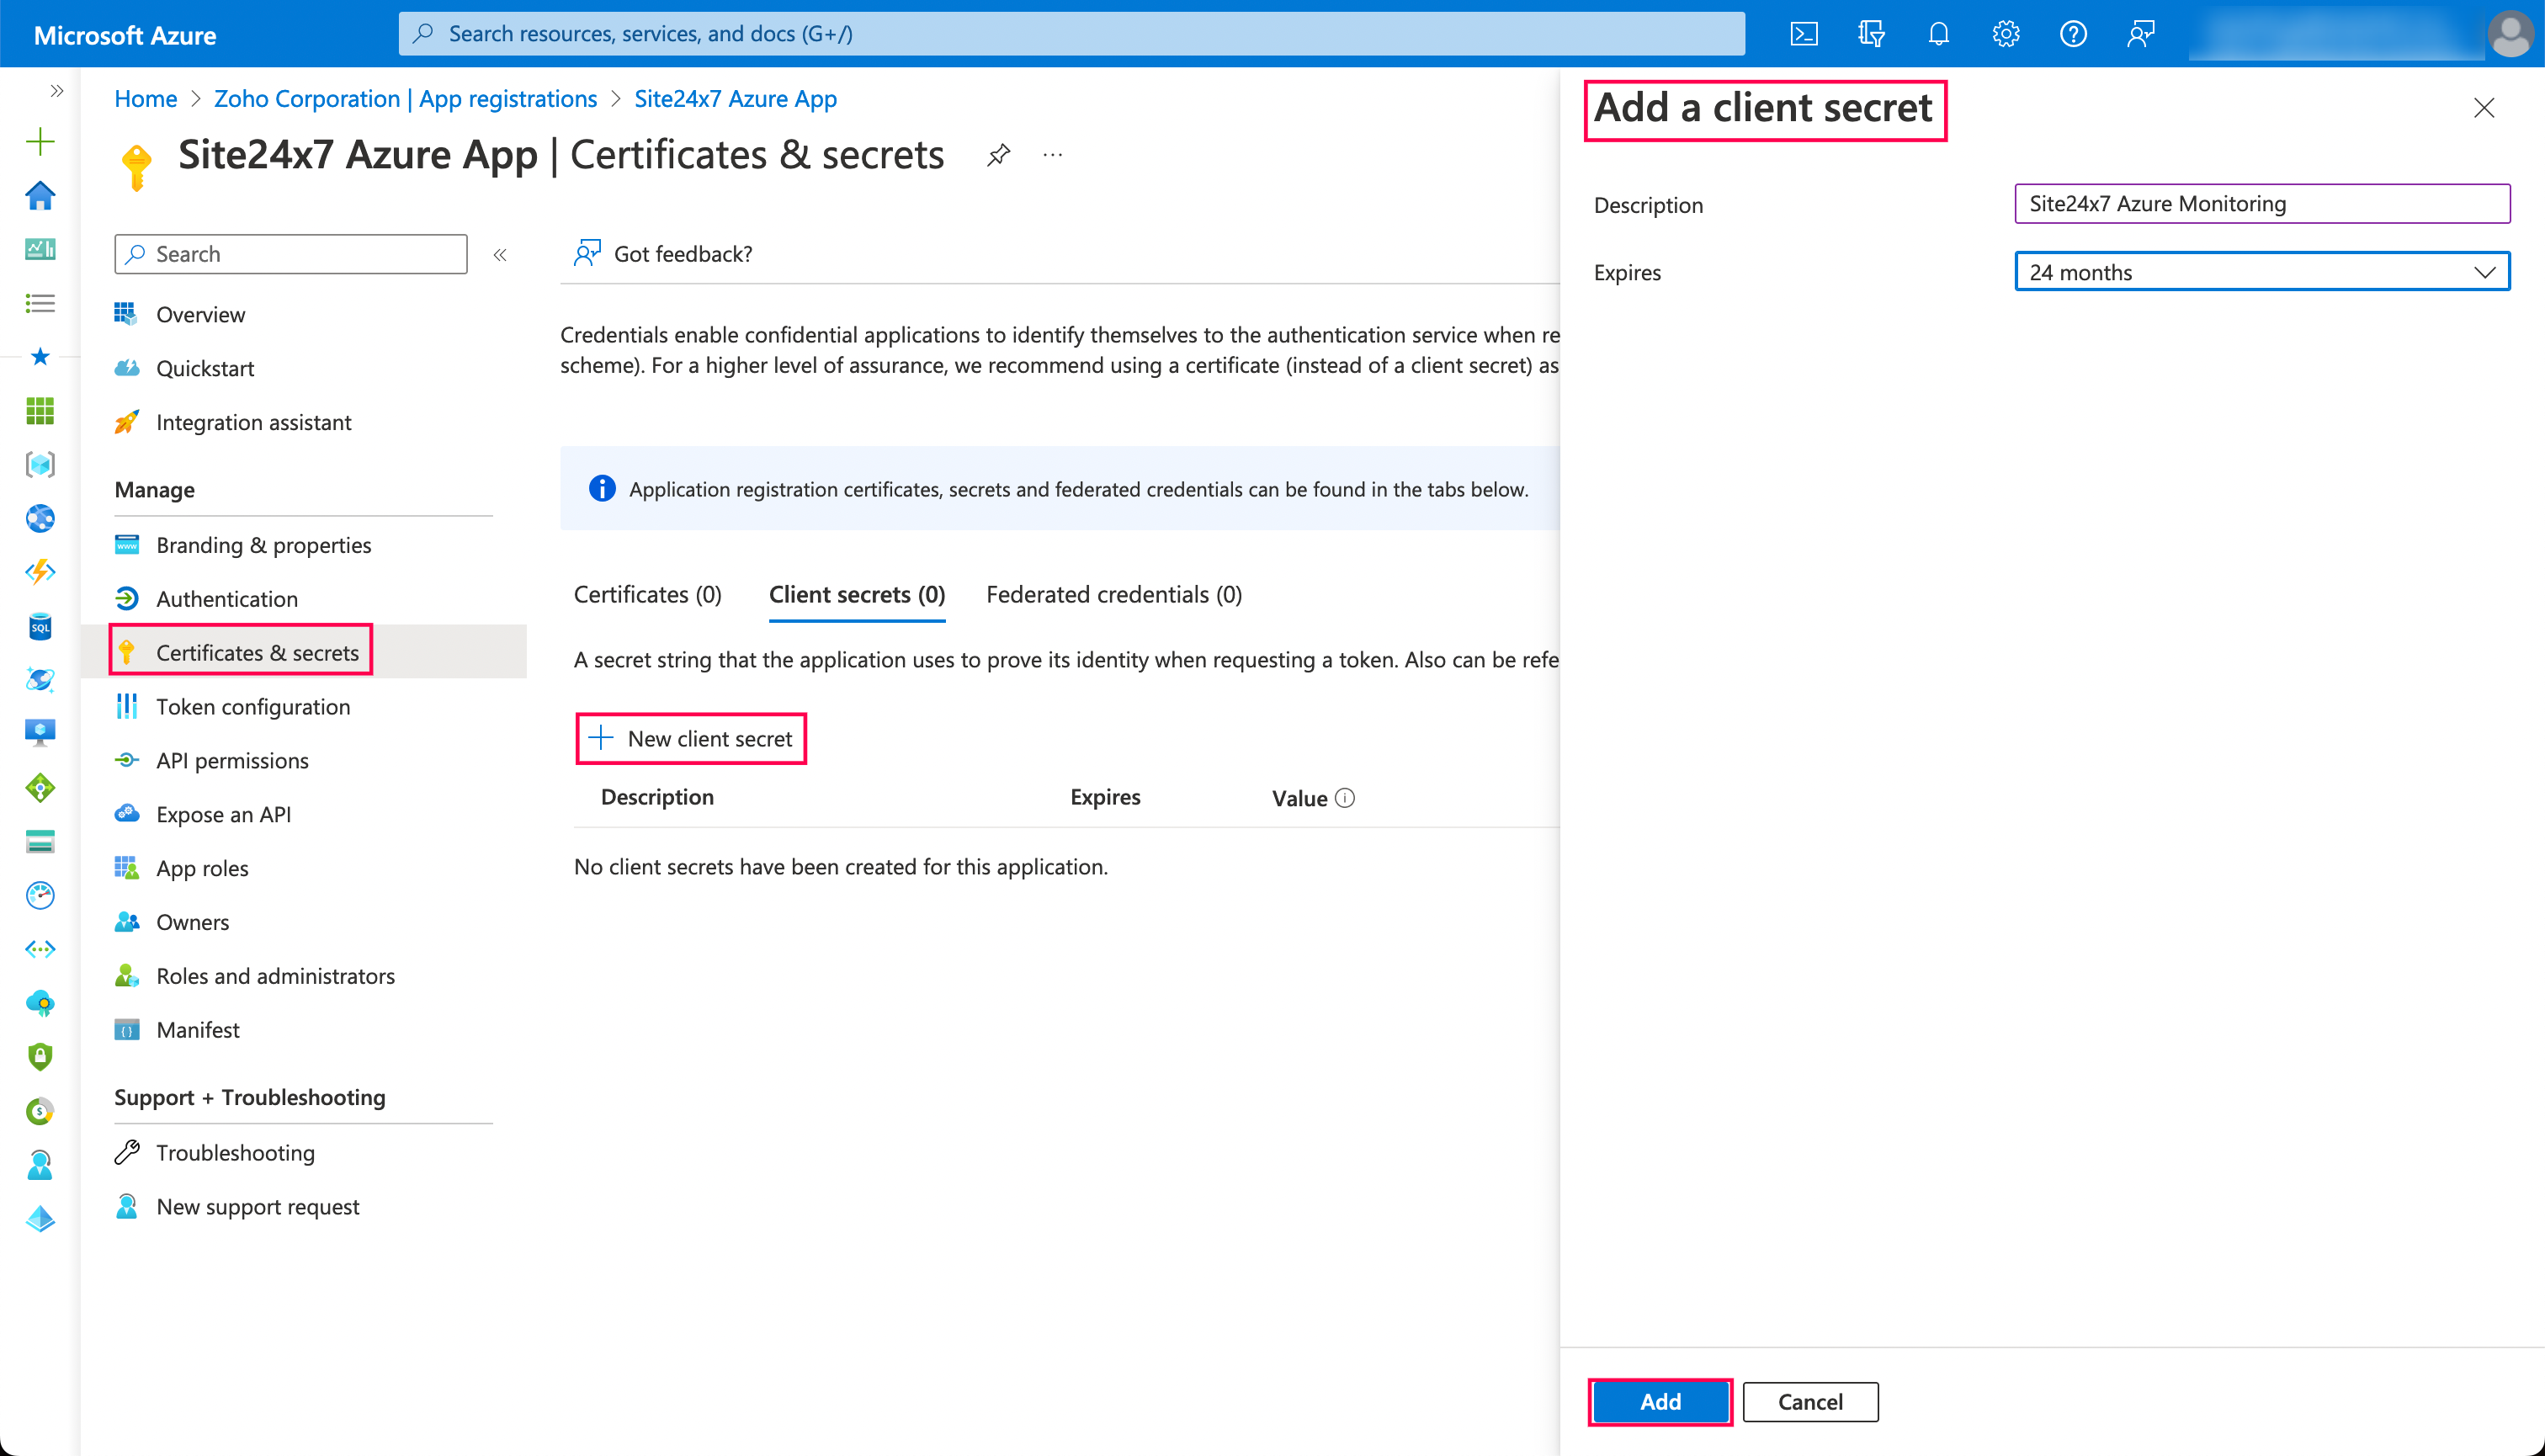
- Under Manage, click Certificates & secrets.
- Under Client secrets, click + New client secret. In the Add a client secret window, provide a Description, choose your preferred period in the Expires field, and click Add.
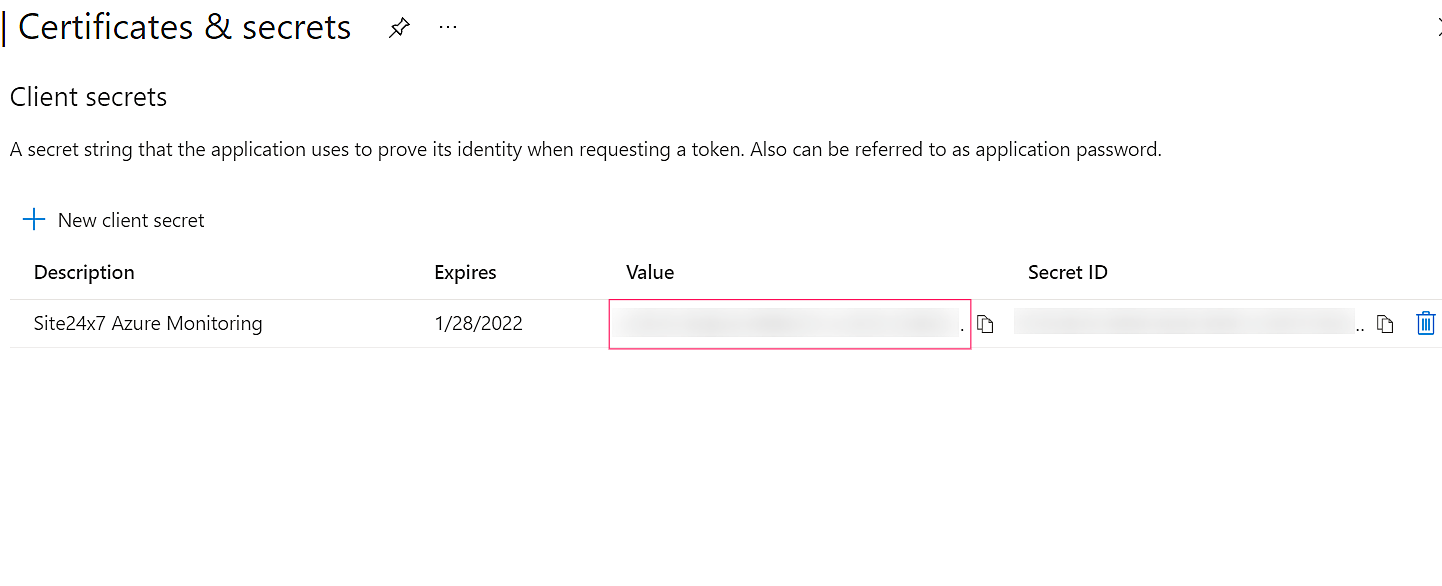
- Copy the Secret value that appears and save it for later use. This value will disappear after a while. So copy and paste the value as soon as you see it.
Note
While entering the validity of the client secret in the Expires field, remember that once the client secret has expired, you will have to create a new client secret by following the instructions above and updating it in the Site24x7 Azure monitor as per the instructions in our knowledge base document.
Part 2: Providing the Necessary Permissions to the Custom App
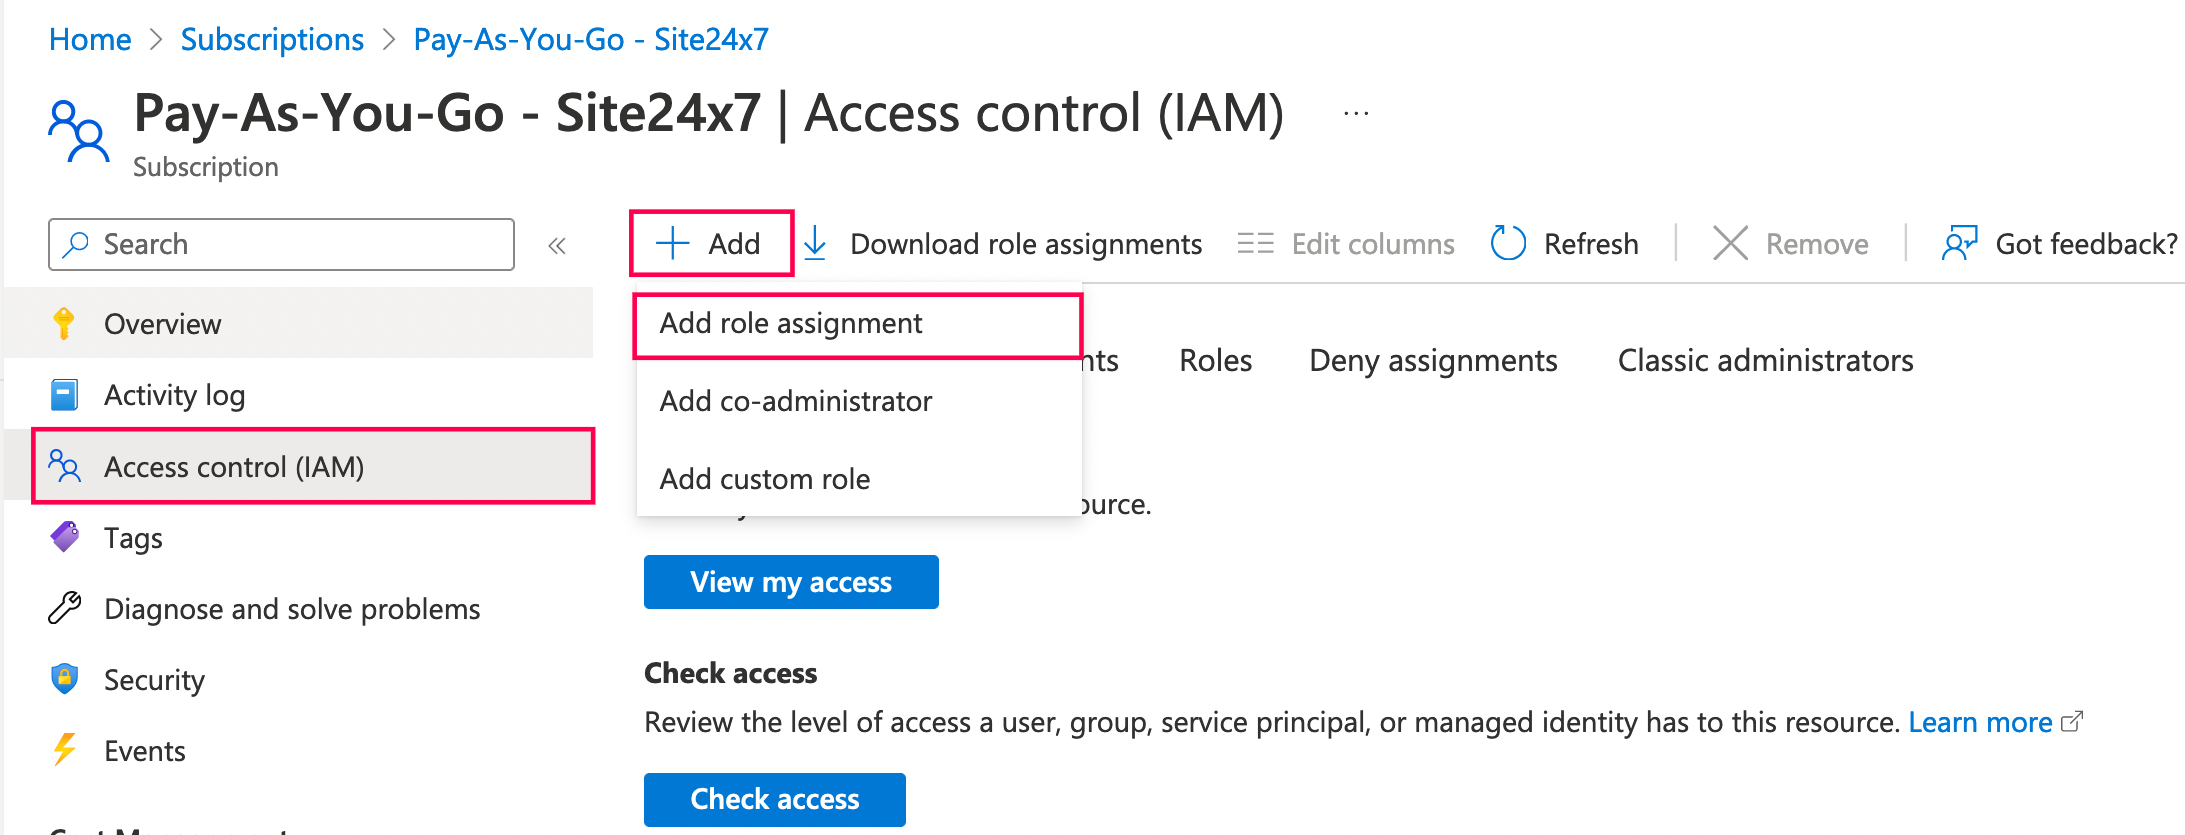
Next, go back to Home and navigate to Subscriptions. Click the subscription that you wish to monitor, and then click Access Control (IAM) > + Add > Add role assignment.
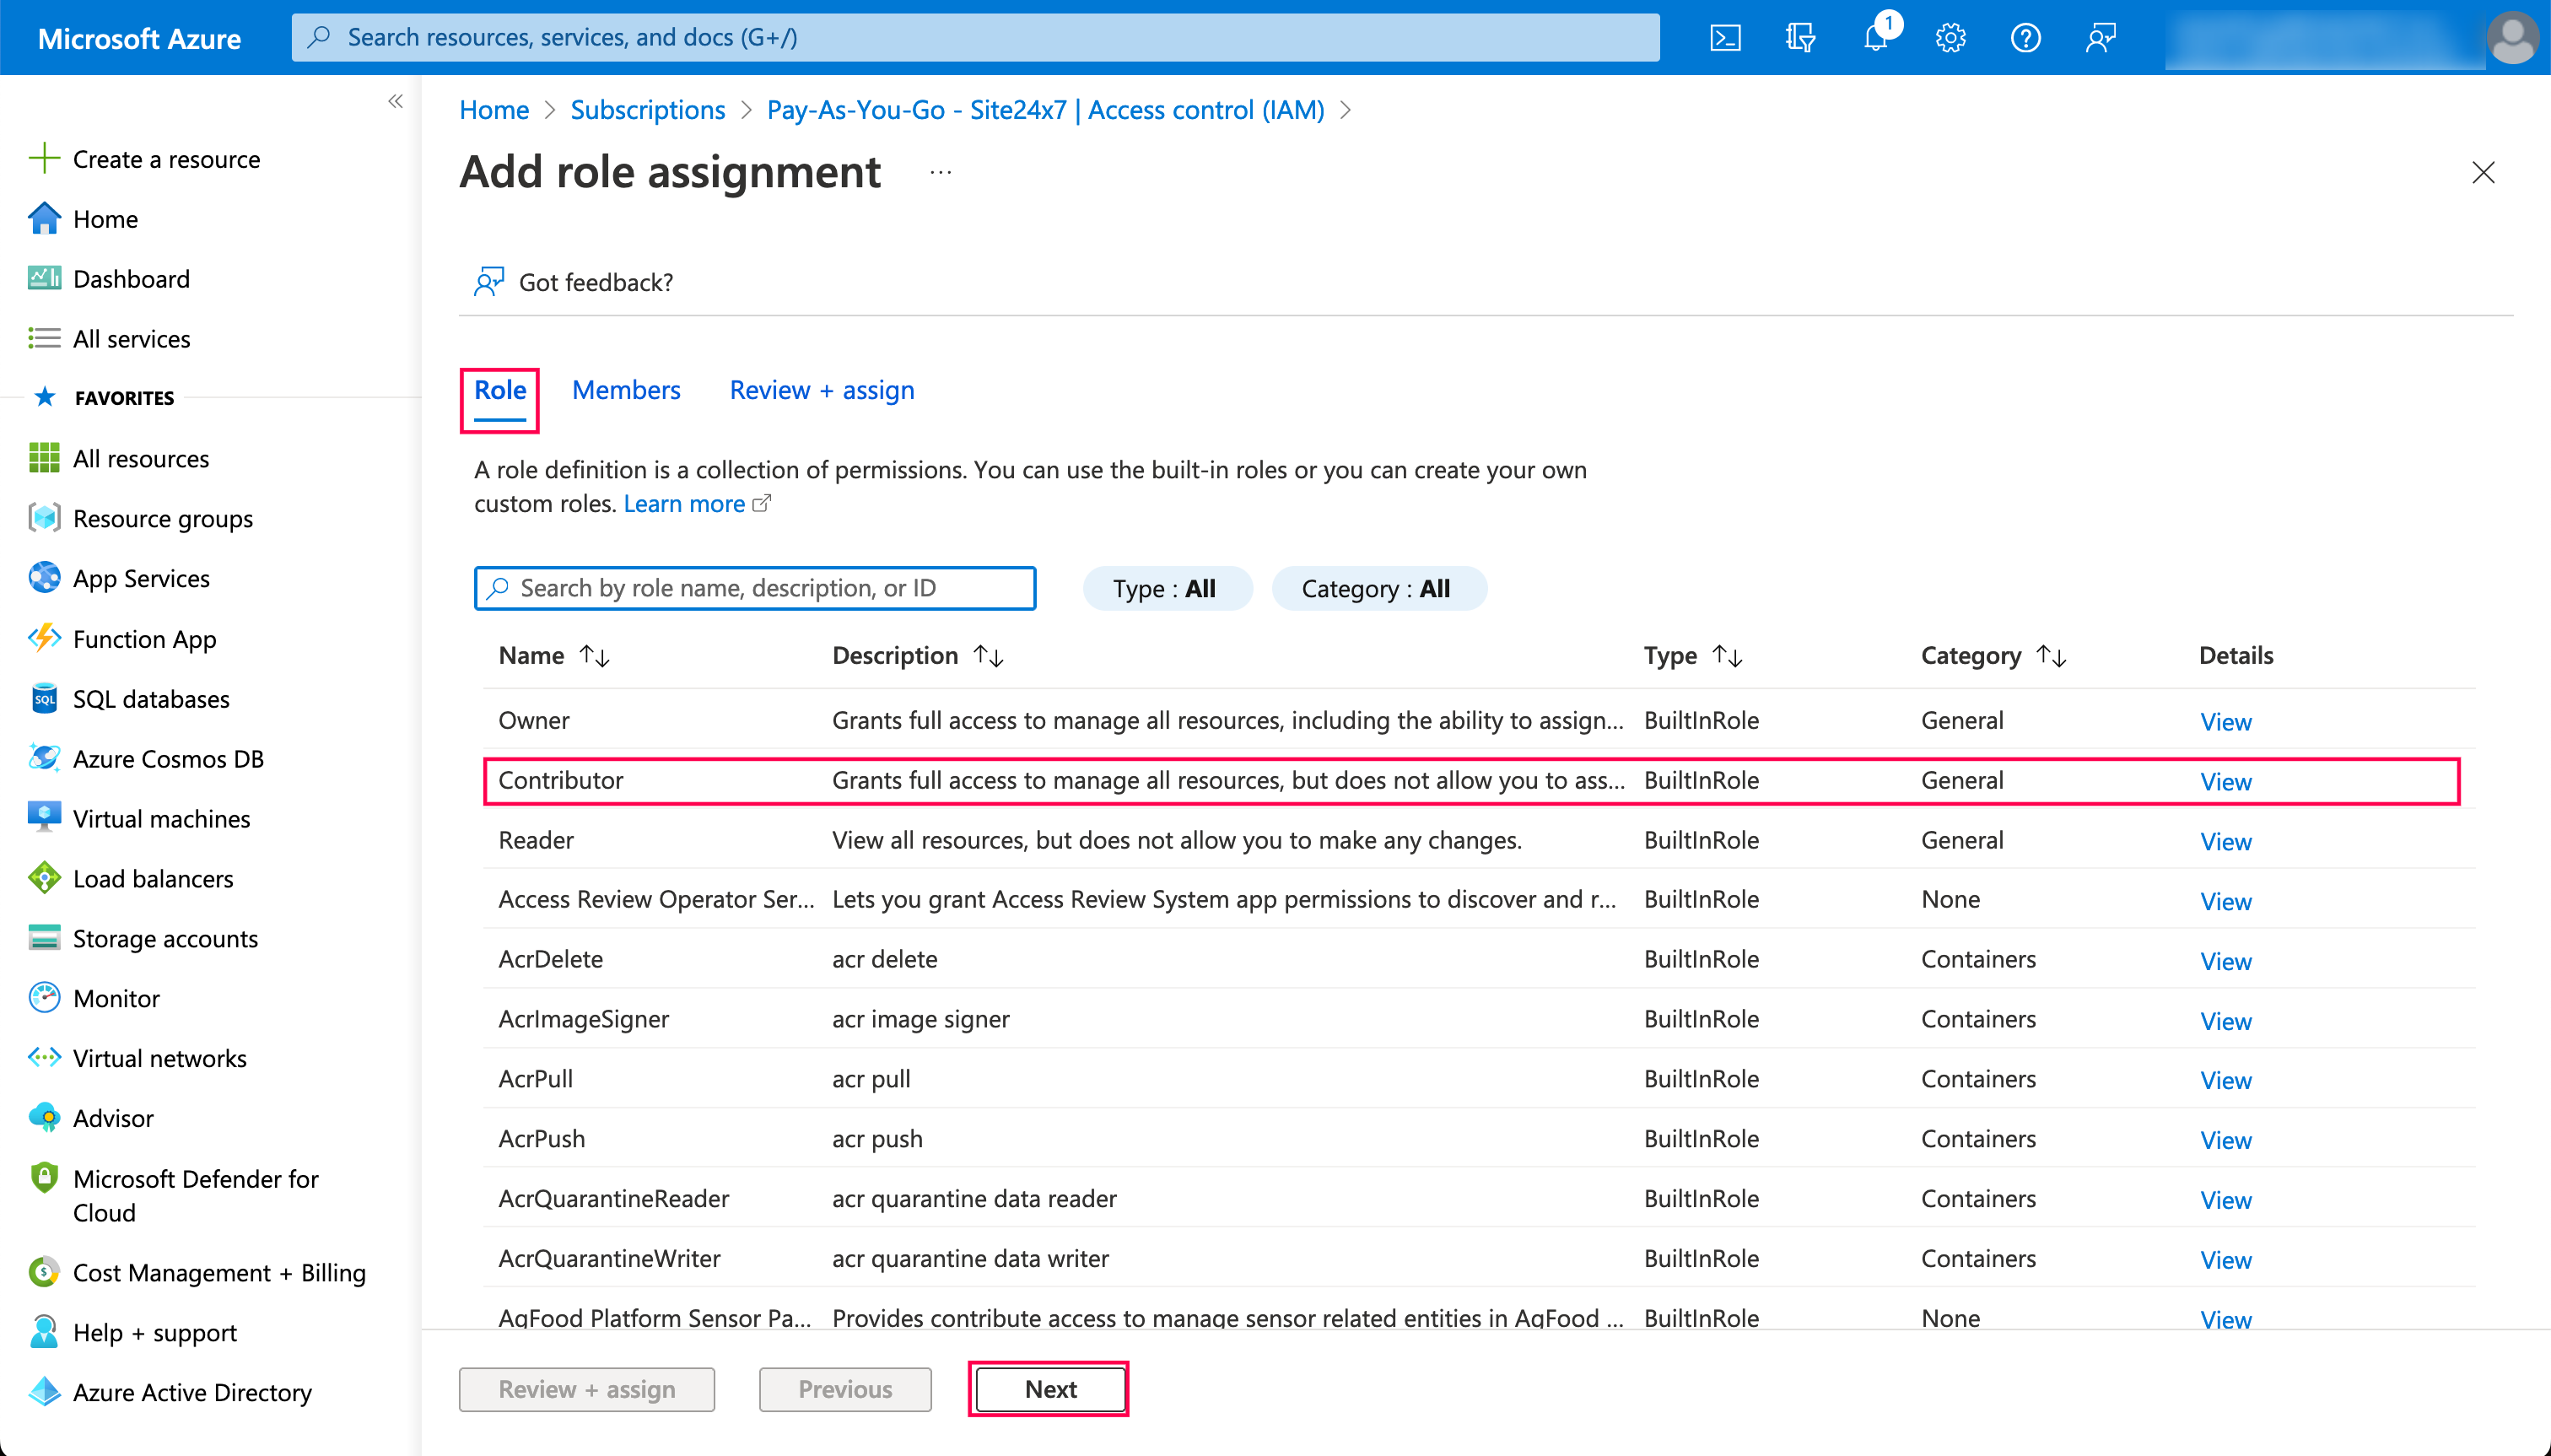
In the Add role assignment page, choose either Reader or Contributor. Then, click Next.
The Reader role is enough for monitoring purposes. But to do IT automation and write operations in Azure portal, Contributor role is required.
In the Members tab, click + Select members. In the right pane, choose the application you created earlier. Click Select.
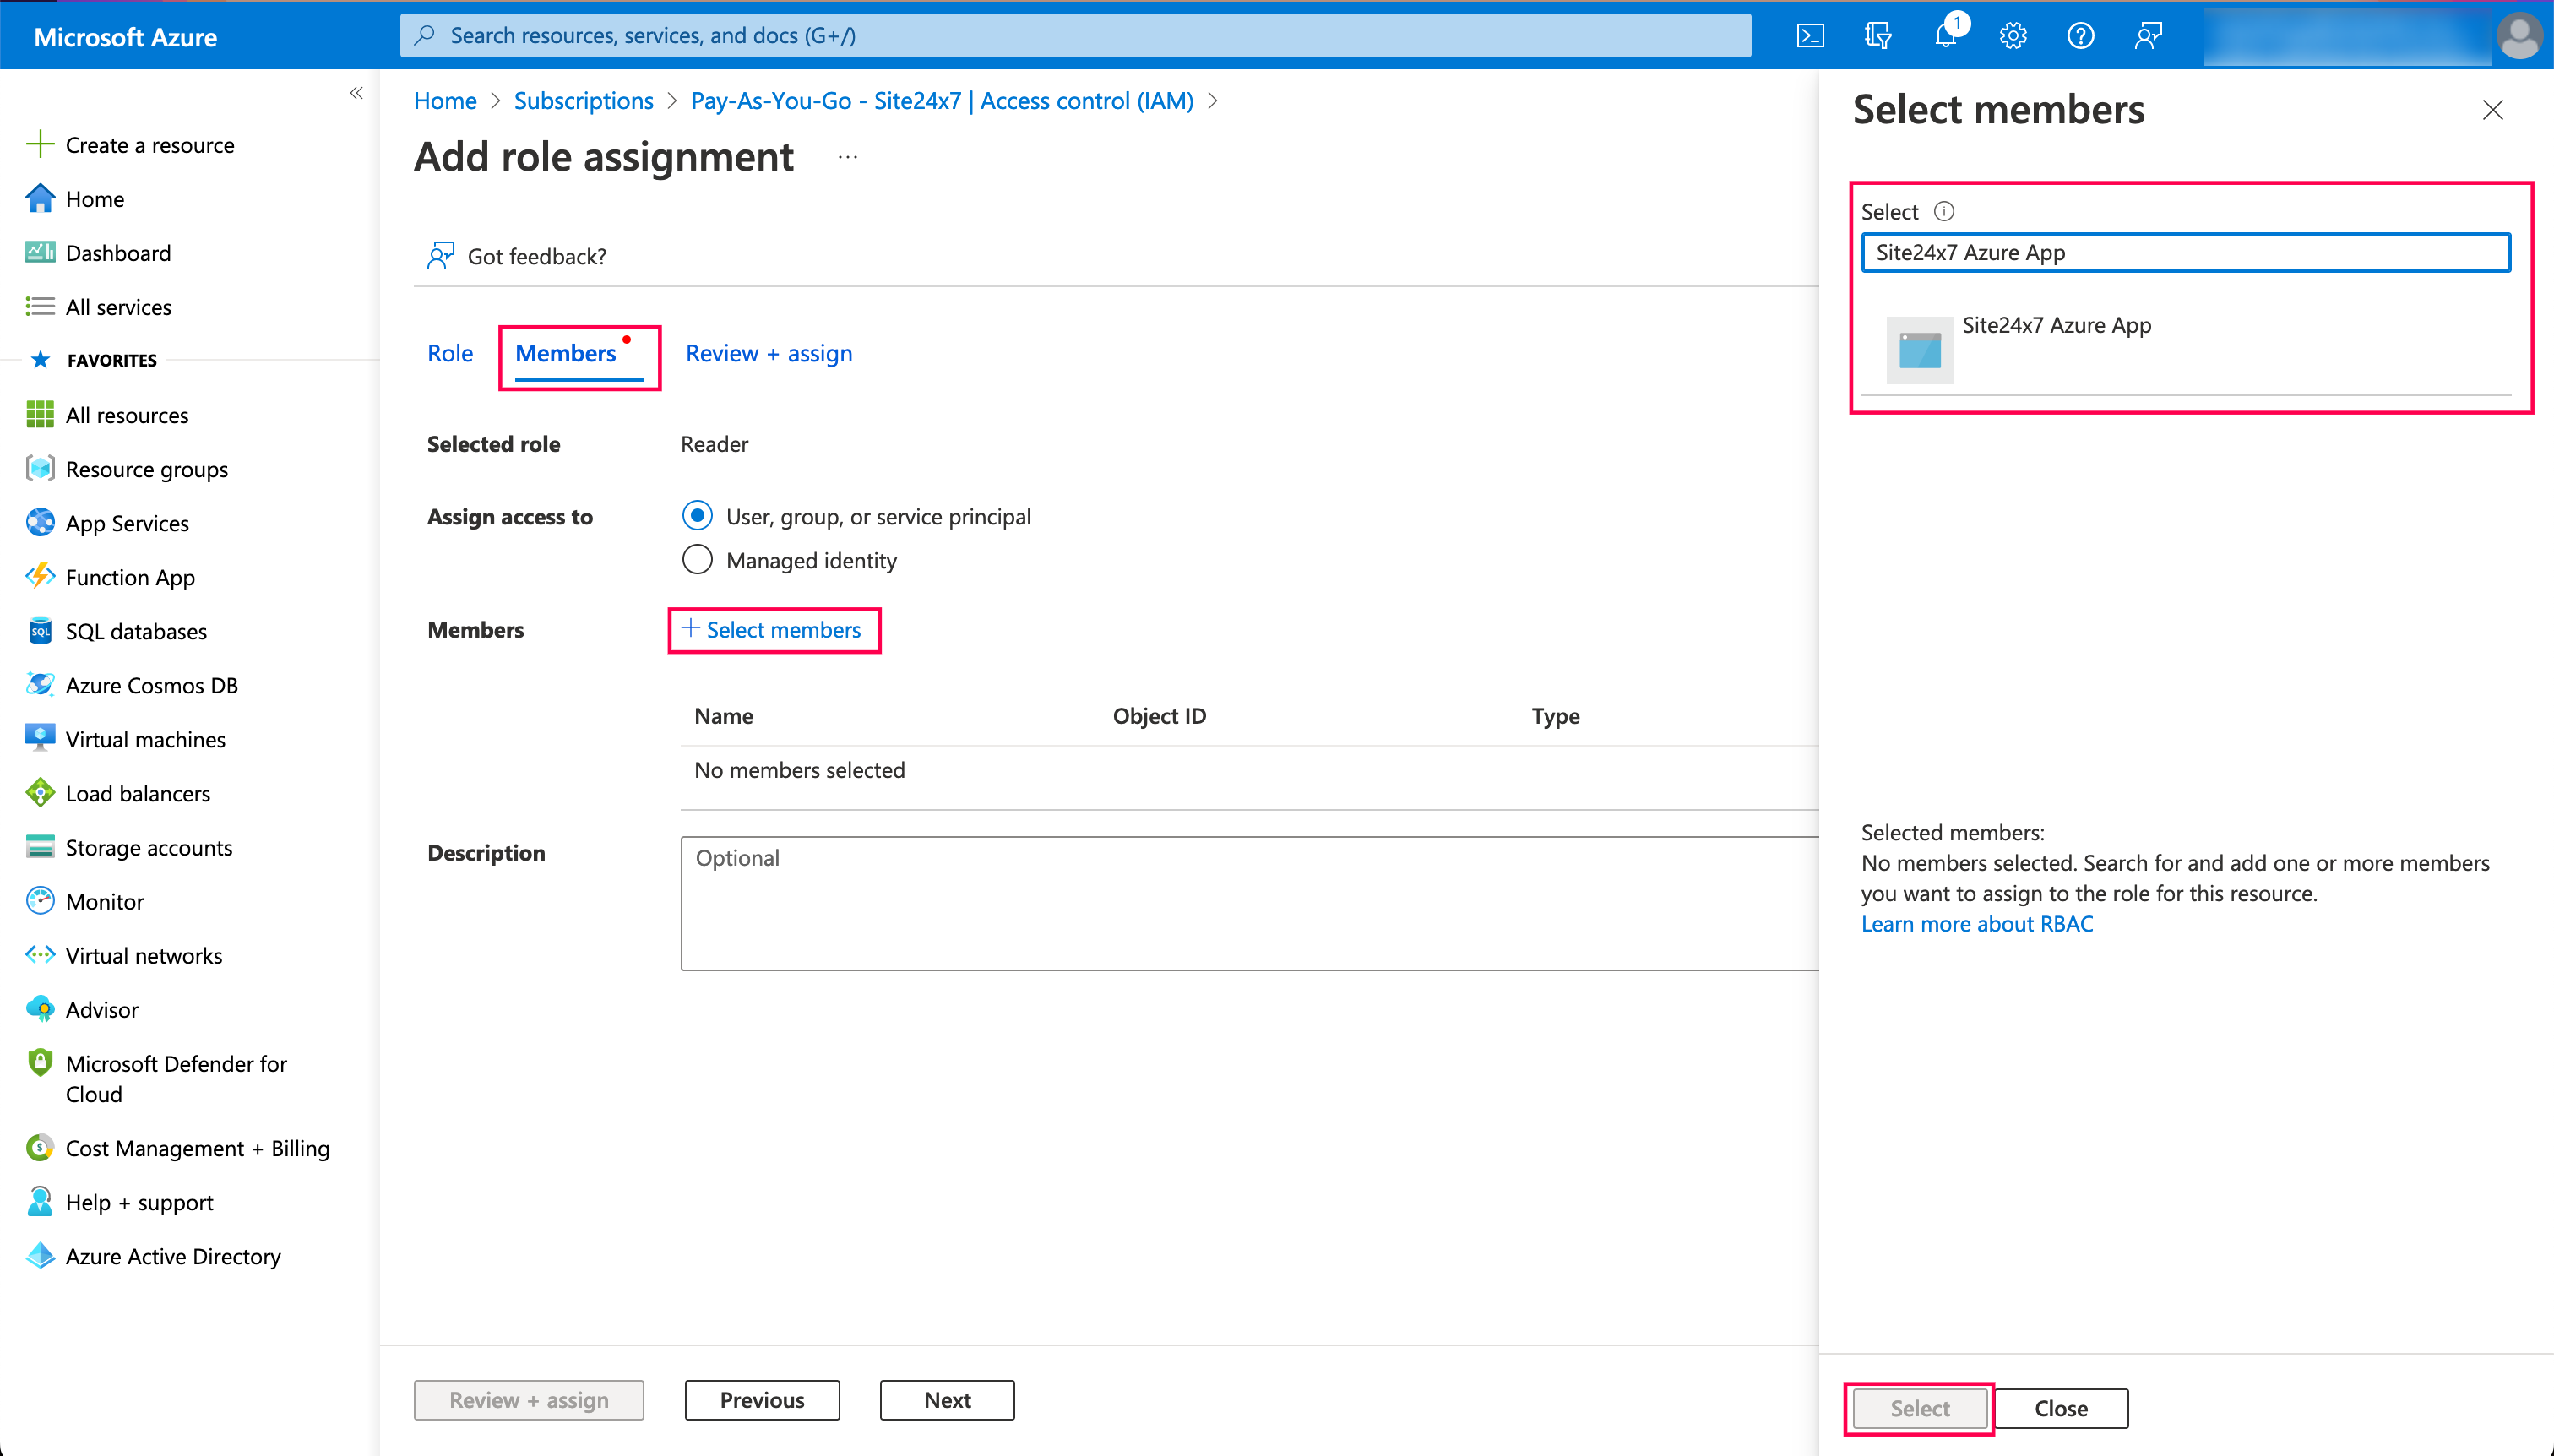
Your application's name will now be added to the Members field. Click Next.
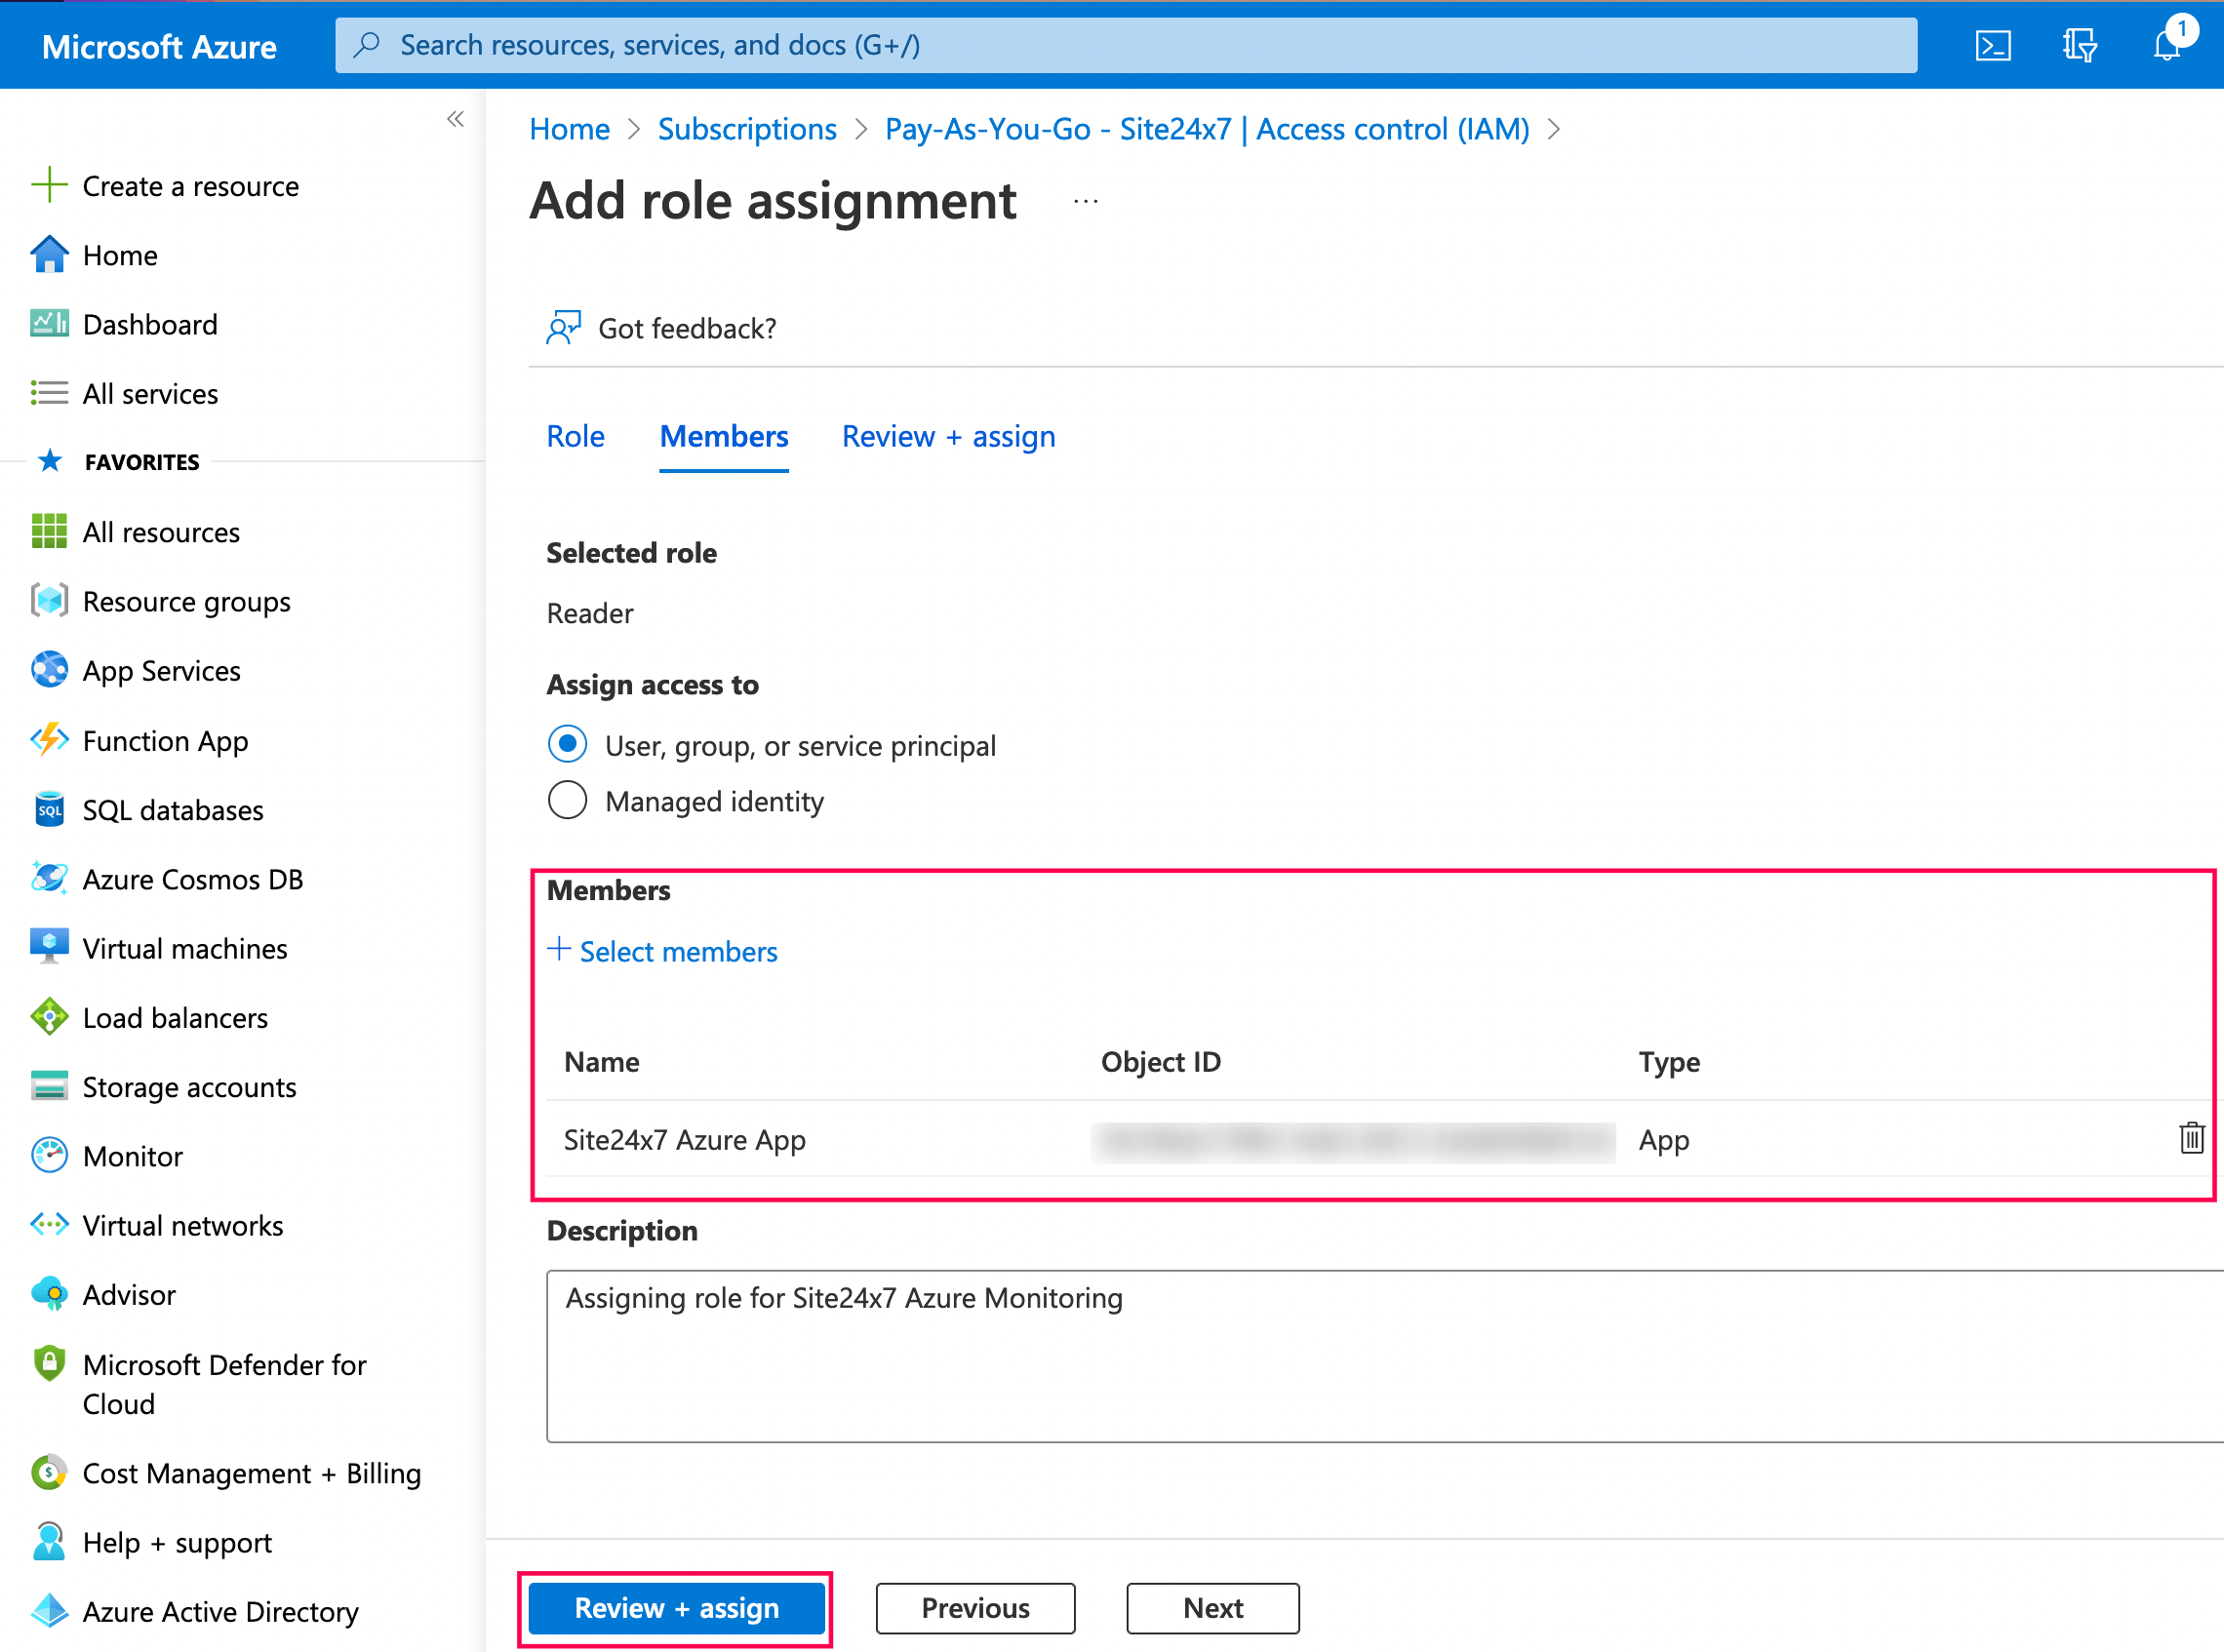
In the Review + assign tab, confirm if the details are correct and then click Review + assign.
Once you have completed all the steps above, you can use the above credentials to add an Azure monitor.
