Installing Java Agent in WebLogic 12.1.3 and above
Note
Refer to this help page for the previous steps.
- Extract the ZIP file to a new directory to find the agent's JAR file and its configuration files.
- Configure the properties such as license key, application name and port in the apminsight.conf file located in the extracted folder.
- Follow either of the following based on your setup:
For standalone setup
- Open the <ORACLE_HOME>/user_projects/domains/<doman_name>/bin/startWebLogic.cmd(.sh) file in any text editor
- Add the following lines to the top of the script file.
- For Windows,
set JAVA_OPTIONS=-DUseSunHttpHandler=true -javaagent:<agent_directory_full_path>apminsight-javaagent.jar %JAVA_OPTIONS%
- For Linux,
JAVA_OPTIONS="-DUseSunHttpHandler=true -javaagent:<agent_directory_full_path>/apminsight-javaagent.jar $JAVA_OPTIONS"
- Save the file and restart the WebLogic server.
For cluster setup
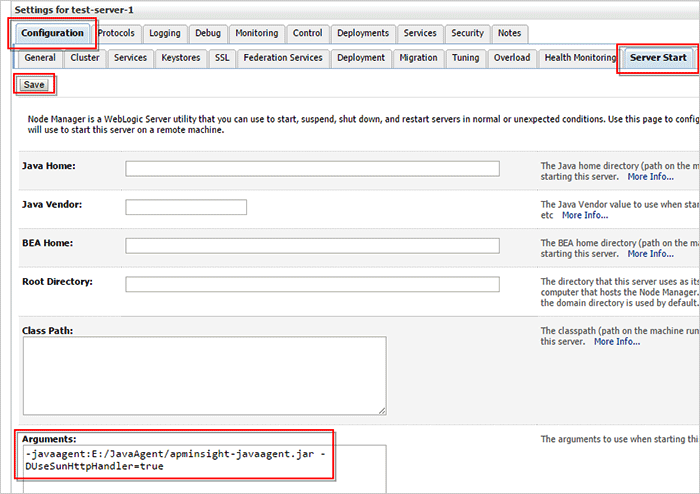
- Open the administrative console of WebLogic server and navigate to the Environment > Servers > Configuration tab.
- Select (Your server name) > Configuration > Server Start tab.
- Locate the Arguments textbox and enter the following argument:
-javaagent:<agent_directory_full_path>/apminsight-javaagent.jar -DUseSunHttpHandler=true

- Save the file and restart the WebLogic server.
-
On this page
- For standalone setup
- For cluster setup
