Slack Integration
Slack is a cloud-based chat tool that offers a single communications platform for teams to effectively collaborate in real-time. Site24x7's integration with Slack lets you instantly share your critical Site24x7 alerts (Down/Up/Trouble) and Root Cause Analysis (RCA) report permalinks in your Slack channels. Setting up a Slack integration involves two steps: Generating a Hook URL in Slack and integrating with Site24x7.
Generate Hook URL in Slack
Before you begin, make sure you're signed into your Slack team and Slack Channel that you want to show notifications in.Further, follow the steps listed below to generate the Hook URL:
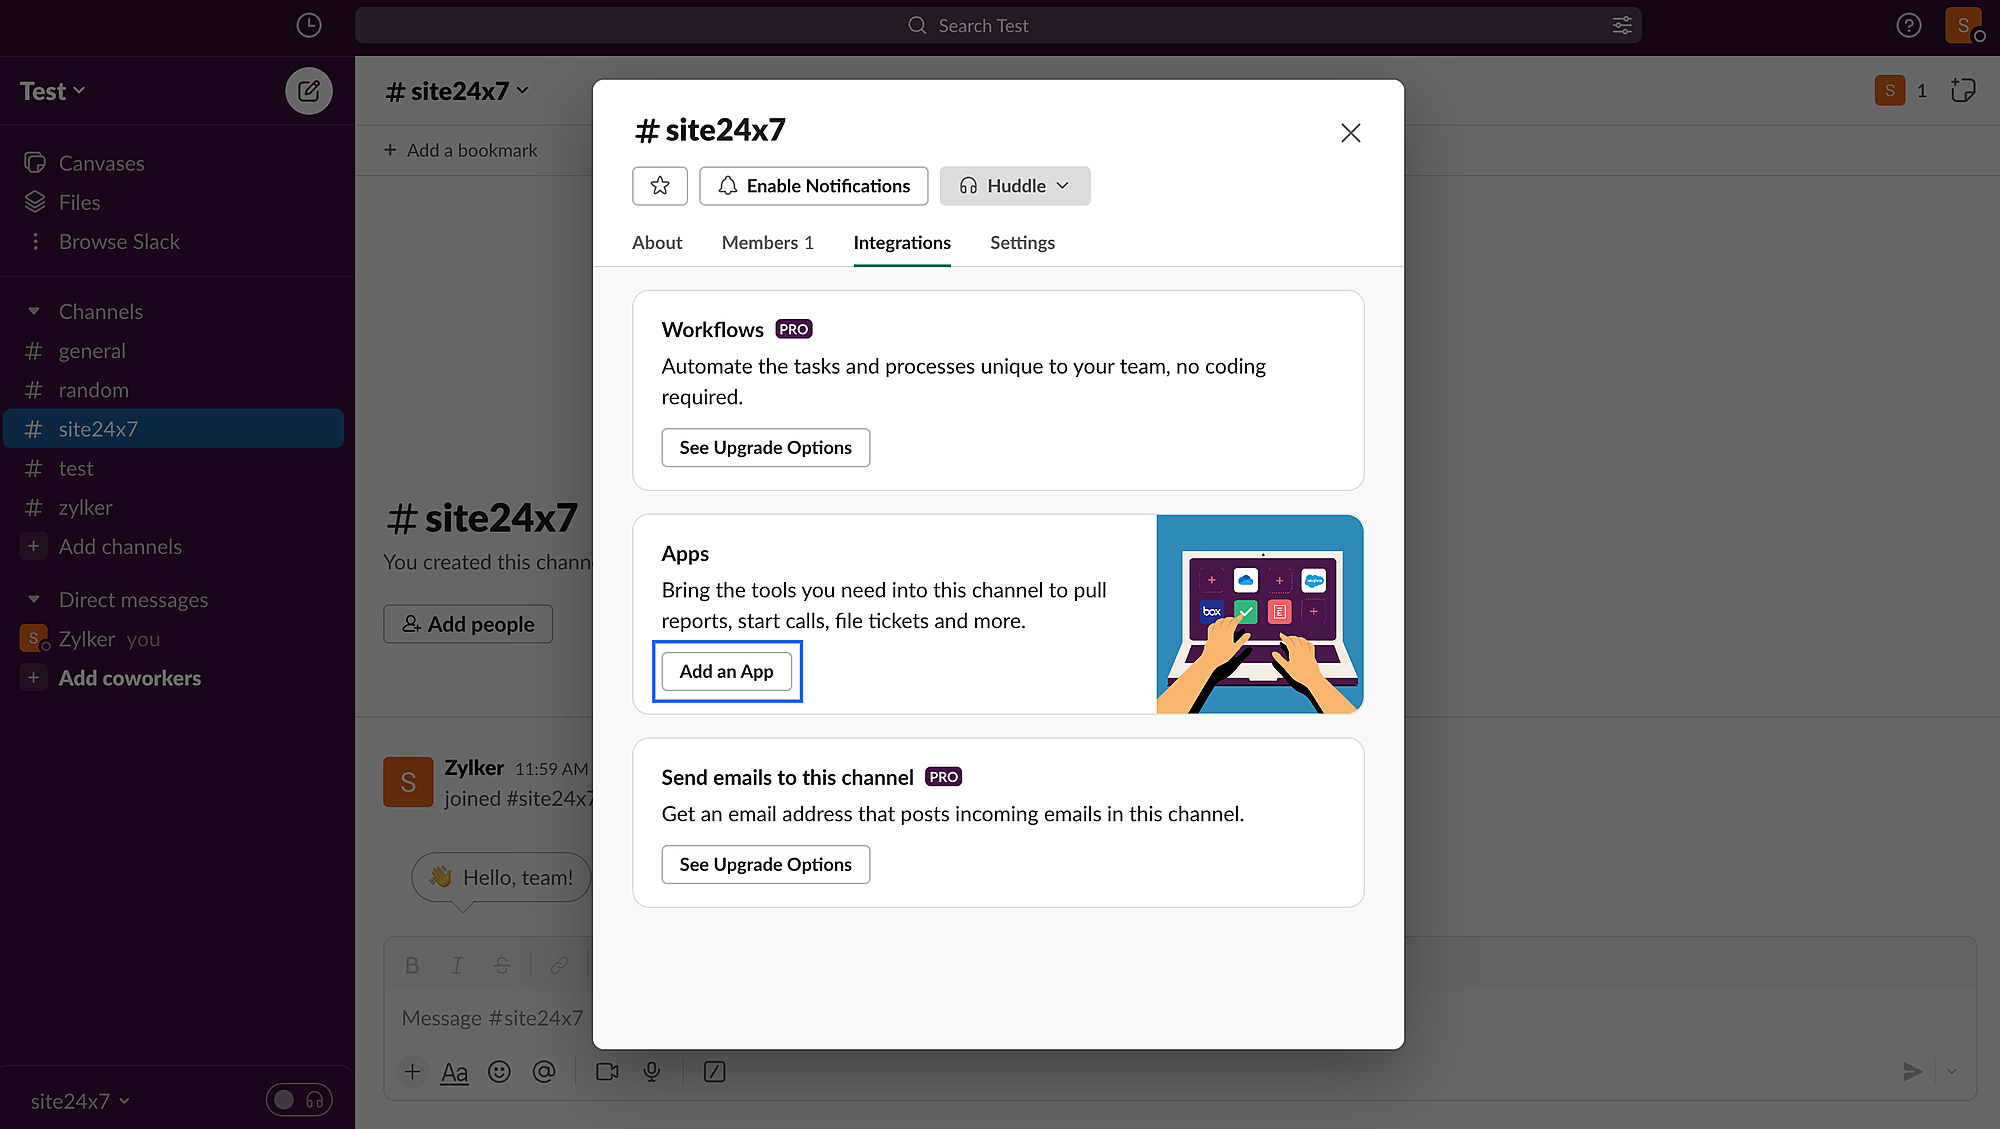
- In the Slack App, navigate to your channel, click on the channel name. In the pop-up that opens, click on Integrations > Add an app.
- In the new page that opens, search for 'Incoming WebHooks' and install it.
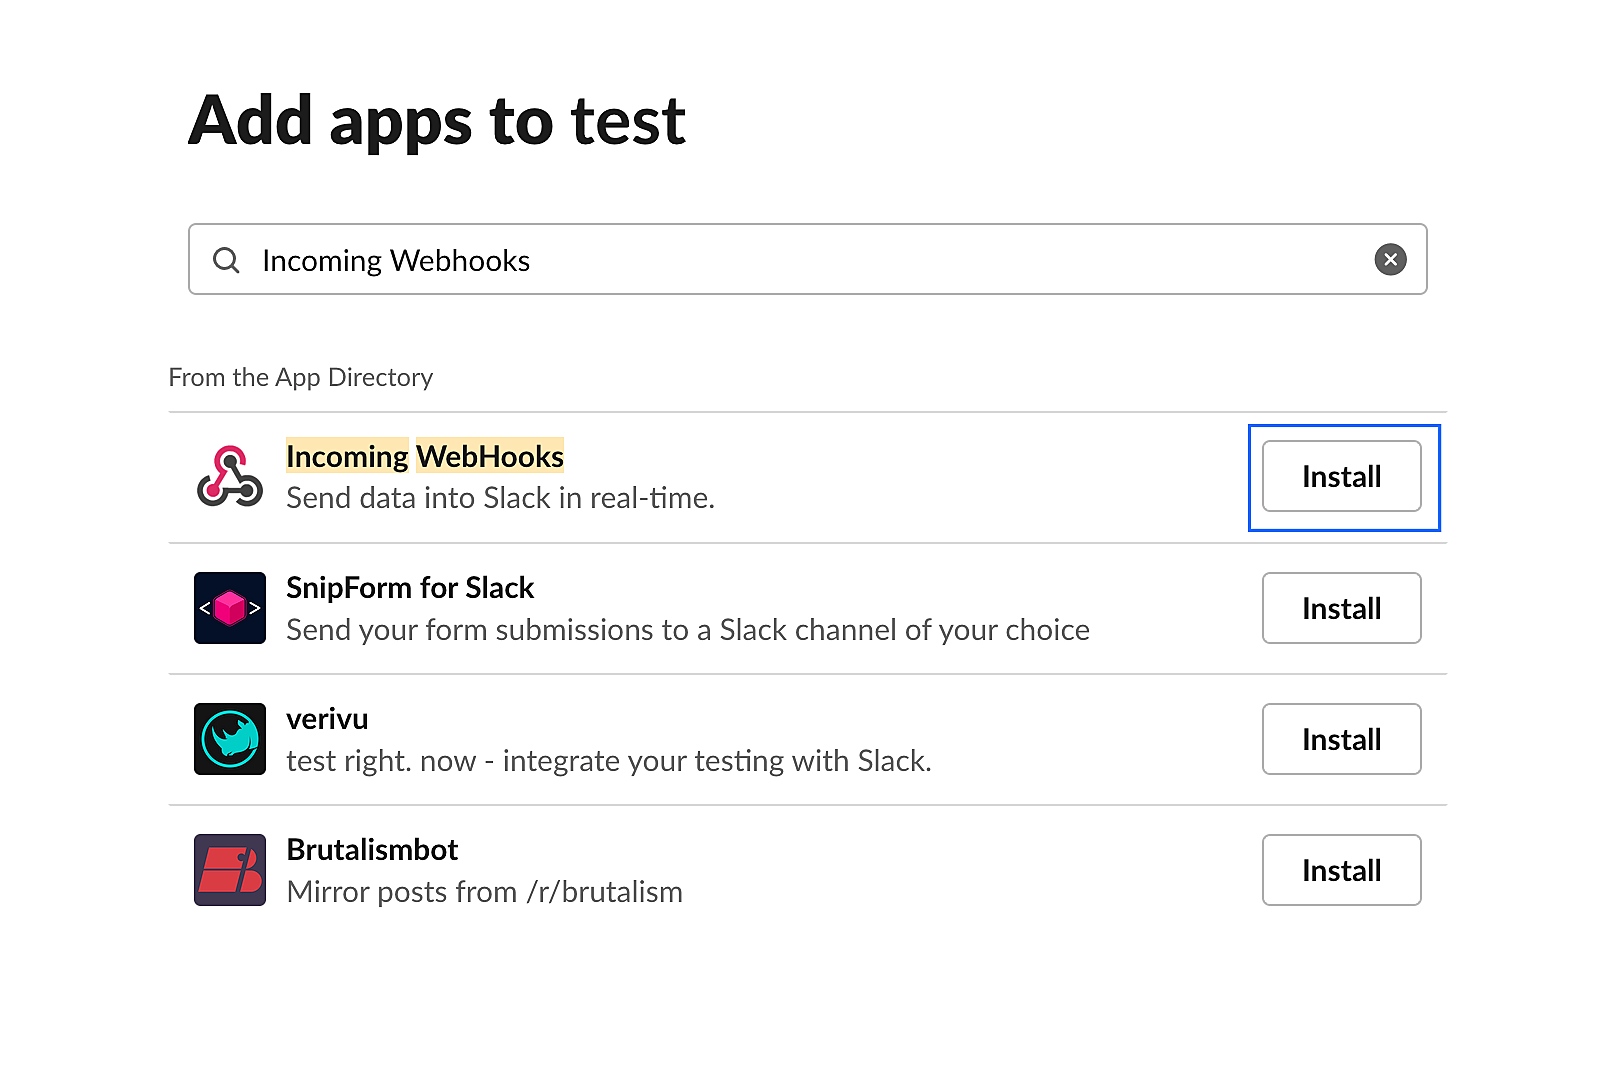
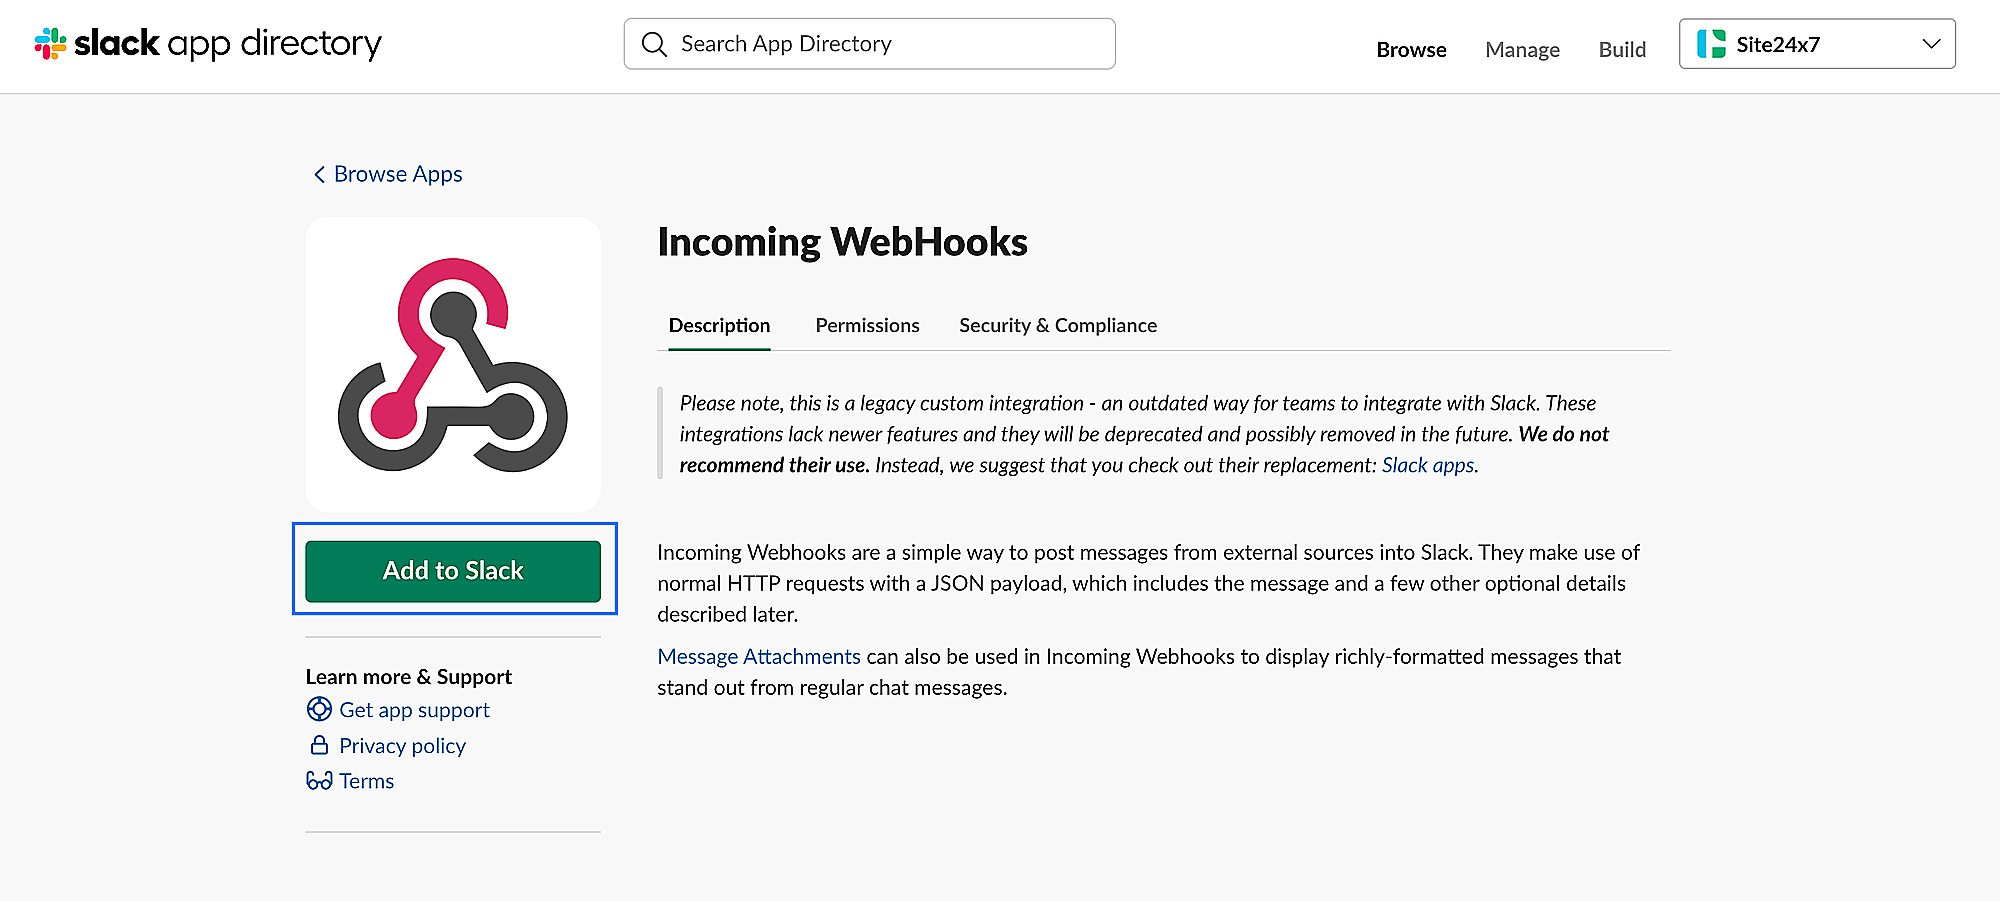
- After installation, click Add to Slack.
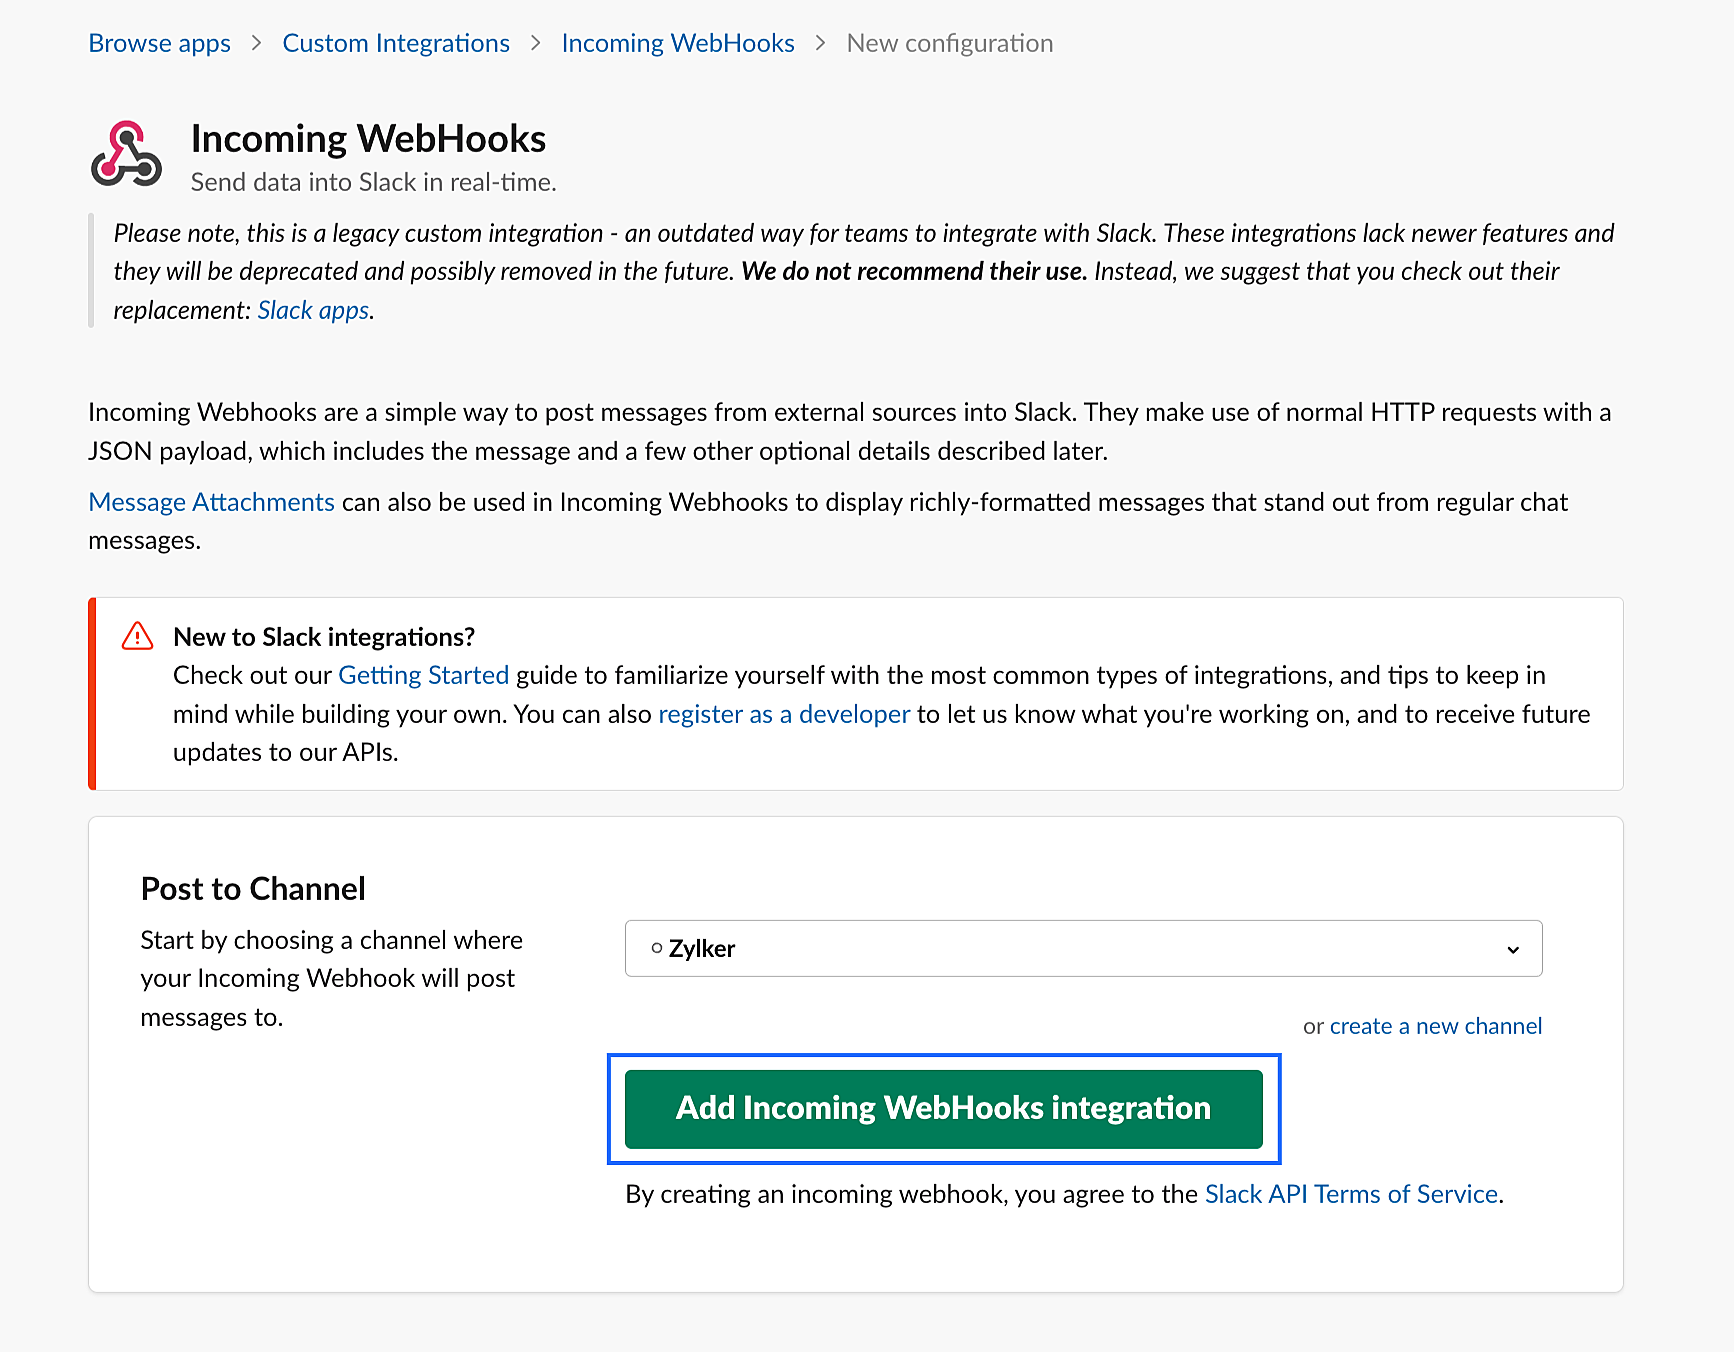
- In the next page, select the channel you want the messages to be posted to, and click Add Incoming WebHooks integration.
- You will find the Webhook URL in the next page. Copy the URL and save it. This will be used to connect your Site24x7 account with Slack.
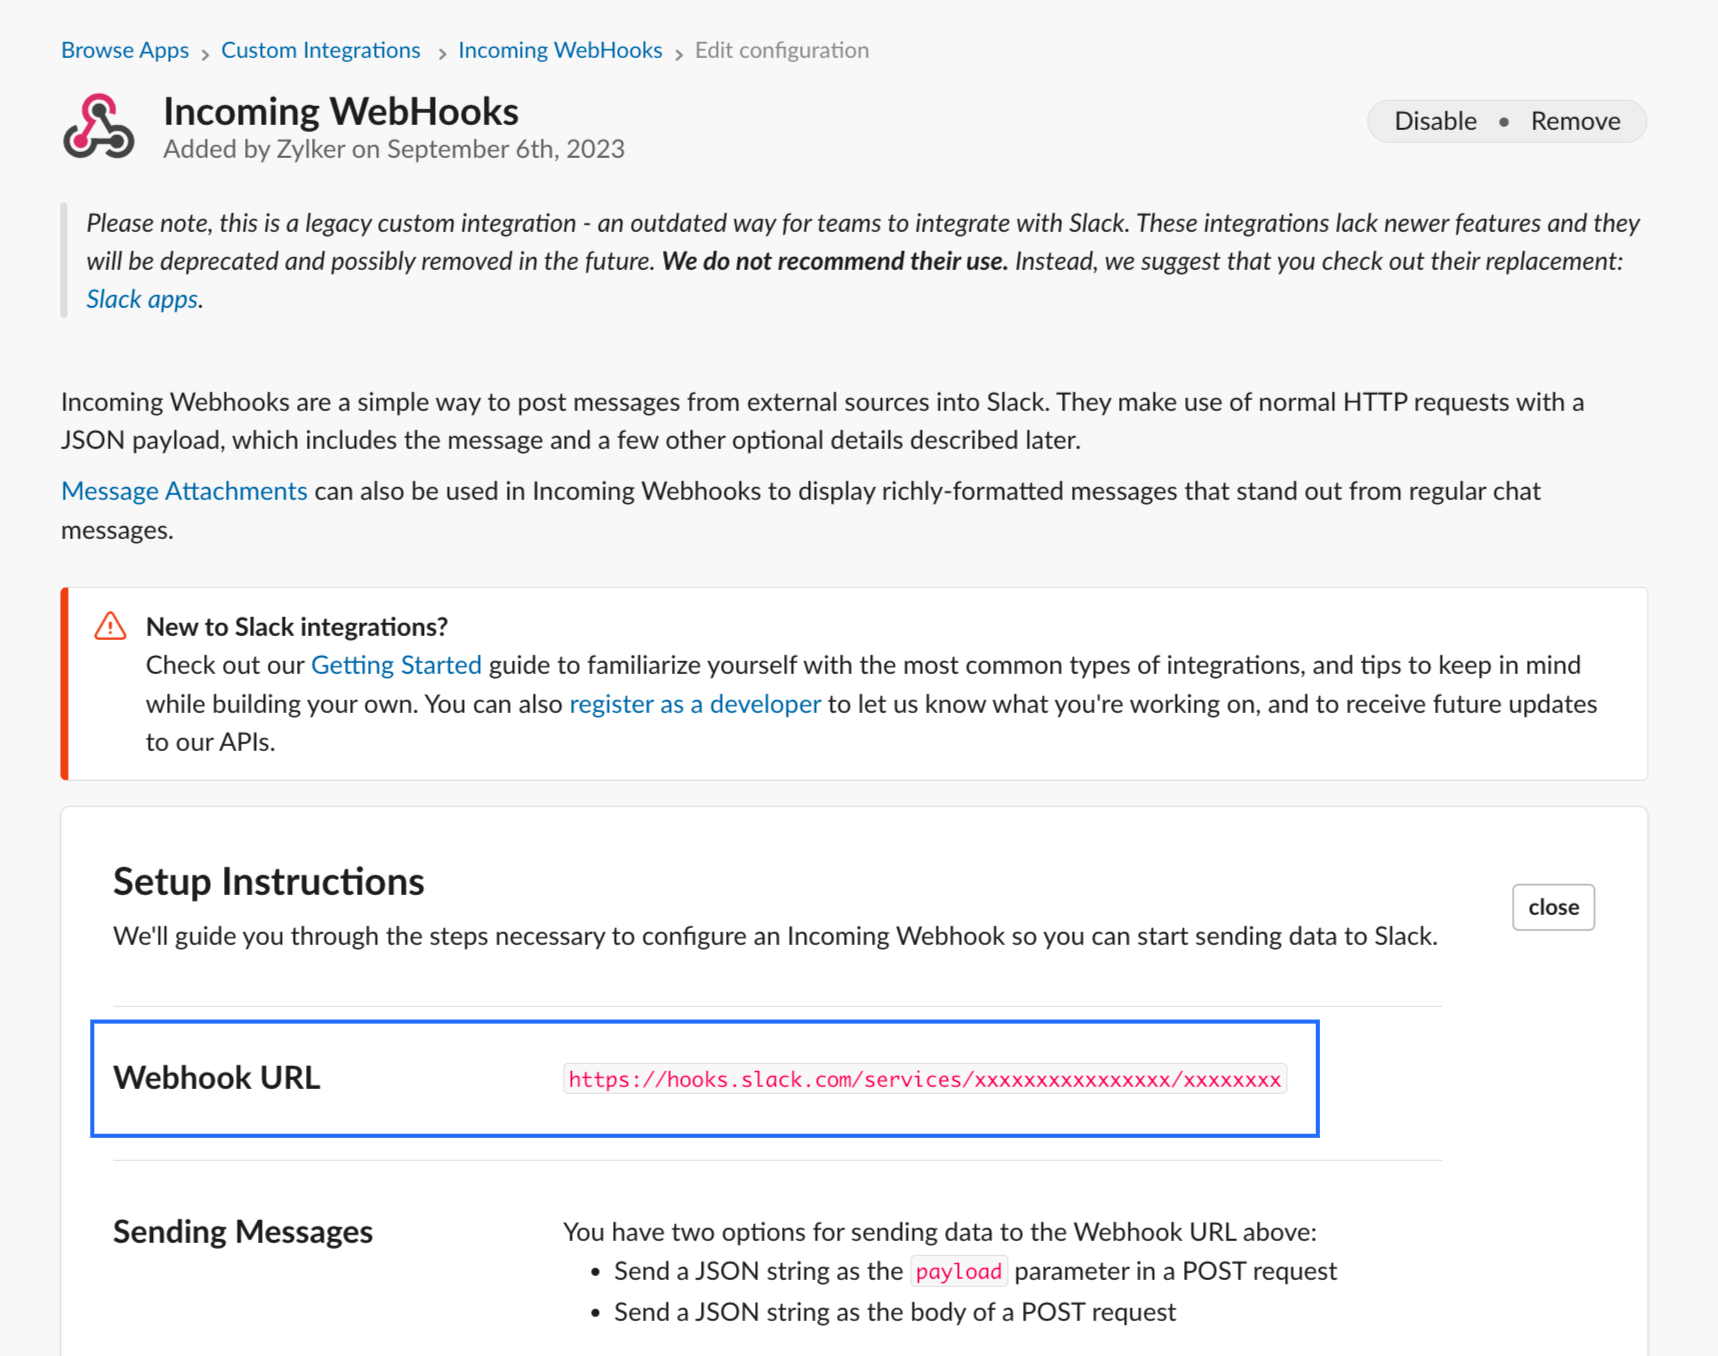
The unique WebHook URL shall be used to connect your Site24x7 account with Slack.
Configuring Slack integration via OAuth
You can integrate Slack with Site24x7 using OAuth tokens to securely send alerts to your desired Slack channel.
To generate an OAuth token in Slack, make sure you're signed into your Slack team and Slack Channel that you want to show notifications in. Further, follow the steps listed below to generate the OAuth token:
- Go to https://api.slack.com/apps/ and click the Create an App button.
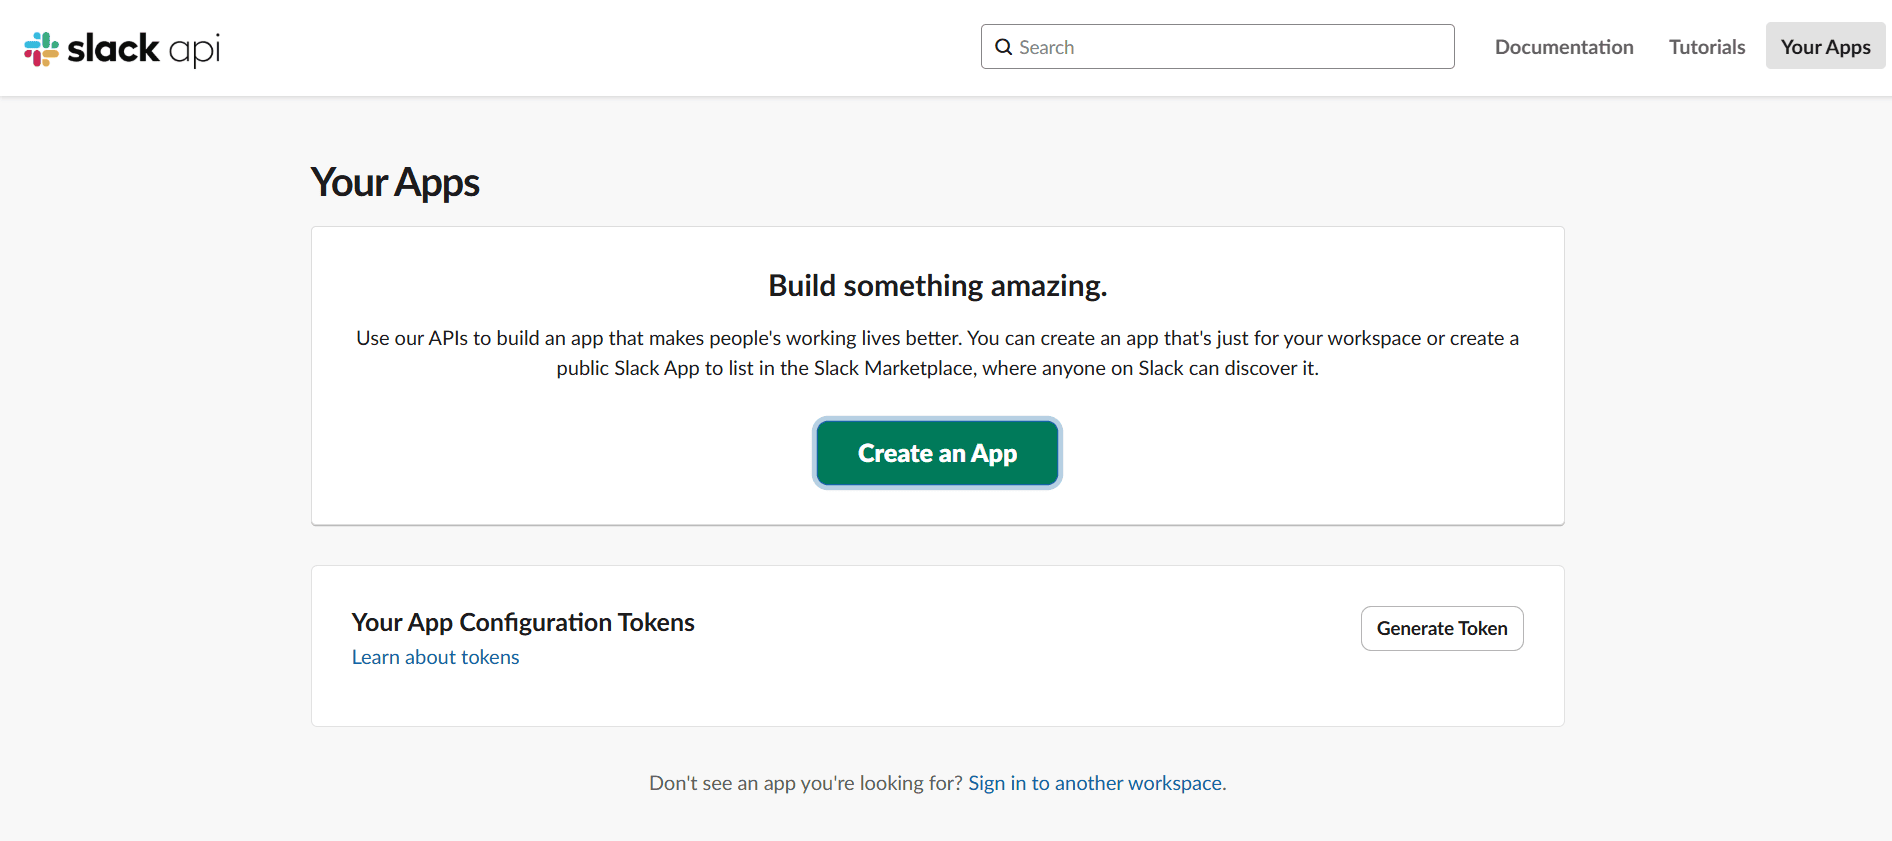
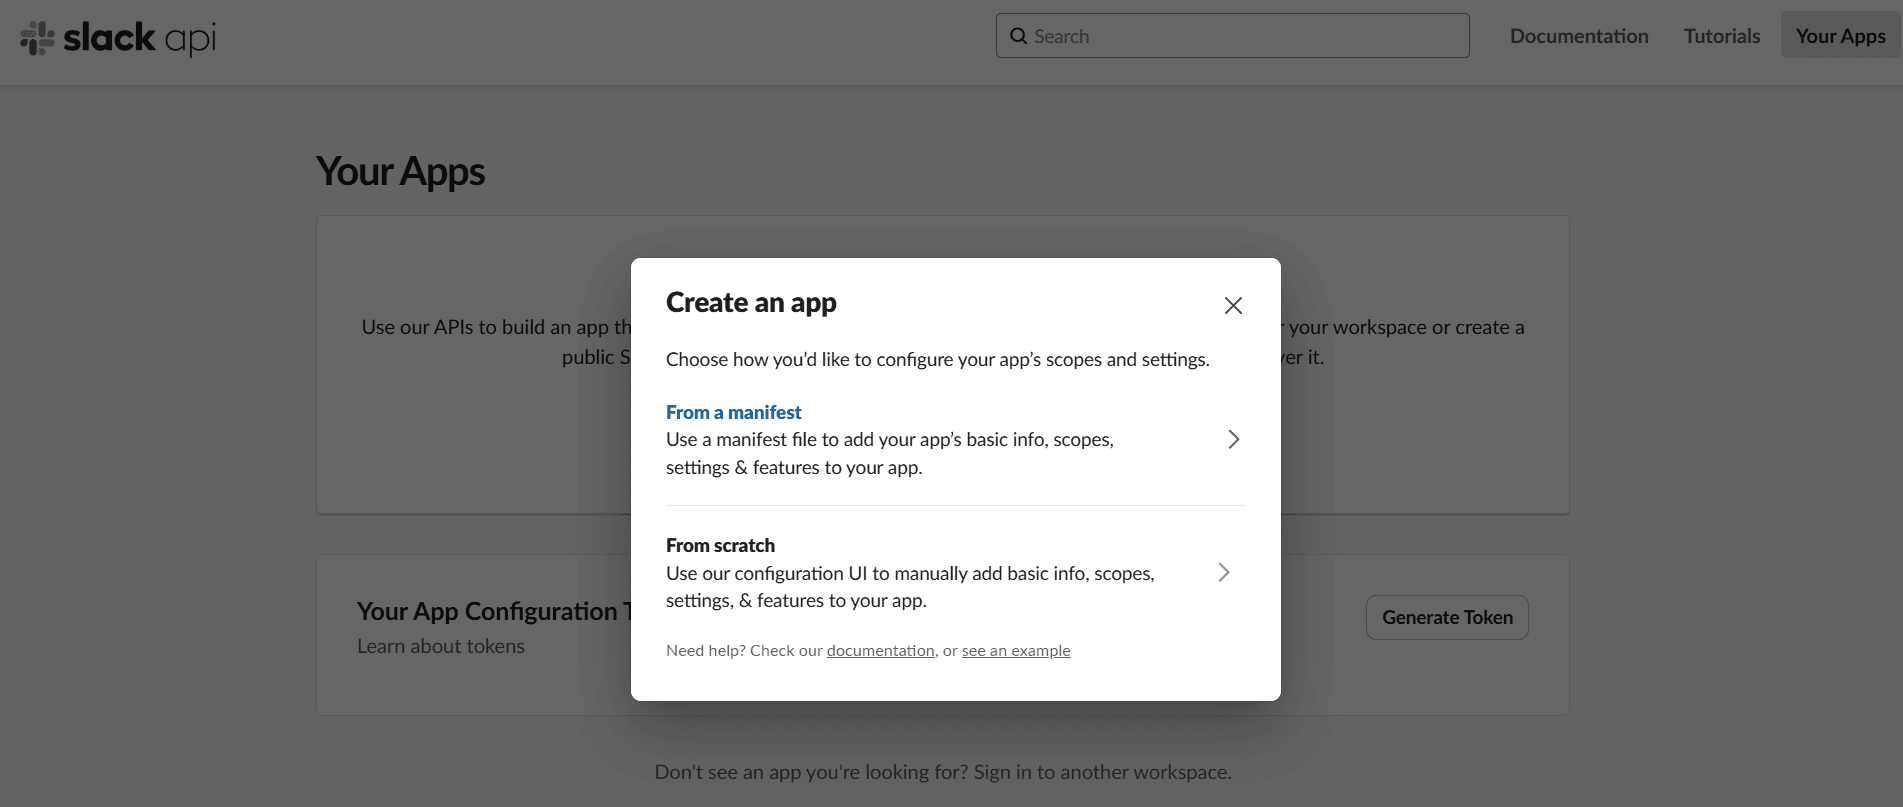
- You can either:
- Create an app from scratch, or
- Use the Manifest option by selecting your workspace, accepting the details, and clicking the Create button.
- Once the app is created, you’ll be directed to the app’s settings page.
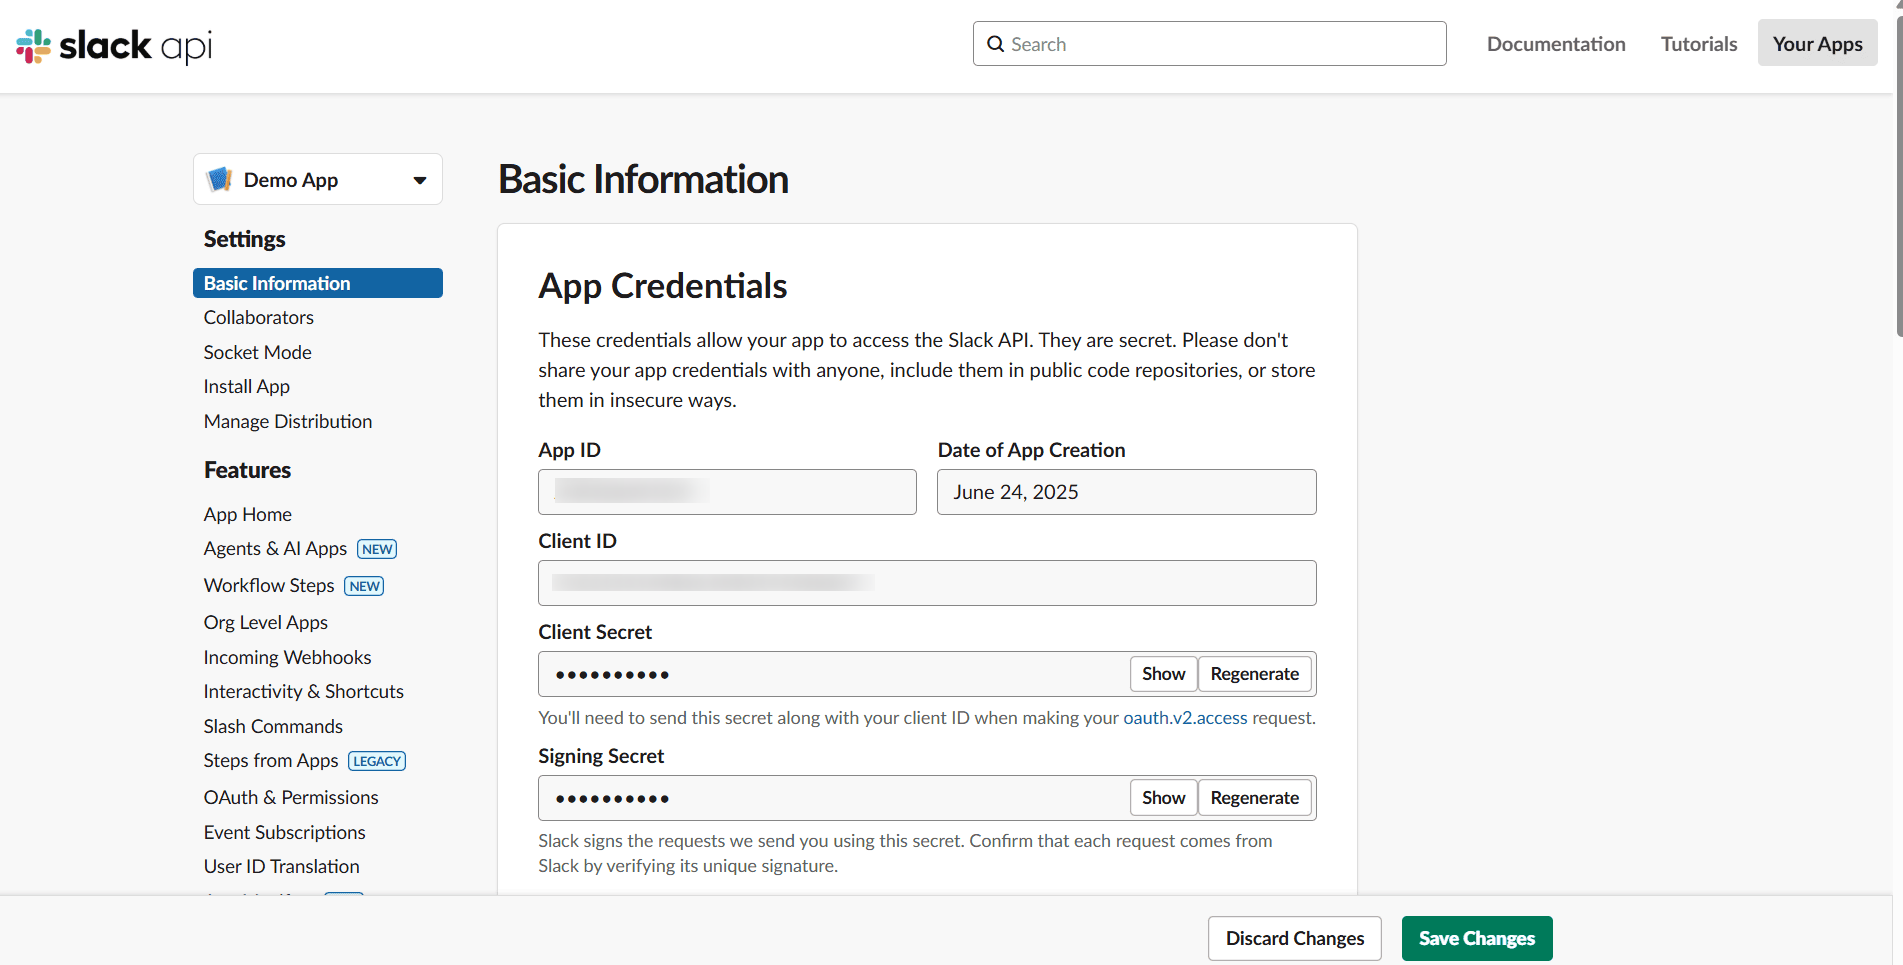
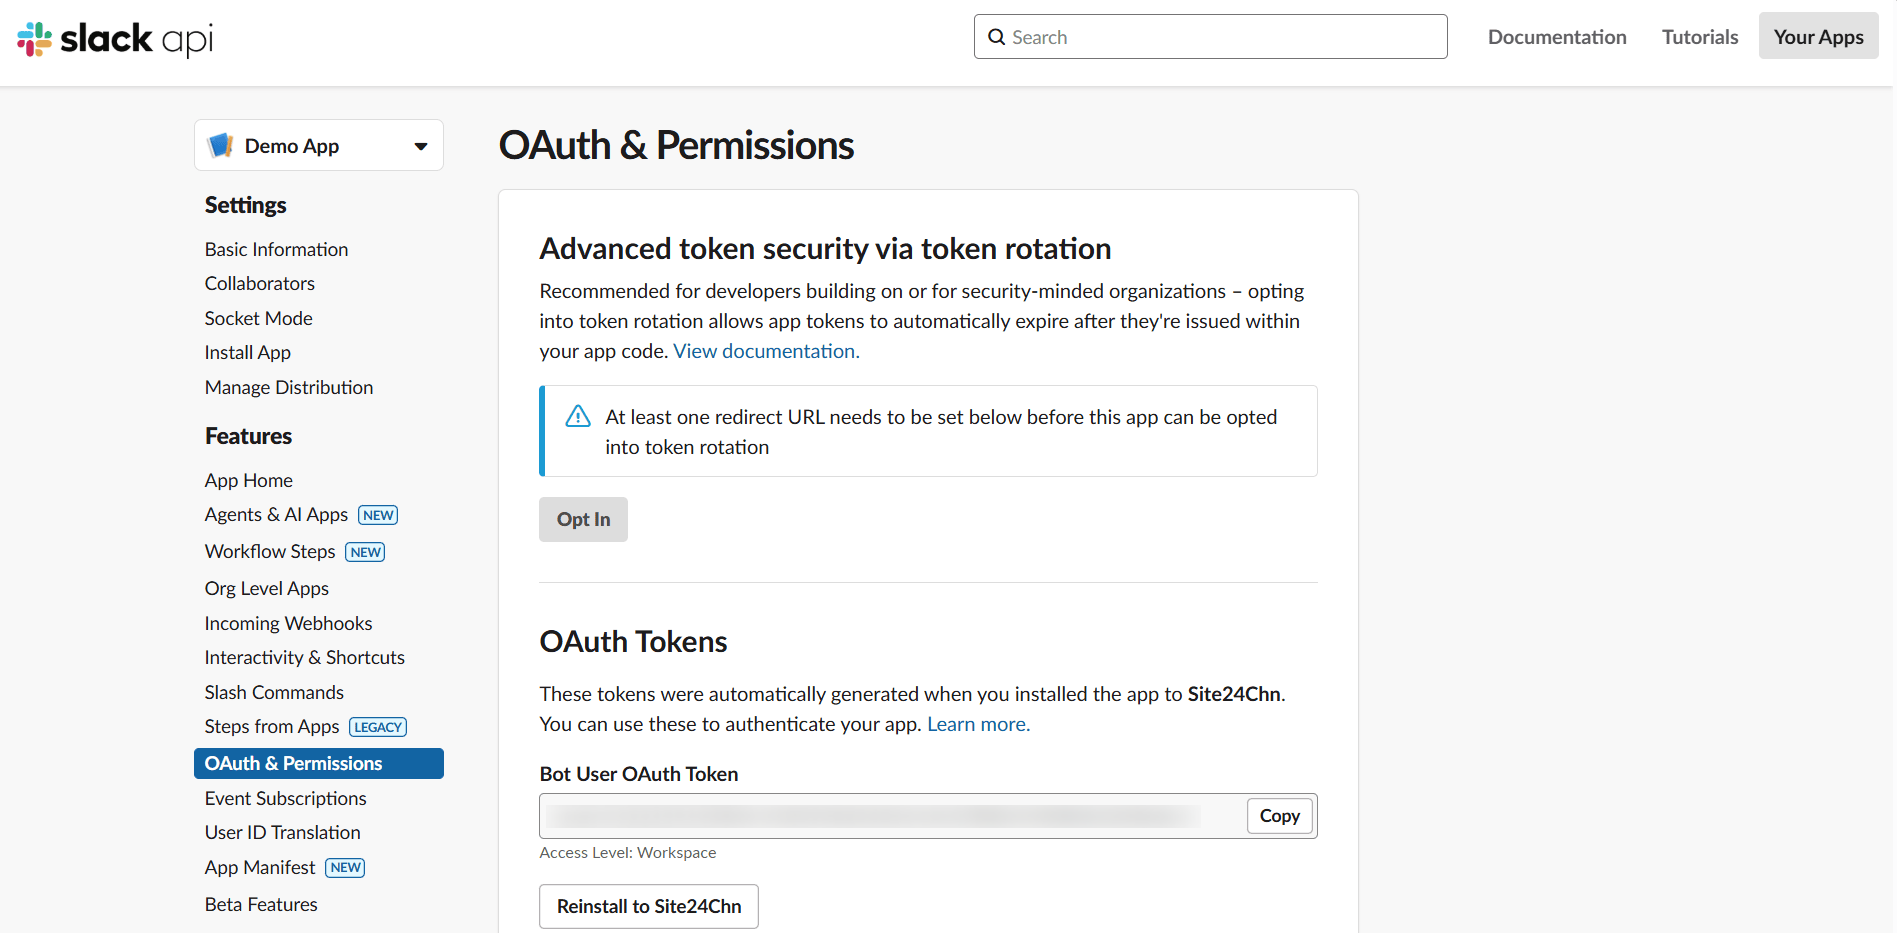
- Choose OAuth & Permissions from the left-hand menu.
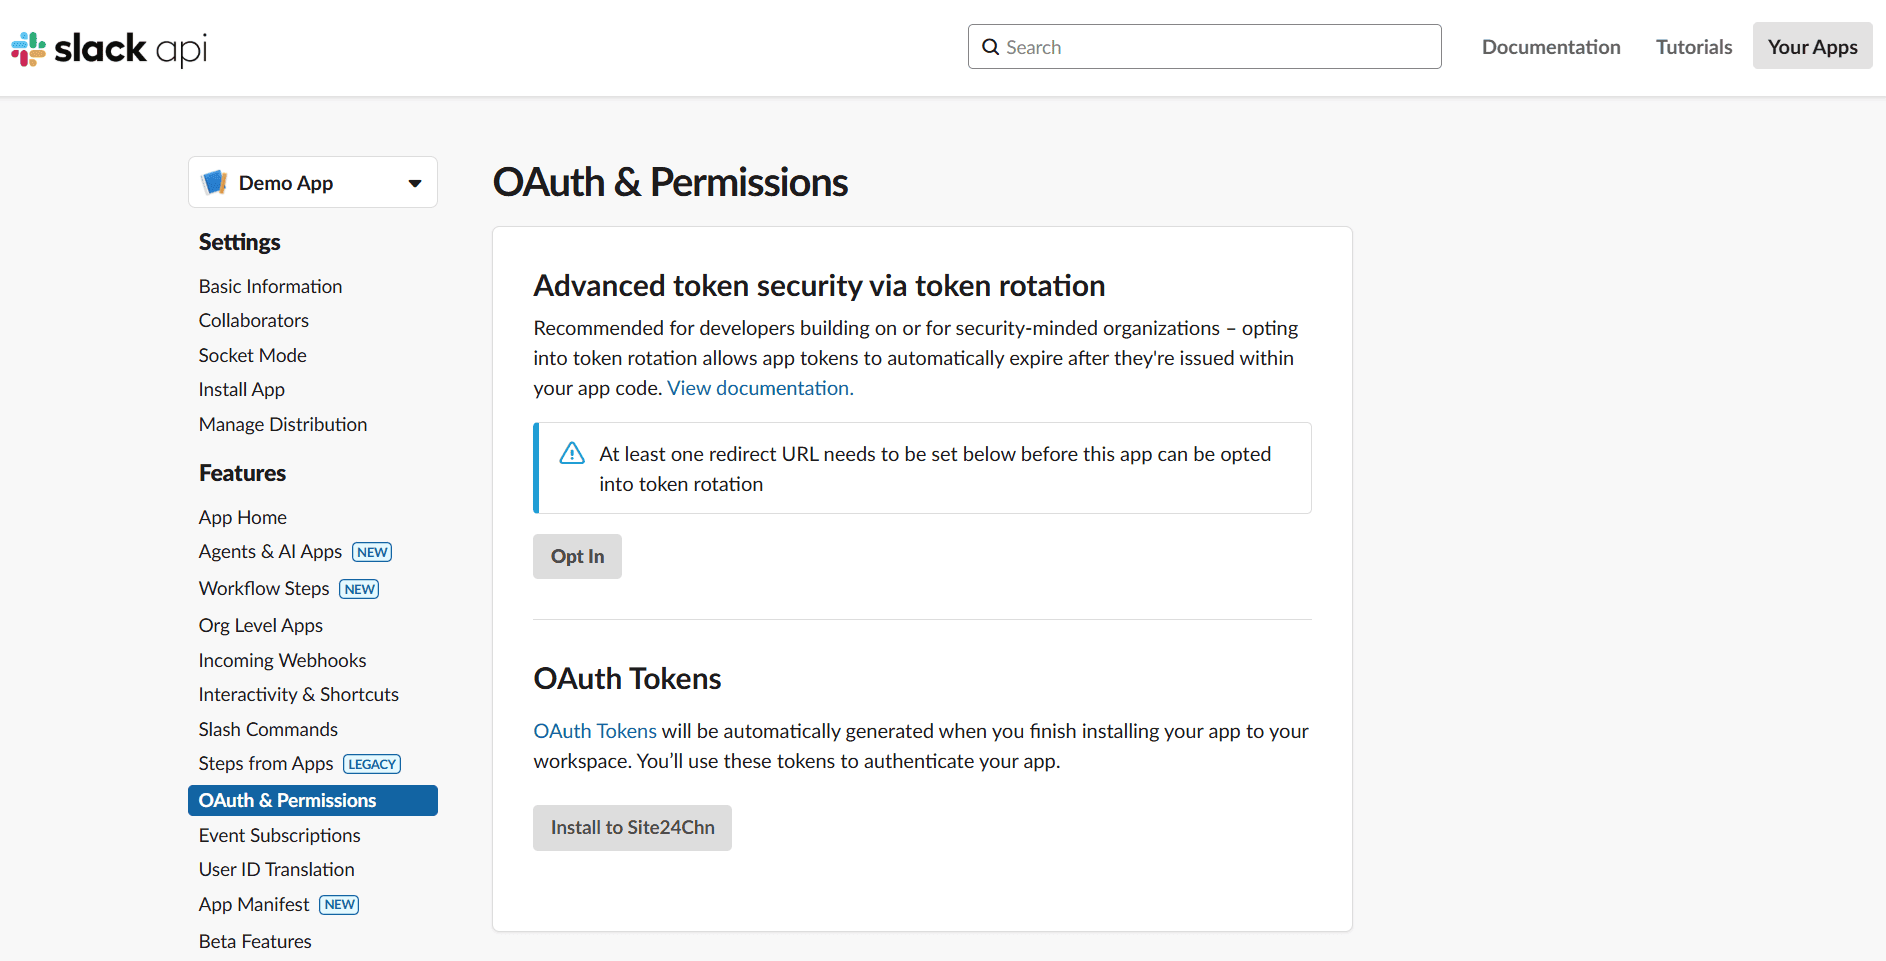
- Under Scopes, add the required permission:
- chat:write – required to post messages to a Slack channel
(Reference: chat.postMessage API)
- chat:write – required to post messages to a Slack channel
- Install the app to your Slack workspace by clicking the Install to Workspace button.
- Click Generate Tokens and Scopes to generate the OAuth token.
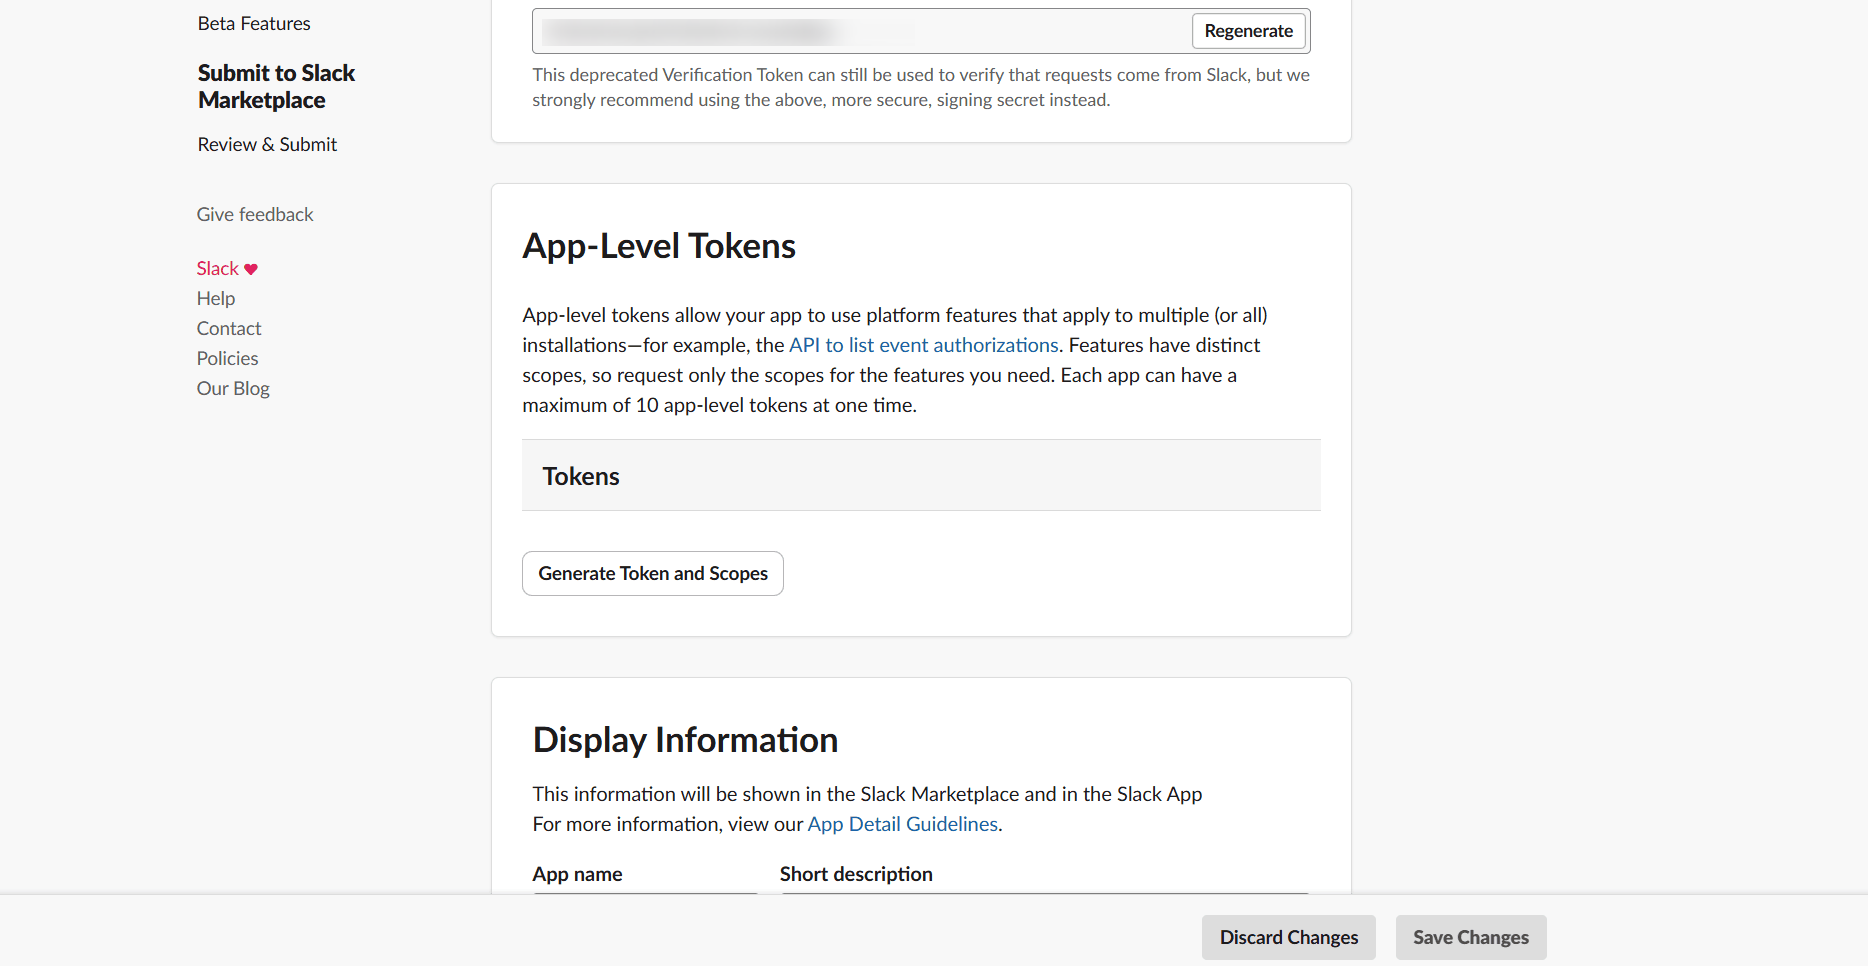
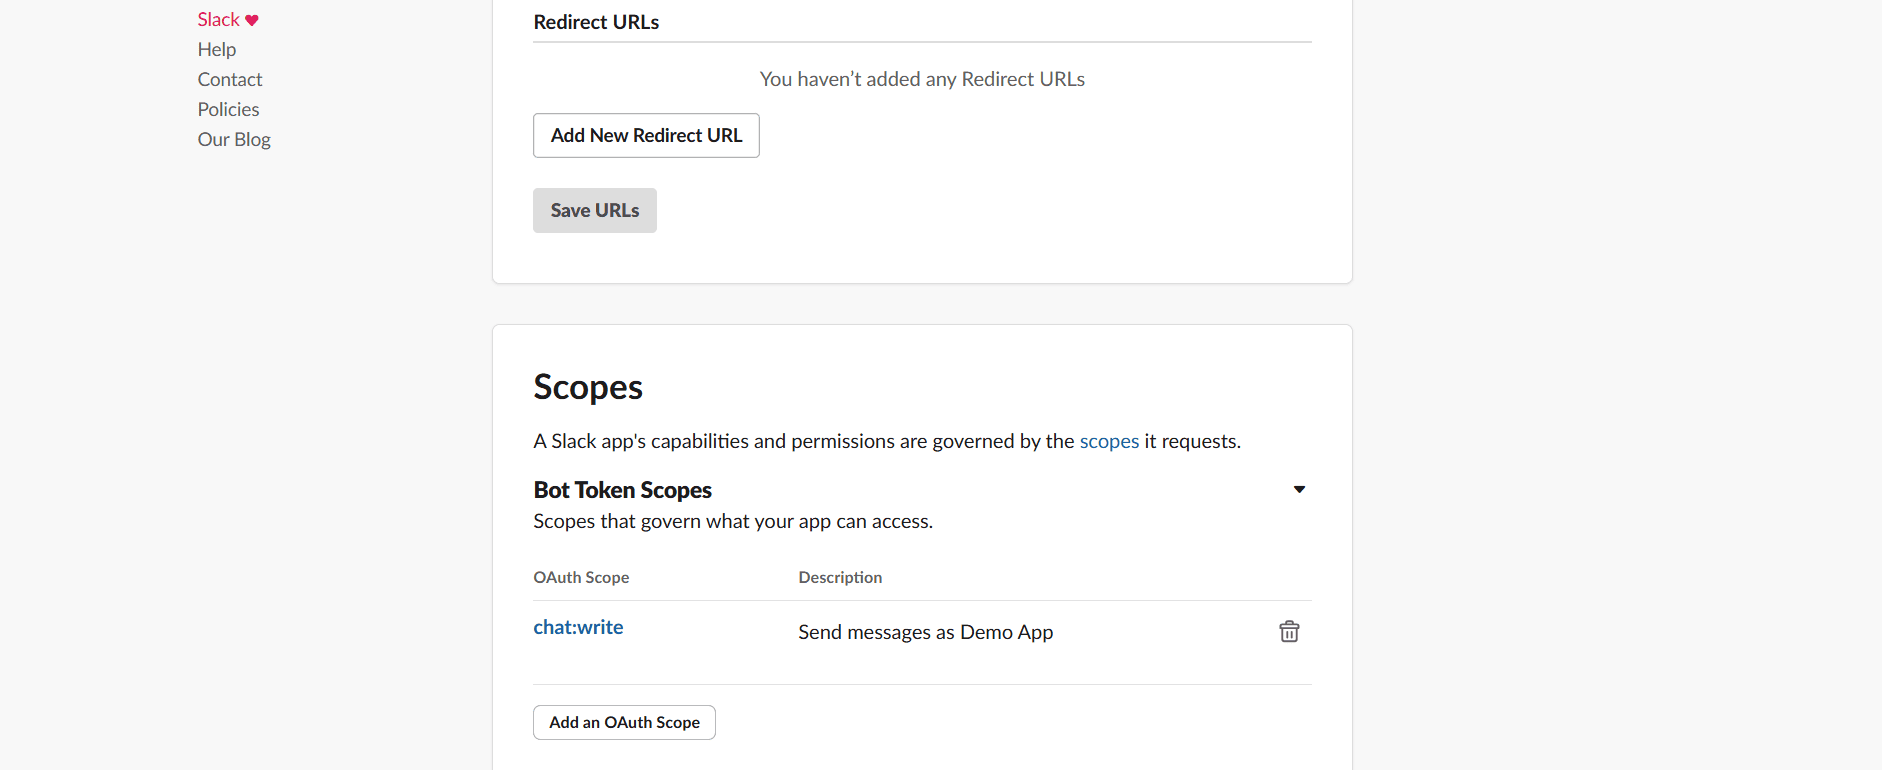
- Once the channel is installed, it will provide an OAuth token. Copy this token and use them to integrate with Site24x7.
Getting the Channel ready
To enable Slack alerts from Site24x7, you must first add your Slack app to the target channel where alerts should be posted.
Add the app to a Slack channel
- Open the Slack channel where you want to receive Site24x7 alerts.
- Click the three-dot menu (⋮) icon in the top right corner of the channel and select Open channel details.
- Go to the Integrations tab and under Apps, click Add Apps and select the app you created for integration.
This grants the app permission to post messages in that channel.
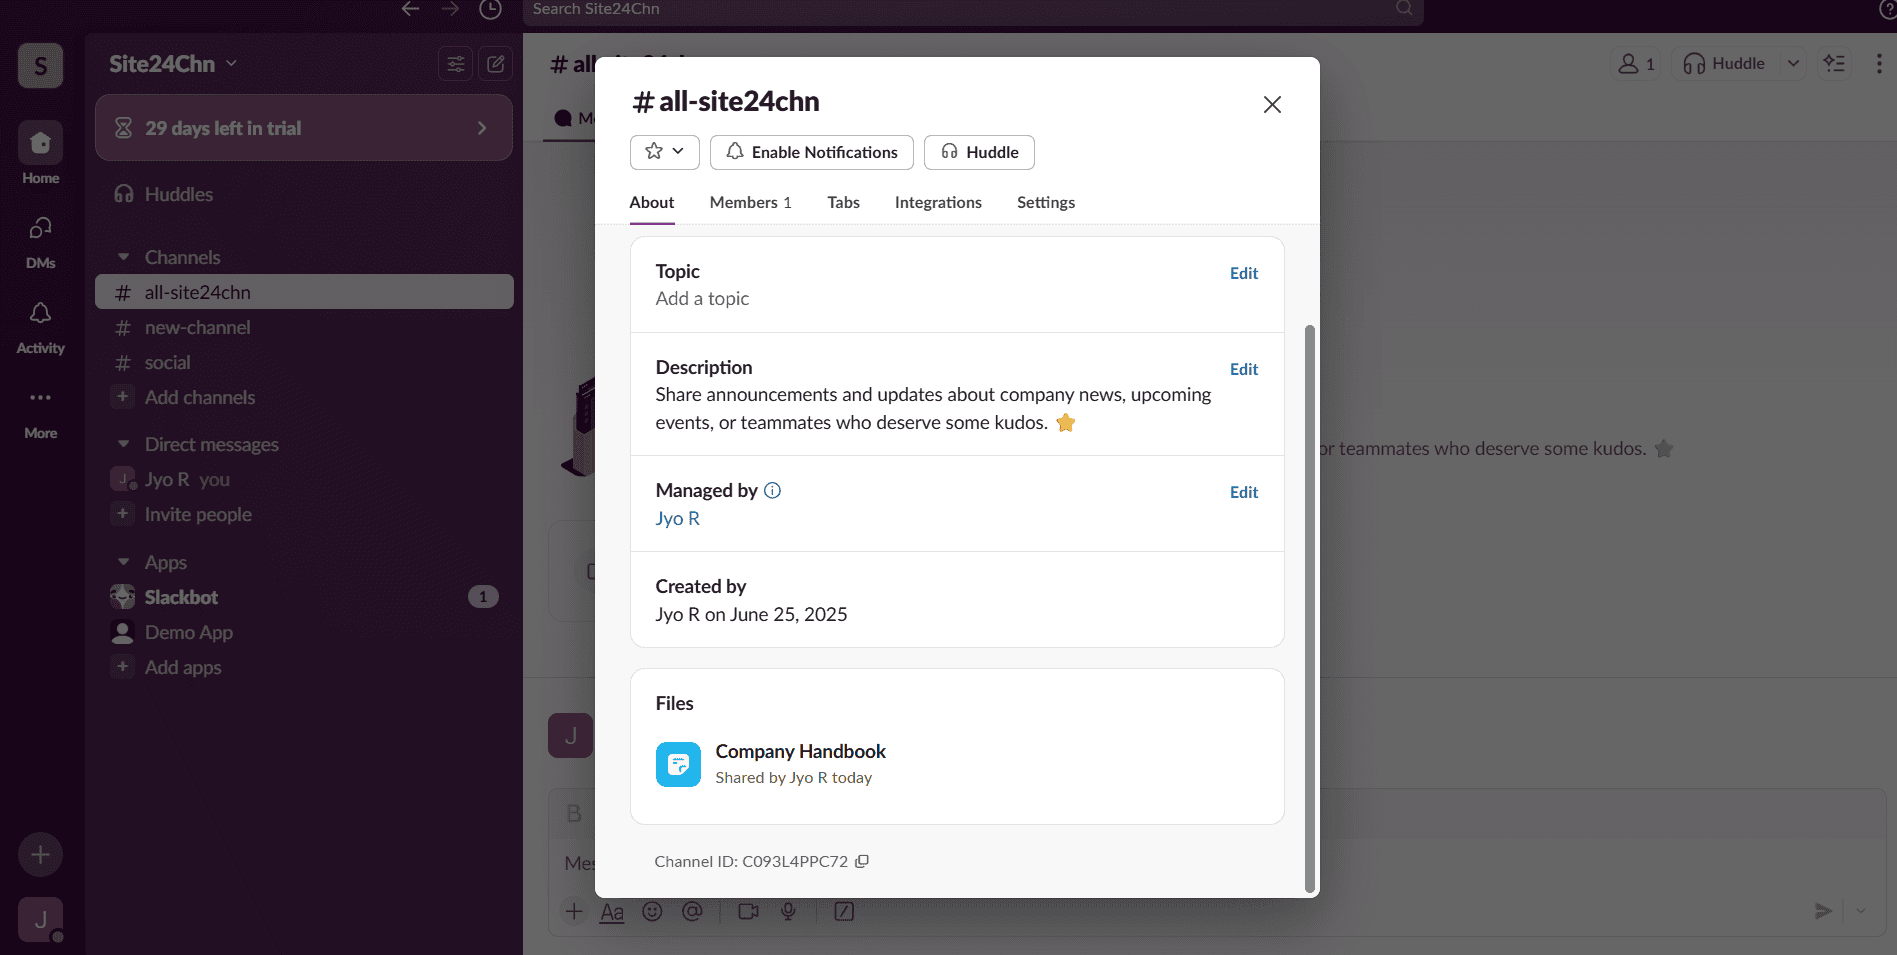
Get the Channel ID
Once the app is added, look at the bottom-left corner of your Slack interface.
The Channel ID will be available in the "About" section of your channel. It will also be visible if you're using the browser version of the Slack application.
Copy this Channel ID and use it while configuring the Slack integration with Site24x7.
Integrate Slack with Site24x7
Once, you've generated a Slack WebHook URL, you must login to your Site24x7 account to complete the integration process. Follow the steps listed here:
- Log in to Site24x7.
- Navigate to Admin > Third-Party Integration.
- Click the Add Third-Party Integration button. Pick Slack from the list.
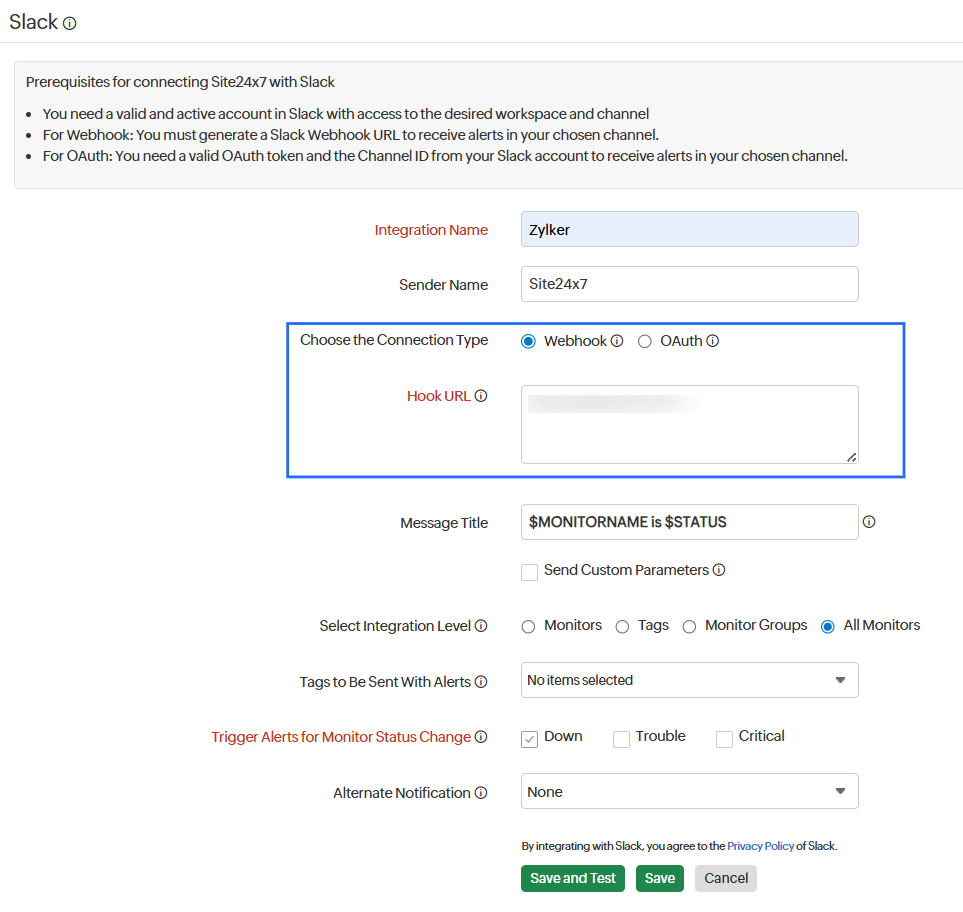
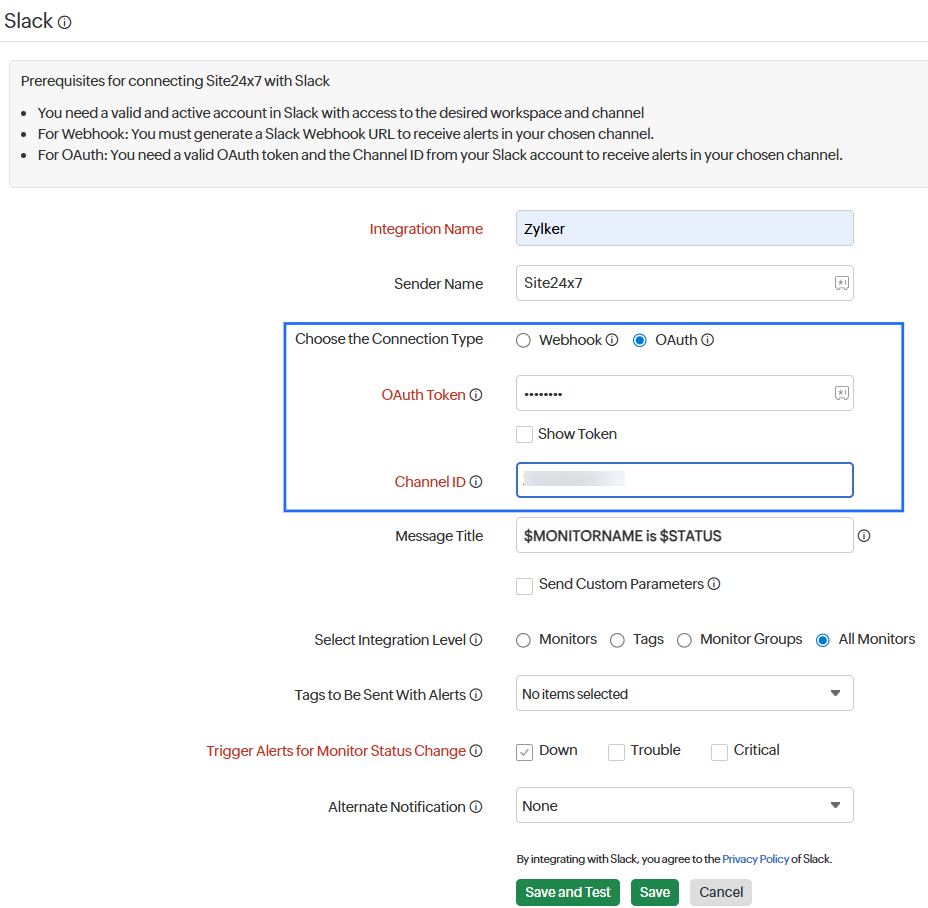
- Fill up the Slack Integration form to complete the integration process.
- Integration Name: Enter the name of your integration.
- Sender Name: Enter the name of the sender.
NoteYou will receive messages in your Slack channel from this configured name.
- Choose the Connection Type: You can configure Slack integration using two methods: Webhook or OAuth. Choose the option based on your organization's Slack setup.
- Message Title: Use the "$ tags" to customize the message title of your Site24x7 notification. Learn more about incident parameters.
- Select Integration level: You can post status alerts and RCA links to Slack channel from specific Monitors, all monitors/monitor groups associated to selected Tags, monitors associated with the selected Monitor Groups, or All Monitors in your account.It is set to All Monitors by default. Hence, it translates into a Global Integration where all alarms from your Site24x7 account are pushed to Slack channel.
Note
For tags associated to your monitor group that have monitors in parent level and a few monitors in sub group level, alerts from only the parent monitors get logged in Slack channel.
- Tags to Be Sent With Alerts: Select the tag keys associated with the monitor that need to be sent with the alert. When an alert is triggered, tags that match with the monitor will be included in the alert notifications. If no tags are selected, all the tags associated with the monitor will be present in the alert notifications.
- Trigger Alerts for Monitor Status Changes: Enable or disable the toggle button to decide whether to log Down, Critical, and Trouble status alerts of monitors as messages in Slack channel.
- Alternate Notification Medium: If the primary third-party notification medium for sending alerts encounters an issue, an alternative notification medium will be activated to ensure that alerts are not missed.
-
Click the Save and Test button to save the integration and to receive a test alert. Or, you can click the Save button to finish the integration.
NoteOnce the set up process is completed, the slack integration will be listed in the Third Party Integration dashboard. You can setup multiple such Slack integrations in your Site24x7 account.
Suspend/Activate/Delete Slack Integration
Follow the steps below to suspend an active Slack integration:
- Log in to Site24x7.
- Navigate to Admin > Third Party Integration.
NoteAll the integrations will be listed here in the Third Party Integration dashboard.
- You can also initiate a Test Alert to check whether the integration is a success or has any configuration error.
-
Click the active Slack integration that you want to suspend.
- Click the Suspend button listed on the top right corner of the integration window. This will stop all alerts messages/RCA links from being send to your designated Slack channel.
NoteIf you wish to reactivate a suspended Slack integration, follow the same steps listed above; then click the Activate button listed on the top right corner of your integration window. Once reactivated, messages will be triggered in your Slack channel for any Up/Down/Trouble status alerts/RCA permalinks from Site24x7.
To delete a Slack integration, follow the same steps listed above; then click the Delete button listed on the top right corner of your integration window. Once deleted, the Slack integration will be terminated permanently.
Read this article to know how to activate mobile/desktop based push notifications for messages in your Slack channel.
Receive Alerts and RCA in Slack Channel
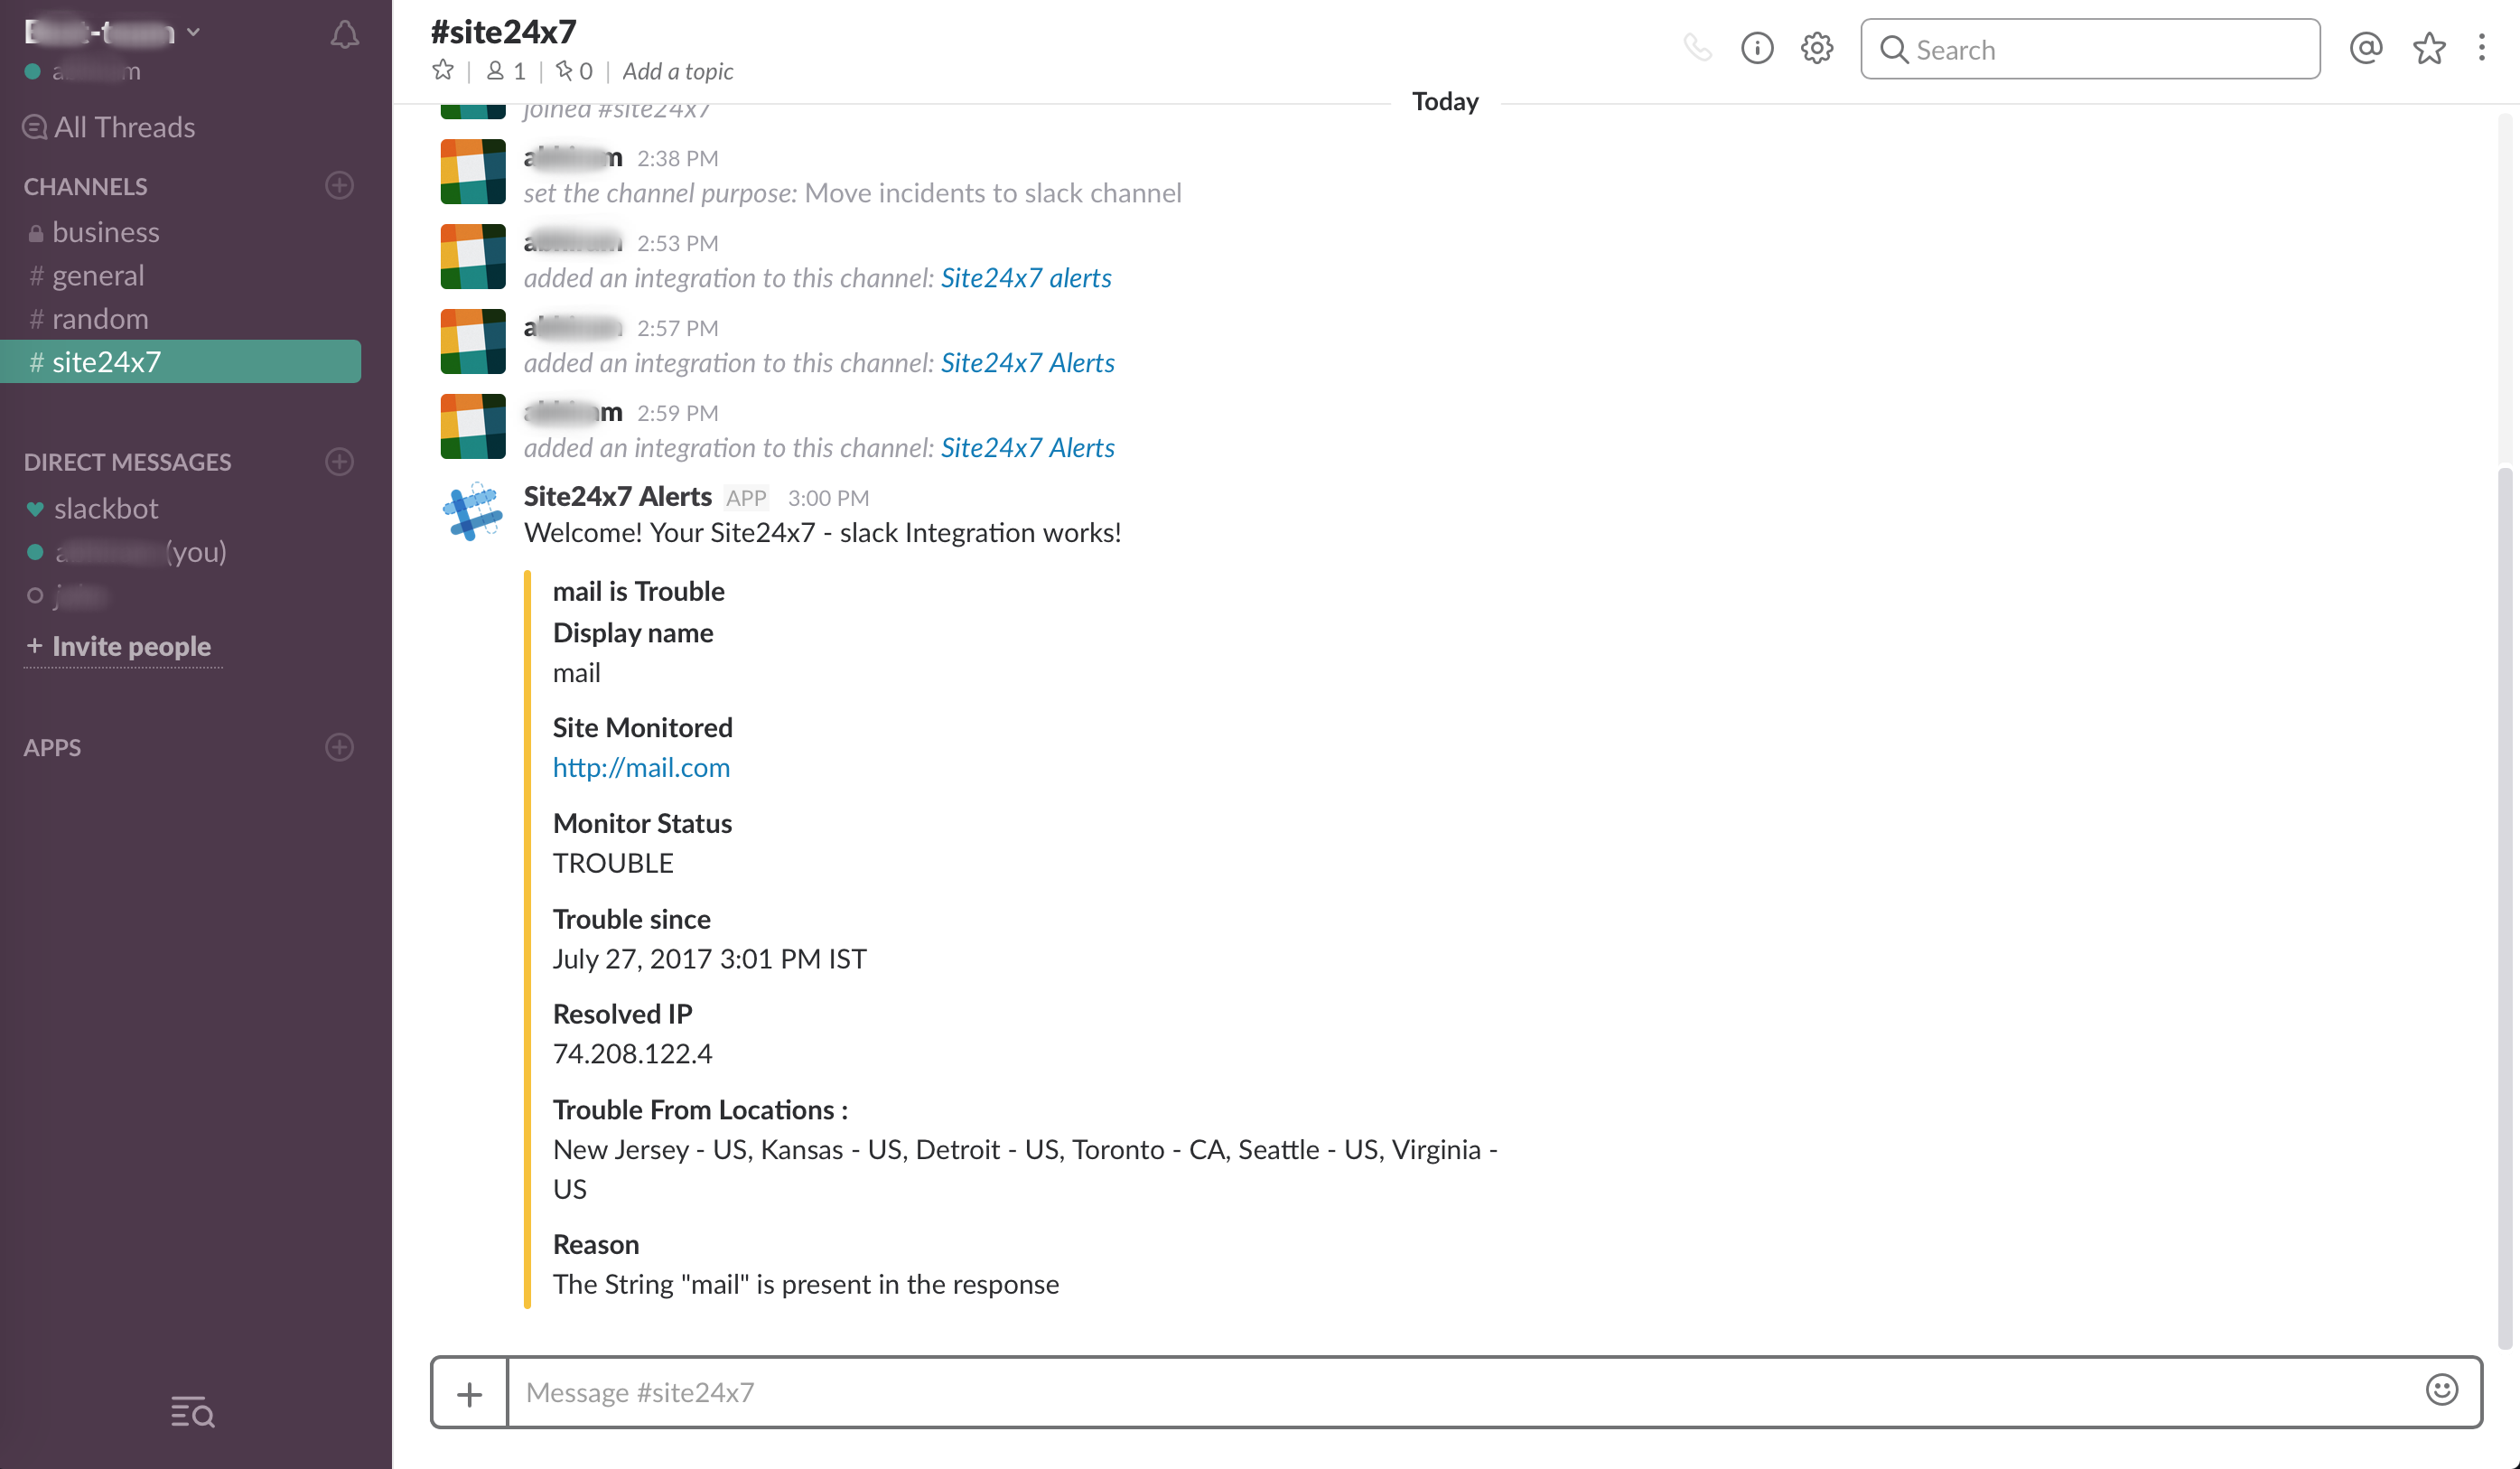
Once the integration is completed, you'll start receiving Site24x7 incident messages and RCA permalinks on your specified Slack channel.
