Monitor List
Monitor list view defines entities and their configuration settings that are used for availability and performance monitoring. You can filter the view by various application types and also perform bulk operations on your configured monitors.
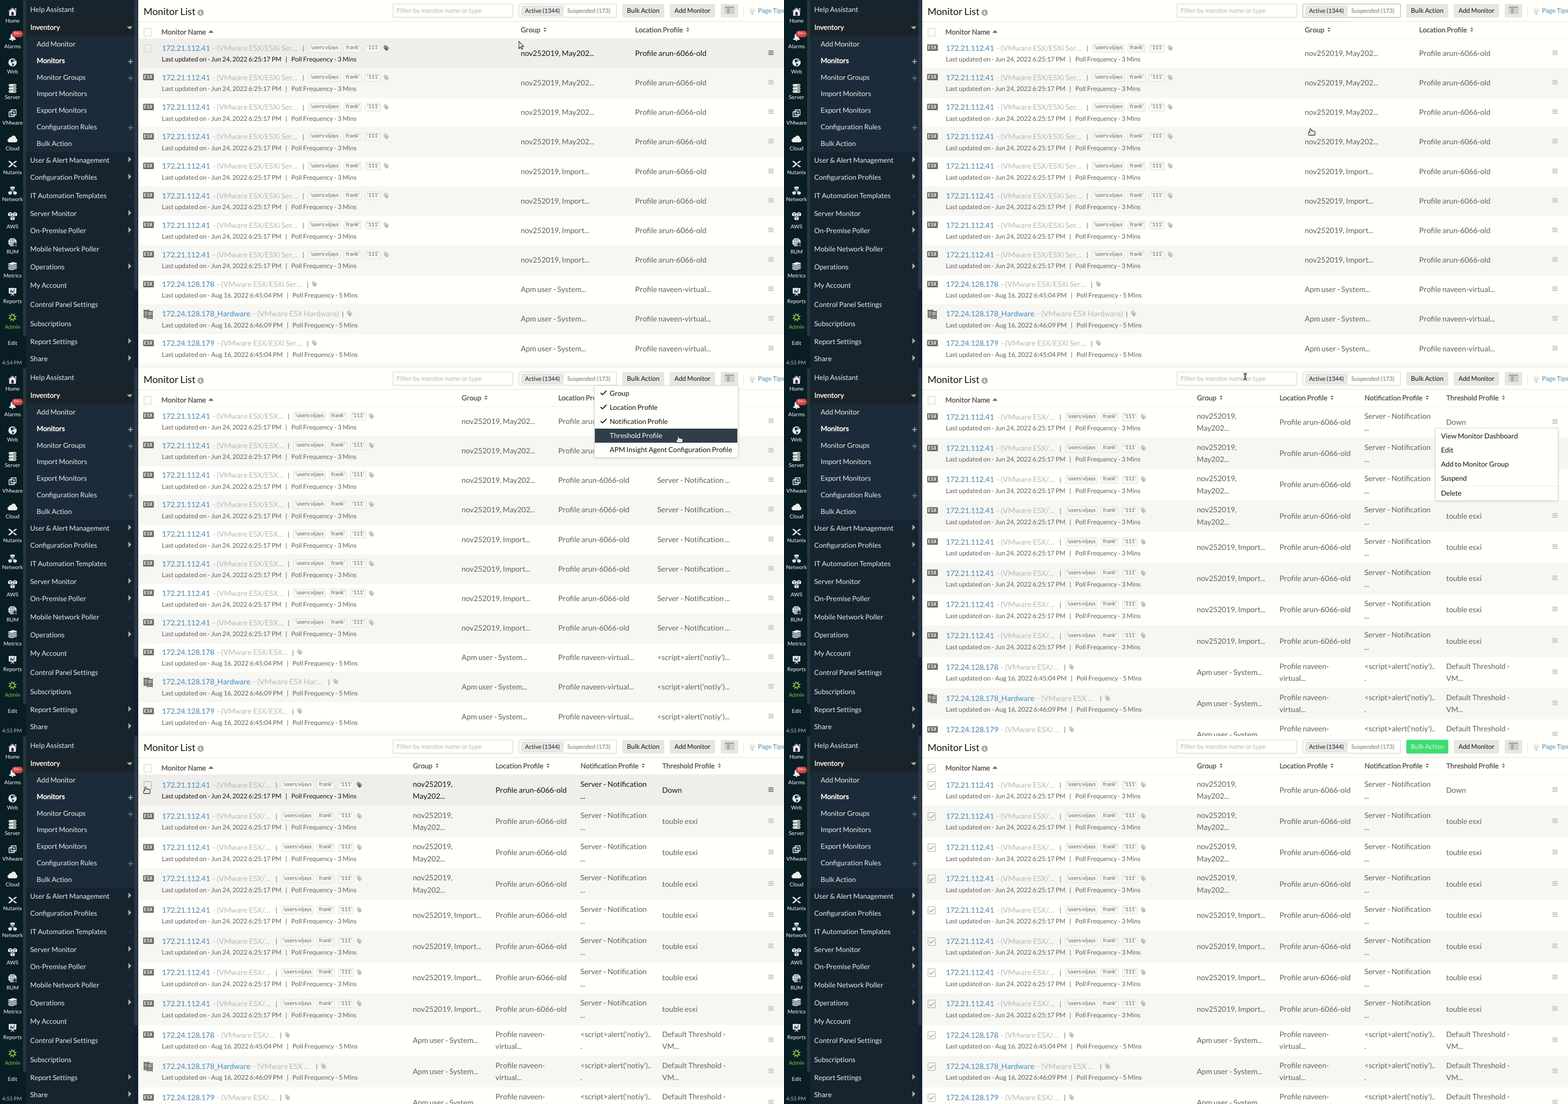
Key Operations:
- Search for Filtering by Monitor Name or Type
- View Active/Suspended Monitors
- Bulk Actions
- Add Monitor
- Customized Column View
- Actions
- Identify basic and advanced monitors
Search for Filtering by Monitor Name or Type
The desired monitor can be searched for from the list of monitors either by entering the monitor type or the name of the monitor in the search box provided.
View Active/Suspended Monitors List
View the number of monitors in the active/suspended state at a glance. Click on Active to view the list of monitors in the active state along with their monitor groups and location profiles. Click on Suspended to view the list of monitors in the suspended state along with their monitor groups and location profiles.
Bulk Actions
Bulk action is aimed at saving your time by letting you edit/upgrade/delete/suspend/activate multiple monitors in bulk. The feature supports the editing of various configurations such as threshold profile, location profile, notification profile, Resource profile, user groups, poll interval, actions, and server sys log/event log preference along with the option to update server agents to the latest version in one go.
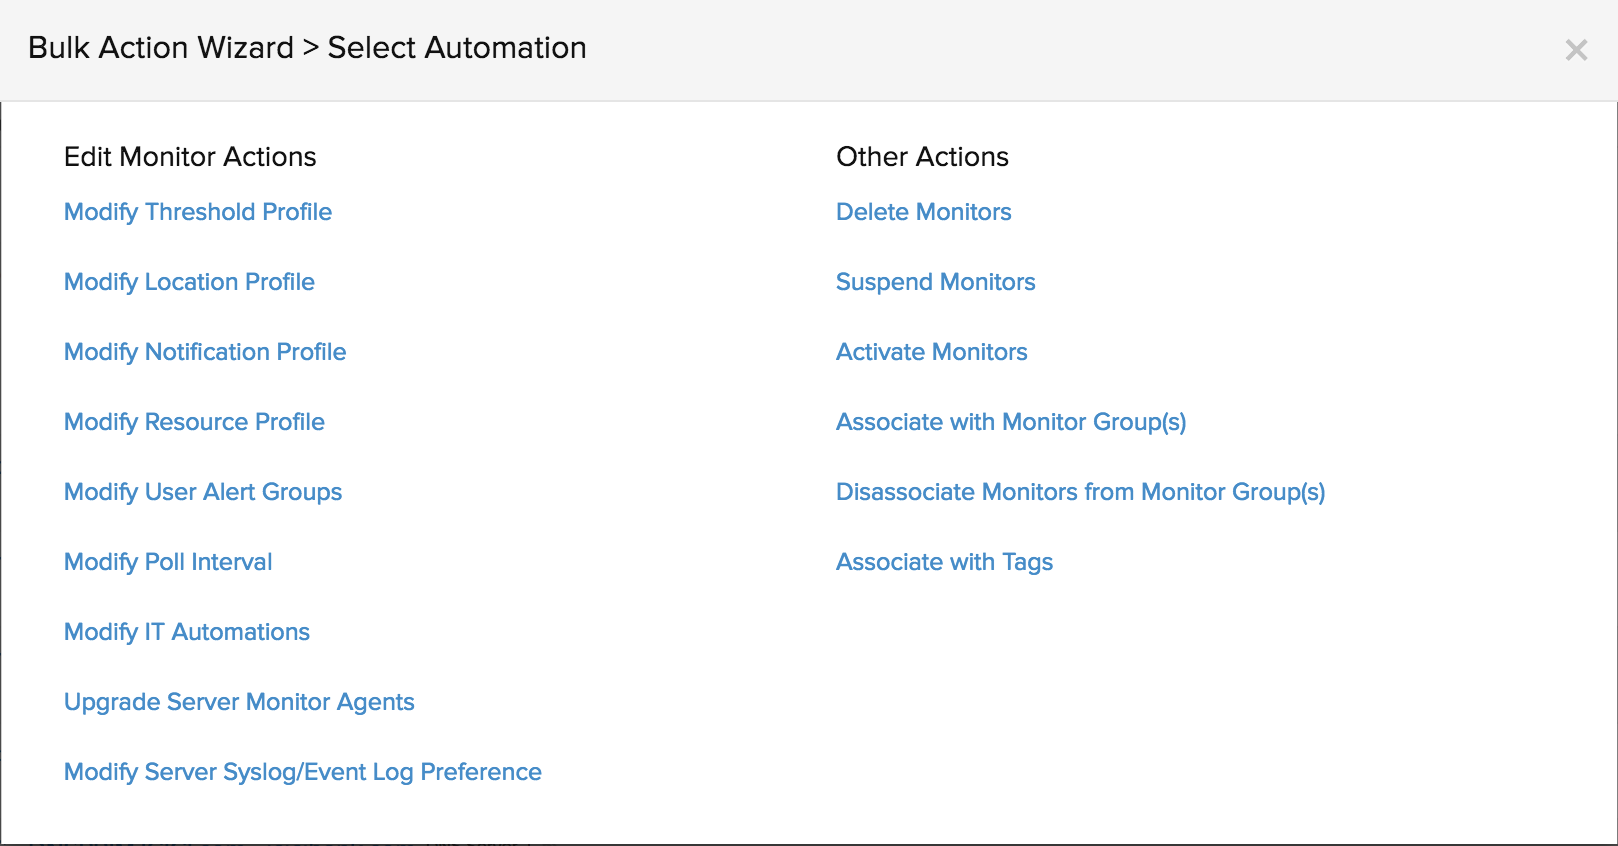
For bulk changes:
- Click on Bulk Action > Open Bulk Action.
- Choose the required monitors and select the desired bulk action in the Bulk Action Wizard > Select Action screen.
- Select details such as Monitor Type, Resource Type, Monitors, Profiles, User Groups, Poll Interval, Actions, Sys log/Event Log needed as per the screen and click the desired actions (Delete/Suspend/Activate/Associate with Monitor Group(s)/Associate with Tags)
Bulk Action: Activate/Suspend/Delete
While performing the following actions: Activate/Suspend/Delete monitors/groups in Bulk, a backgroud task is also activated in the Monitor list view for a better user management. On clicking the task icon, you'll be prompted with a detailed message about the actual status of the bulk action. An email will also be triggered to the user based on the status of the operation. The following task icons will help you distinguish among the different task statuses.
| Task Status | Icon |
| Success |  |
| Complete Failure/ Partial Success |
 |
| Under Progress |  |
Add Monitor
Monitors can be added directly from the page on clicking Add Monitor. The Add Monitor screen appears. Click on the desired monitor, enter the details and click Save.
Customized Column View
You can obtain a filtered view of the monitors with select details from Group, Notification Profile, Threshold Profile, Tag, and Location Profile displayed for improved clarity. To view specific details, click on the tabular view icon and check the configuration details to be displayed.
Actions:
Actions such as edit/clone/suspend/delete can be performed for individual monitors.
View Monitor Dashboard:
To view the details in the dashboard of a monitor, hover the cursor over the icon and click View Monitor Dashboard.
Edit:
To edit a monitor, mouseover on the icon under Actions and select Edit. Edit the details in the respective edit monitor screen and click Save.
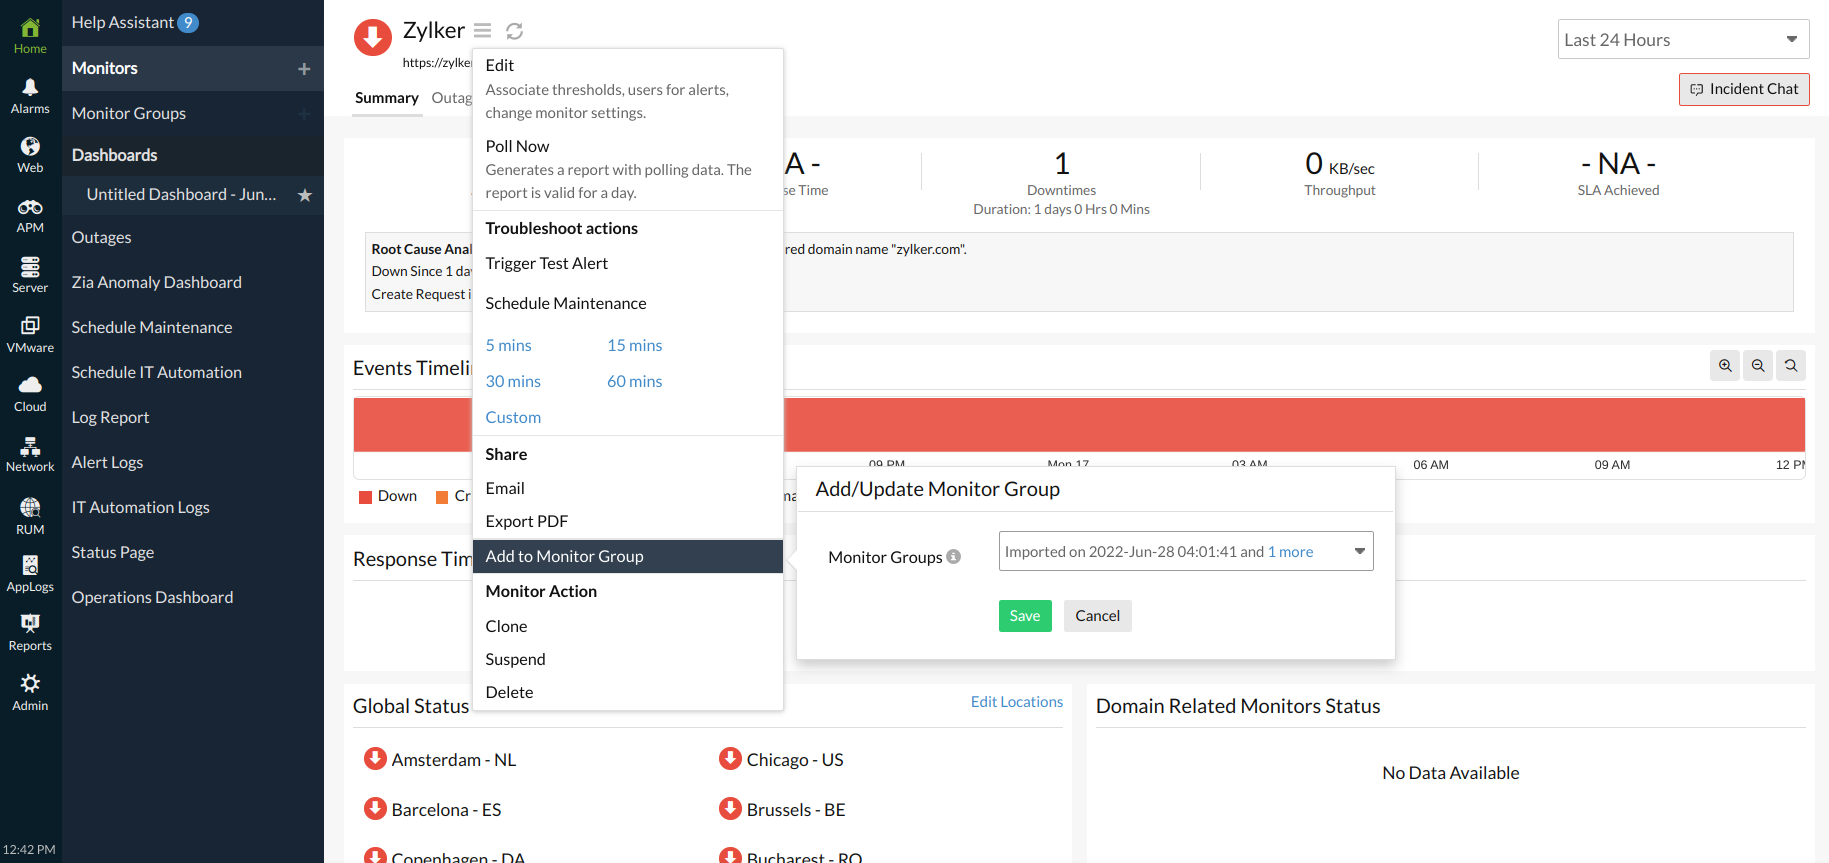
Add to Monitor group:
-
- Log in to Site24x7
- Go to Home > Monitors. Select the monitor you want to add.
- Click the Hamburger icon next to the monitor name and click Add to Monitor Group.
- In the popover that opens, select the monitor groups you want to add and click Done. Click Save to save your changes.
Clone:
To create an exact copy of your exisiting monitor with the same configuration settings, you've to access the "Clone" functionality for a monitor in the web client. Follow the steps below:
-
- Login to Site24x7 and navigate to Admin > Inventory > Monitors.
- Mouseover next to the monitor to clone and select the Clone option or in the Monitor Details page, click on the icon next to the monitor name and choose Clone option.
- Click Save to create a copy of your existing monitor configuration.
NoteClone option is supported for all Internet Services monitors. It is not available for all agent-supported monitors.
Trigger Test Alerts
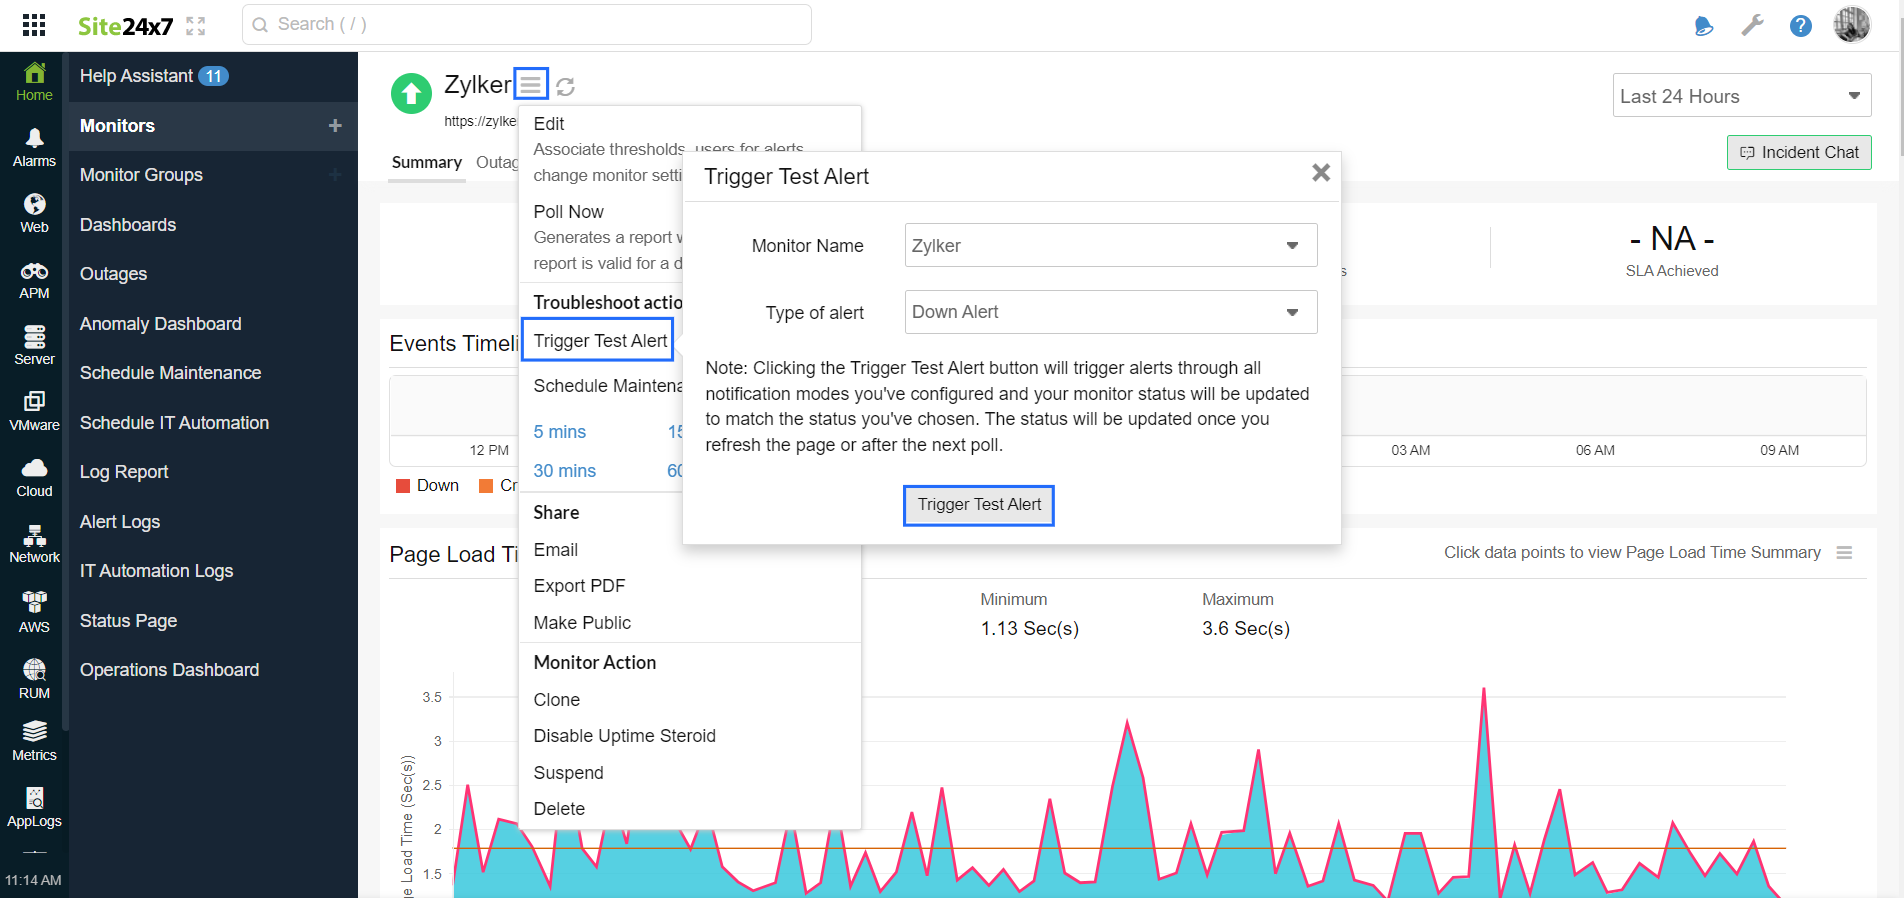
Opting to trigger test alerts by clicking the Trigger Test Alert button will help you to receive alerts through all the notification modes configured for a monitor. This alert will be added to audit logs and alert logs. Once the button is clicked, the status will be updated to match your status preference for the test alert and will be updated once you refresh the page or after the next poll. The notification modes will include email, escalation alerts, SMS, calls, chats, push browser and mobile) notifications, and third-party tools.
To trigger test alerts:
1. Log in to Site24x7.
2. Choose any monitor of your preference. Clicking on it can take you to Monitor Details page.
3. Click on the hamburger icon next to monitor name and choose Trigger Test Alert.
4. In the pop-up window that opens you can confirm the monitor name or choose a new one using the drop-down option as well the type of alert (Up/Down/Trouble/Critical/Escalation) for which you wish to receive the test alerts.
5. Click on the Trigger Test Alert button to receive the test alerts.
Suspend/Activate:
To suspend a monitor, mouseover on the icon under Actions and select Suspend. You can also activate your suspended monitors by selecting Activate under Actions.
You can not suspend/ activate monitors in maintenance state. Once the maintenance is complete they'll switch back to their previous state.
Delete:
To delete a monitor, mouseover on the icon under Actions and select Delete. Click Delete in the Delete Monitor screen that appears next to confirm the action.
Identify Basic and Advanced Monitors:
Navigate to Home > Monitors to view the list of all the monitors in your account. At the top right corner you will see the number of basic and advanced monitors in your account as shown in the image below:
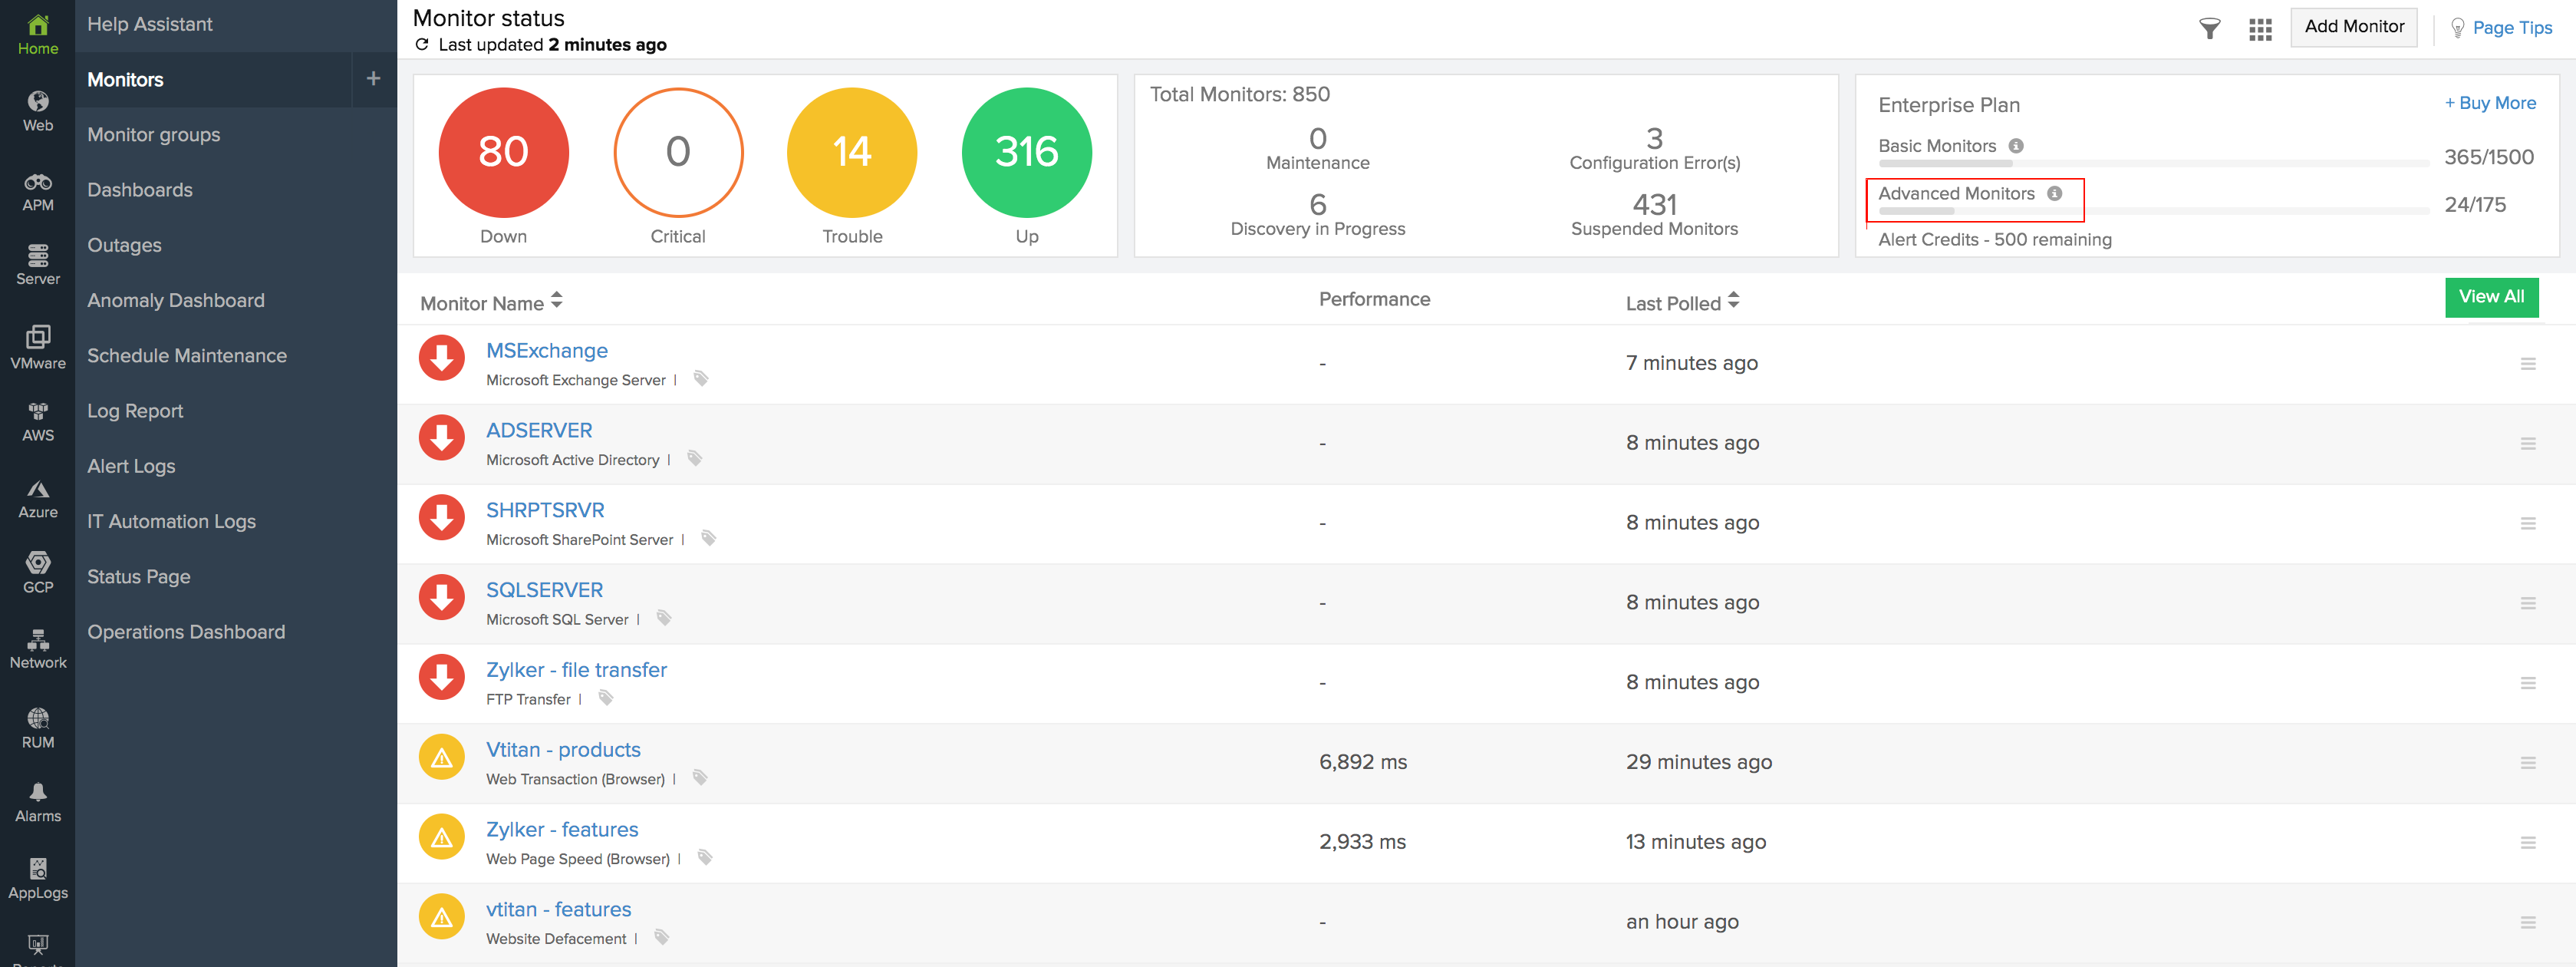
You can click on these option to to view the list of monitors under each category. You can click on the "View All" option to see all the monitors under the selected monitor category.
